Register and login
personal account
1
1
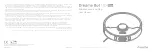
Power ON/OFF
Using APP
Open the cover and slide power switch to on.
Clean/Pause
Clean
Ensure the power switch is in
the "ON" position.
2 To begin cleaning, use one of the options below:
a. Press the " " key to start cleaning.
b. Press the Start/Pause button on the remote.
c. Press the Start button on the APP.
The robot will enter a sleep mode if it is not used for an extended period of time. Press
the " " button to wake the robot, and then use one of the options above to start cleaning.
12
11
Pause
When robot is working, press the " " and it will stop cleaning.
If your home WiFi name or password is changed, you will need to reestablish connection with
your robot vacuum.
App supports iOS 8.0 and above, Android 4.4 and above phone system versions, but
Pad device is not accepted; generally the phone system version may be checked by
clicking “Settings-About Mobile Phone” in the mobile phone.
This model does not support WEP encrypted router;
The network accessing configuration of the cleaner requires WiFi network of 2.4GHz
frequency range,5GHz frequency range is not currently compatible;
Do not configure network accessing under the charging state;
WiFi is mandatory for network accessing configuration of the cleaner; once the network
accessing is configured successfully, App may be operated in WiFi/2G/3G/4G network
environment and the cleaner may be controlled remotely;
If your home WiFi password is changed or the router is replaced, the cleaner will be
displayed off-line on App; Without any changes of App account number, one just needs
to configure network accessing for the cleaner once again;
If others want to use App to operate same cleaner, they just required to be invited on
App by the family creator to join in (on the condition that the invitee has downloaded
App and registered for an account);
When App changes, the old users may be invited to remove device on mobile App and
the new users just need to configure directly network accessing in accordance with
network accessing instructions (if the old users don’t remove the device on mobile App,
it will be removed automatically after the
new users configure successfully network
accessing);
Once the cleaner is configured successfully network accessing, the following operations
will result in clearance of WiFi settings and secondary network accessing configuration
is required; Long press the network accessing configuration key on the device over 3
seconds and after a tick sound is heard, all Wi-Fi information will be cleared;
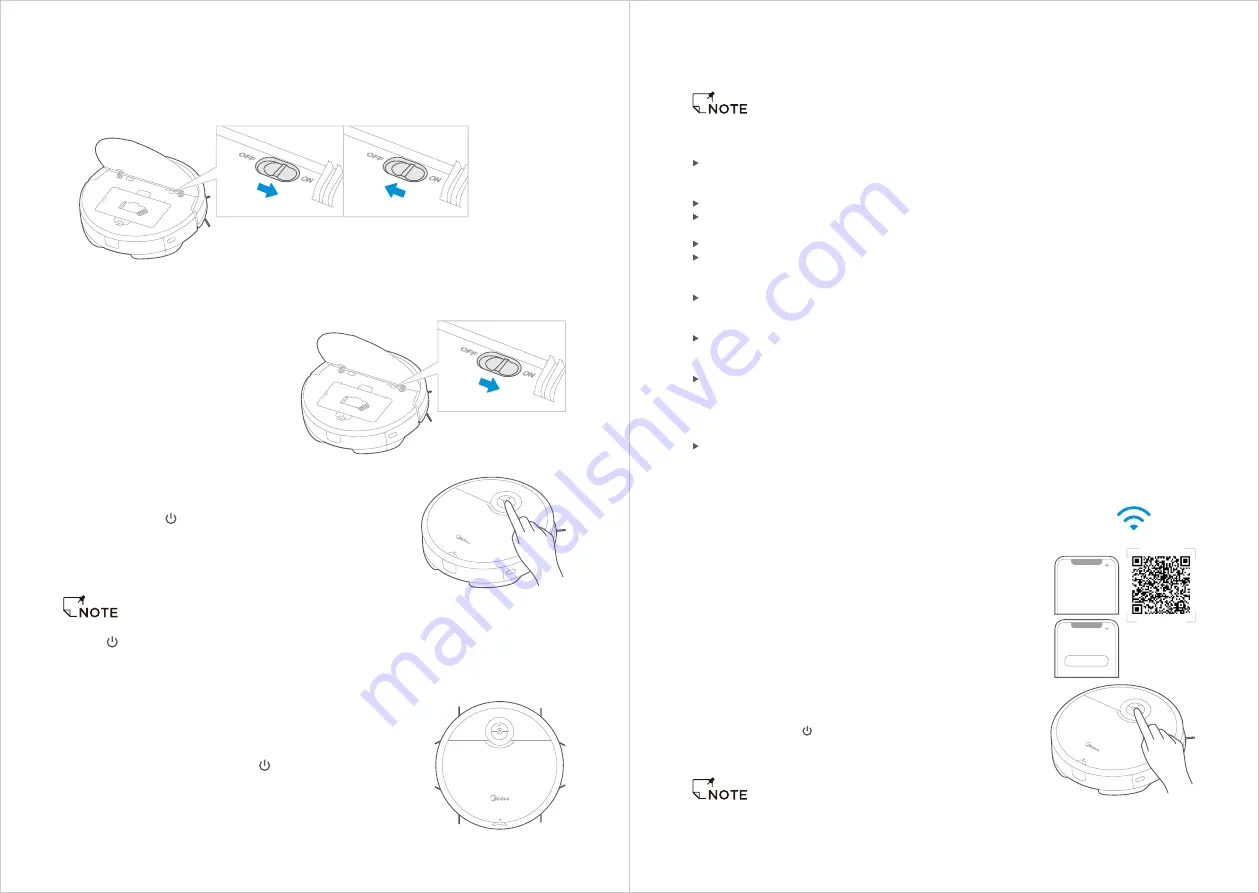
Ensure mobile phone is connected to your home WiFi.
Download the MSmartLife app and register your vacuum:
a. Scan the QR code or search for the MSmartLife
app in the Apple or Google Play store. Download
the app.
b. Open the app and create your personal account.
Follow instructions on the screen.
Add your robot vacuum to your app
Connect your robot to your WiFi
1
2
3
4
WiFi
Press the " + " button on the main screen of the app and
select VCR09B from the available list of products.
Add Equipment
After assembling and powering on the robot, press and
hold down the " " button for 3 seconds until a beep is
heard. The WiFi indicator light should start to flicker.
Follow instructions on app for next steps.
Once the network access is configured successfully, you will be the owner of this cleaner
and can operate your security intelligent cleaner by accessing to cleaner operating interface.