


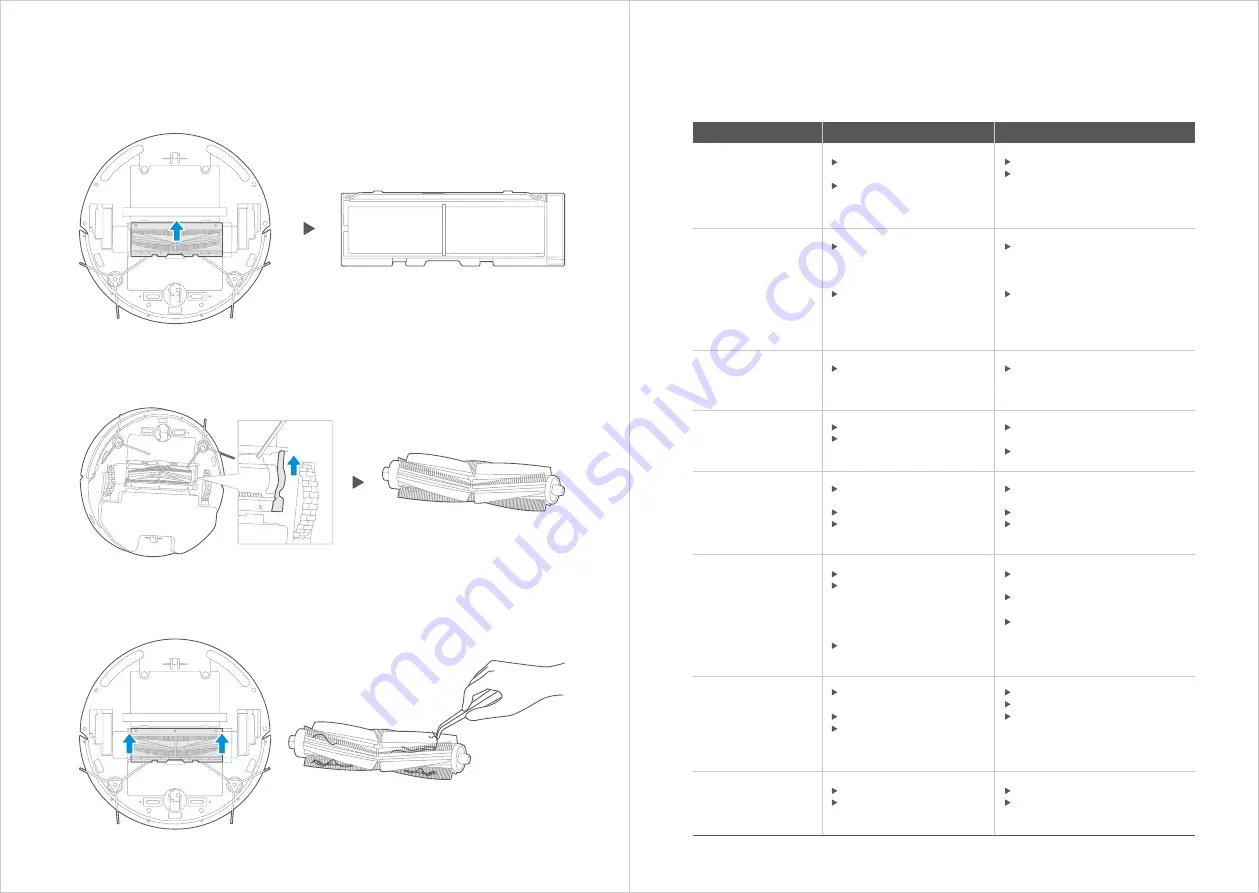
Cleaning the Brushroll
With the vacuum turned upside down, place your thumb in the open slot
between the two tabs and lift off to remove brushroll cover.
1
Press brushroll lock and lift up to access brushroll.
2
Clean the brushroll with a soft cloth or warm water. Dry THOROUGHOLY
and reinstall.
3
TROUBLE SHOOTING
In case of mis-function, please refer to the following table
.
Problem
Possible reason
Solution
The appliance will
not be charged
The power switch is not
turned on while charging.
The appliance and charging
terminals are not in full
contact.
Power on the appliance .
Make sure the appliance is fully
in contact with the charging
terminal.
The appliance gets
stuck
The appliance is covered
by wires on the ground,
drooping curtain fabric or
blankets are twined.
Side brush and brushroll,
etc. get stuck, and the
appliance cannnot run
normally.
The appliance will automatically
start the escape mode. If it is
not out of trouble, it needs
manual help.
Clean the windings on the side
brush and restart it. If not, contact
the after-sales department.
Not cleaned
completely,
and recharge it
The appliance does not sense
enough battery power.
Charge the appliance.
No cleaning
according
to the preset time
The power switch is not on.
Scheduled appointment is
cancelled.
Turn on the power switch of
appliance.
Reset and make appointment.
After the mop
holder is installed,
the appliance
is impermeable
The mop holder magnet
falls off.
There’s no water in water tank.
The appliance base outlet
hole is blocked.
Contact the aftersales service
center.
Add water.
Clear water outlet and tank filter.
The appliance has
missed sweeps,
there is no plan for
cleaning, and the
map in app shows
irregularly
The ground is slippery.
Wires, shoes and other
o b j e c t s placed on the
g ro u n d , a f fe c t i n g t h e
normal operation of the
appliance.
Cleaning is interrupted
halfway.
If the floor is waxed, dry it
before use.
Minimize ground items as much
as possible.
D o n o t m ove o r b l o c k t h e
appliance during work.
Appliance does not
work
The power switch is not
turned on.
Low battery.
Wheels are dropped and
the three groups of drop
sensors are in a falling state.
Turn on the power switch.
Charge the appliance.
Place the appliance close to
the ground.
Contact aftersales service center.
Appliance retreats
There’s obstacle ahead.
Bumper rail is clamped.
Clear the front obstacles.
Tap the bumper rail to check
for if there’s foreign matter stuck.
18
17


