ScanMaker 6000 Supplement 11
For Macs:
1. Place the Microtek CD-ROM into the CD-ROM drive. When the Microtek CD-
ROM icon appears on the desktop, double-click this icon to open it. Then,
double-click “For OS 9.x” or “For OS X”, depending on the Mac OS you are using.
2. In the software installer screen:
For Mac OS X: Double-click “LightLid 35 Calibrator” to mount the LightLid 35
Calibrator on the desktop. Click this icon to open it, double-click “LightLid 35
Calibrator.pkg”, then enter the administrator's name and password to install the
program.
For Mac OS 9.x: Double-click “LightLid 35 Calibrator”, then “LLD 35 calib
Installer” to install the program.
Follow the on-screen instructions until installation is complete. Once the program
is successfully installed, the “LightLid 35 Calibrator” or “LL 35 Calibrator” icon
appears on the desktop.
Starting the calibration process
To launch the LightLid 35 Calibrator:
• For PCs: Go through the Windows menu – click Start, Programs, Microtek
ScanWizard 5 for Windows, then LightLid 35 Calibrator.
• For Mac OS X: Double-click the “LL35 Calibrator” icon on your desktop or from the
Applications/ScanWizard 5 folder.
• For Mac OS 9.x: Double-click the “LightLid 35 Calibrator” icon on your desktop or
from the LightLid 35 Calibrator folder.
Note: Before you launch the LightLid 35 Calibrator, make sure that ScanWizard 5
has been already installed on your system and that your scanner is powered up.
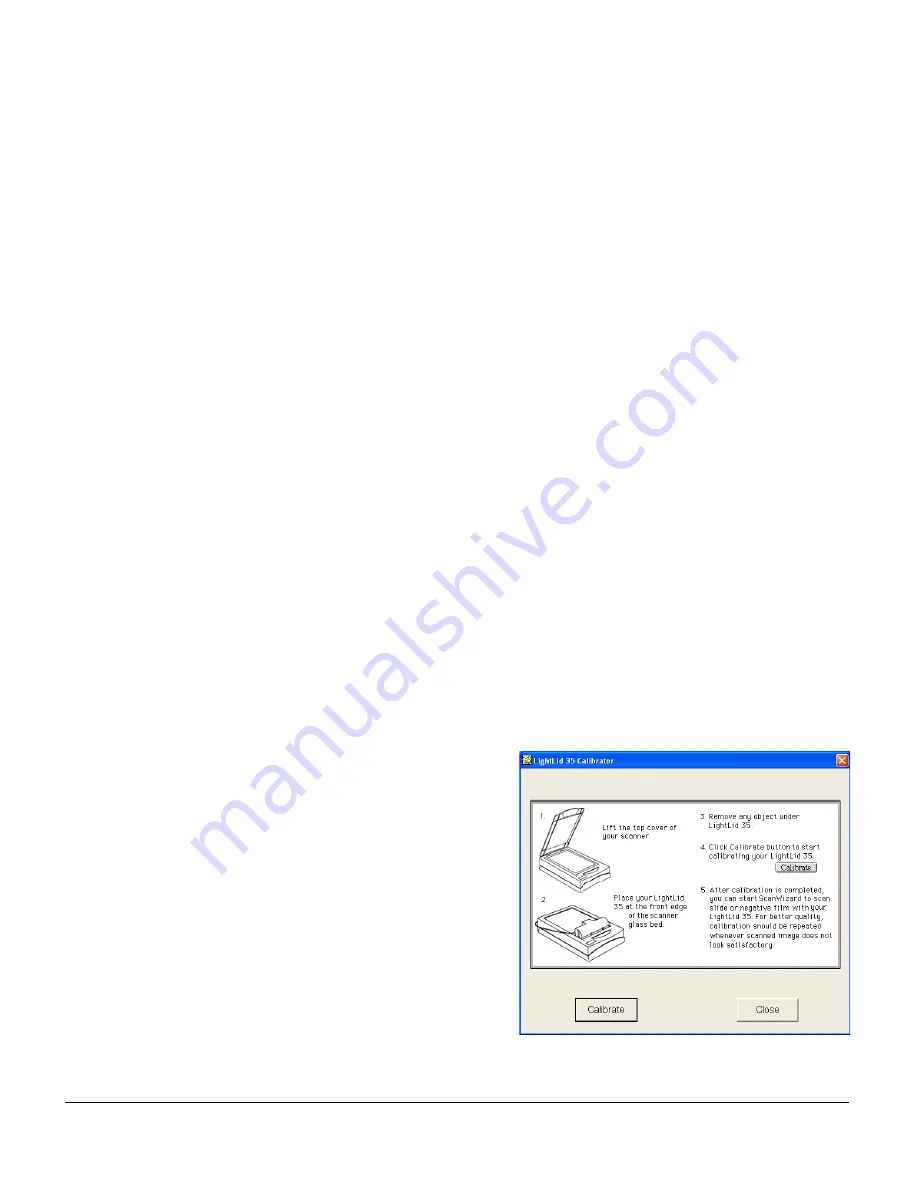
When the LightLid 35 Calibrator
window appears, follow the on-screen
instructions to start calibration.
When calibration is done, the
“Calibration is completed” message
appears. Click the “Close” button to
exit the LightLid 35 Calibrator
program, then start ScanWizard 5 to
scan film with your LightLid 35.
To obtain optimal color accuracy,
Microtek recommends that you
perform calibration when you notice
a loss of quality in your scanned
images.
Summary of Contents for ScanMaker 6000
Page 9: ...ScanMaker 6000 Supplement 9...
Page 15: ...ScanMaker 6000 Supplement 15...


