7
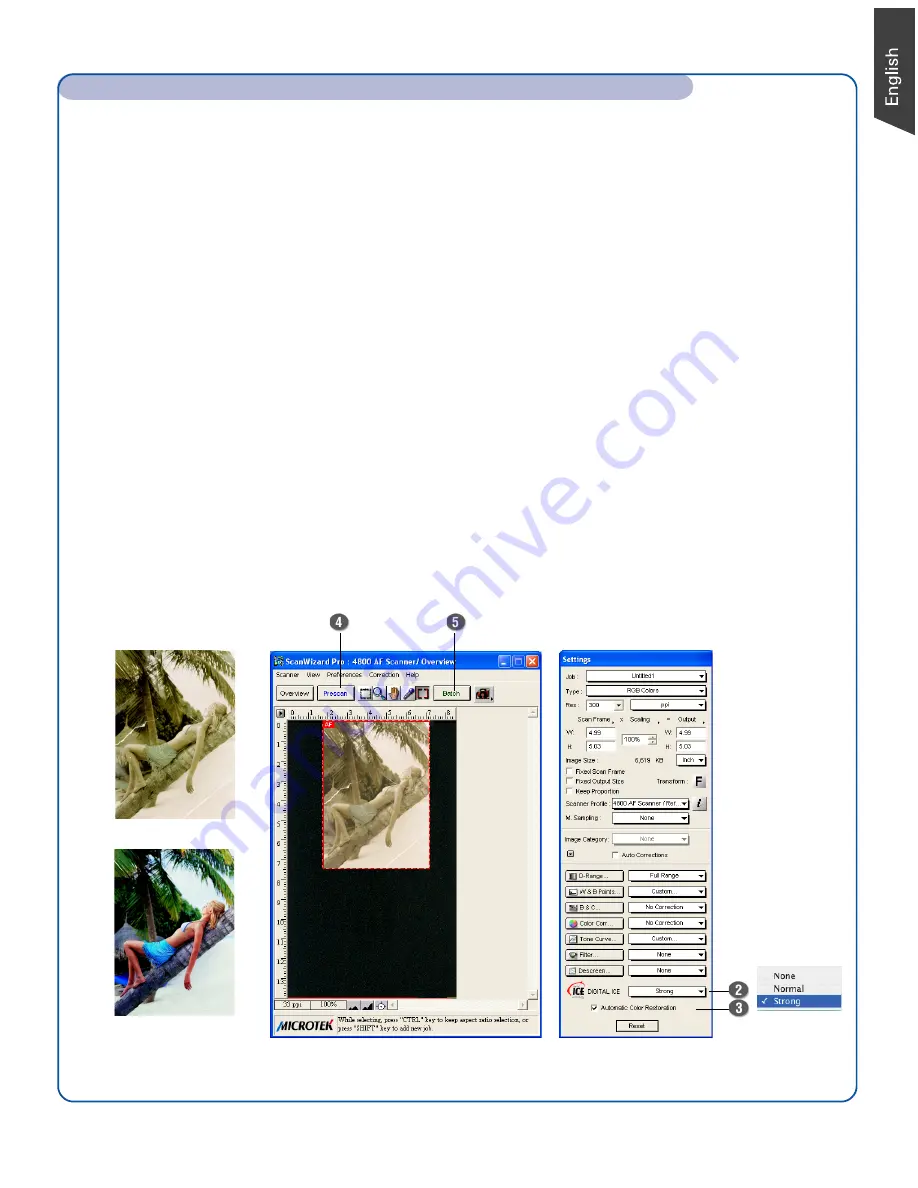
Scanning Damaged Photos or Film (using DIGITAL ICE)
1. For damaged photos, follow steps 1 to 8 in the procedures for “Scanning Non-Damaged Photos”.
For damaged film, follow steps 1 to 3 in the procedures for “Scanning Non-Damaged Positive or
Negative Film”.
2. To repair rips, tears, and other surface defects from your photo or film, choose the DIGITAL ICE
option in the Settings window that works best for you. Select
Normal
or
Strong
.
3. If the colors in your photo or film are faded and need restoring, check the
Automatic Color
Restoration
box in the Settings window.
4. Click the
Prescan
button in the Preview window to display a detailed image of the area
selected by the Scan Frame tool. A thumbnail of the prescan image appears in the Scan Job
Queue window.
5. Click the
Scan
(or “Batch”) button in the Preview window to start scanning.
Before DIGITAL ICE
After DIGITAL ICE
How to Scan: Scanning Photos, Using DIGITAL ICE, and Scanning Film (cont.)
Summary of Contents for ArtixScan F1
Page 10: ...10...


