


Microtek ADF-700 Installing and Getting Started 5
Scanning for OCR
1. Place the documents to be scanned on the Document Feed Tray.
2. Launch ScanWizard 5 in stand-alone mode or from your image-editing software.
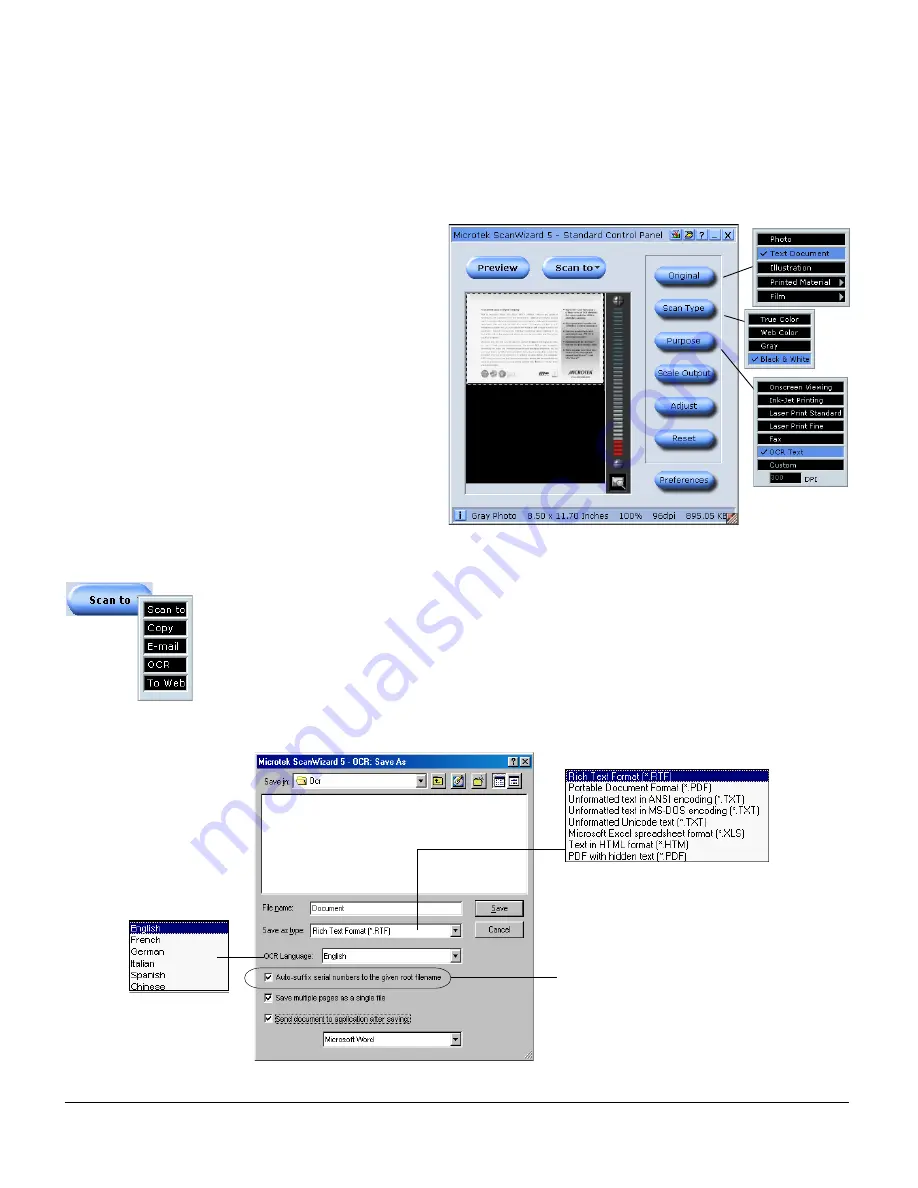
In the ScanWizard 5 Standard Control Panel, specify the following settings:
a) Click the Original
button, then select
Text Document as your
scan material type.
b) Click the Scan Type
button, then select
Black & White as your
output image type.
c) Click the Purpose
button, then select
OCR Text.
Selecting this check box will create files
under the specified file name, and
numbers are added serially and in order
to generate multiple file names for the
scanned/saved documents.
For example, assuming the document is
saved as "Sample," the first document
will be Sample.001, followed by
Sample.002, Sample.003, etc.
Note: When scanning colored text originals, you must select “Photo” and use
either True Color/Web Color (unless B/W is the chosen output).
4. Click and hold the Scan to button. When the options menu appears, select OCR.
5. When the OCR: Save As dialog box appears, use the default “Document” file
name, or key in your preferred file name and select the export file format (.rtf, .txt,
.htm, .xls, or .pdf ) .


