J-654 hamProAudio
TM
Microphone Equalizer/Conditioner
Instruction & Technical Manual
-9-
SYSTEM SETUP
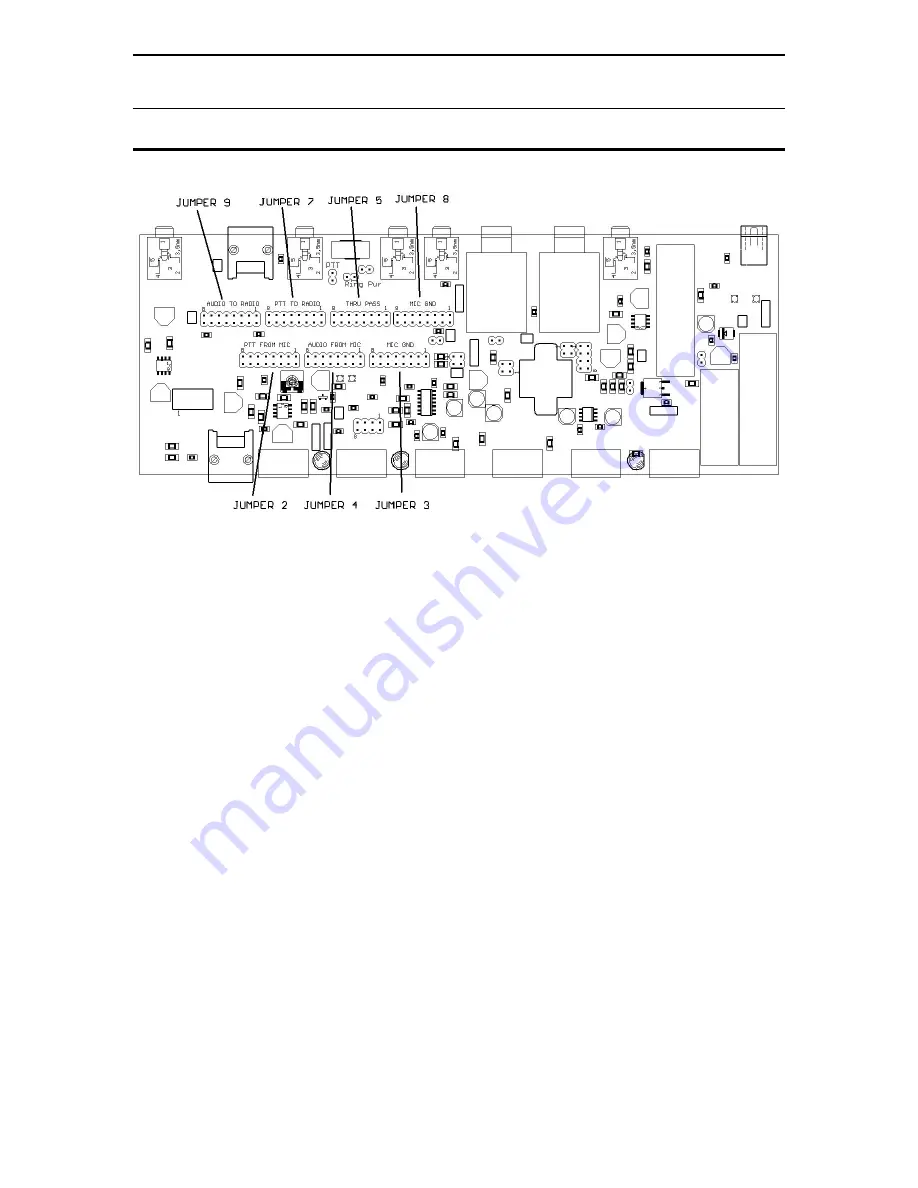
Figure 4: Internal Jumper Blocks
Refer to Table 1 for common microphones. Consult your owner’s manual to
determine your specific microphone pinout.
1. Jumper 2:
PTT from the Microphone. Place a jumper on the pin number that
corresponds to the pin of your microphone that supplies the PTT line to the radio.
2. Jumper 3:
Microphone Audio Ground. Place a jumper on the pin number
that corresponds to the pin that supplies the shielded ground from the
microphone.
3. Jumper 4:
Microphone Audio Input. Place a jumper on the pin number that
corresponds to the pin that supplies microphone audio.
4. Jumper 5:
Pass/Thru. This allows you to pas any other lines from the
microphone for feature such as up/down/fast. Normally all lines that are not
being used for the Mic Audio, Mic Ground and PTT line will be jumpered.
5. Jumper 7:
PTT to Radio. Place a jumper on the pin corresponding to the pin
that your radio requires for PTT
6. Jumper 8:
Microphone Audio Ground to Radio. Place a jumper on the pin
that corresponds to the pin that your radio requires for the shielded ground.
7. Jumper 9:
Microphone Audio to Radio. Place a jumper on the pin that
corresponds to the pin on your radio that feeds microphone audio to the radio.


