background image


Quick-Start


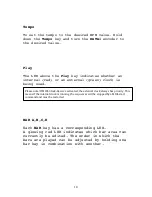
Tempo:

 Hold down the 

TEMPO-

key and use 

       the 

DATA1-

encoder to select and set,  

       the desired tempo in BPM, as shown on the display. 


Play:

  Pressing the 

PLAY

-key will start the  

       internal sequencer. 
 

Pattern 
 
Select:

 Hold down the 

Pattern

-key. 

        Press one of the upper black buttons 
        (marked 0-9). 
        For example to select Pattern 01 you 
        have to press 0 first and then 1. 
        

This input pattern applies  to pattern location 99. 


Programming:   

If the LED above the 

MAN TRG/RECORD

-key  lights up green, 

                                 you are in 

Manual-Trigger-Mode.


                                 To activate the 

 Real Time Note-Record-Mode.


                                 Hold the 

PATTERN/SHIFT-

key


in conjunction with key 10  

                                 (VOICE2,REAL RECORD). 

                                 Display shows Real Time Note. 
                                 Set to Yes by pressing 

DATA3

-button. 


      Press the  

INTRUMENT/SEL-

key to confirm and save the settings. 

                                 The instruments will now be triggered by the corresponding 
                                 keys while the sequencer is running. 


Instrument-Selection :

     If the sequenzer is stopped, instruments are directly  selected 

                                                    and shown in the display with two further 
                                                    parameters by pressing each corresponding key. 


            While the sequencer is running, hold the 

INSTRUMENT/SEL- 


key and press the key for the desired instrument.                         

Here you will find a brief explanation of some of the basic functions so that you can 

program your first patterns as quick as possible. 


ATTENTION! There are  two different modes to program patterns Modi 

Manual-Trigger-

Mode 

and 

Record-Mode

.  In Manual-Trigger-Mode,  the instruments can be triggered 

(prelistened) by the corresponding buttons,while the sequencer is not running. To really 
record them ,  the function 

Real Time Note Record Mode 

needs to be activated.


This is 

explained here. 
The 

Record-Mode

 and its function-enhancing operating modes are explained in detail on 

page 12. 


Summary of Contents for Tanzbar 2

Page 1: ...Tanzb r 2 Hybrid Drumcomputer Operating Manual...

Page 2: ...he Tanzb r 2 To guarantee this machine to never gets boring we advise you to read the following instructions carefully and in all peace IMPRESSUM MFB Ingenieurb ro Manfred Fricke Neue Stra e 13 14163...

Page 3: ...by the corresponding commercial laws Any duplication processing or form of distribution of this manual or parts of it requires permission of the manufacturer Safety Instructions Please carefully read...

Page 4: ...lace containers of liquid on the device Ensure a safe and firm stand when in use Make sure no objects get inside the device Should this happen switch off the device and remove it from the receptacle C...

Page 5: ...s against MFB Disposal This unit has been manufactured RoHS conforming in compliance with the requirements of the European parliament and council and thus is free from lead mercury cadmium and hexaval...

Page 6: ...14 Accent 14 Sample key 15 Flams 15 LFO 16 Mute LFO 16 Mute 17 Tempo 18 Play 18 BAR A B C D 18 Synthesizer Programming 19 Shift Functions Shuffle Last Step Scale Copy BAR 20 Paste BAR Saving Patterns...

Page 7: ...ings The instruments will now be triggered by the corresponding keys while the sequencer is running Instrument Selection If the sequenzer is stopped instruments are directly selected and shown in the...

Page 8: ...8 User Interface 15 16 17 18 19 20 21 22 23 24 25 26 27 28 29 30 31 32 33 34 35 36 1 2 3 4 5 6 7 8 9 10 11 12 13 14...

Page 9: ...nstrument 17 OPEN HIHAT Sample based Instrument 18 CLAP Sample based Instrument MIDI CLOCK 19 PERC1 2 3 Sample based Instrument 20 RIMSHOT Sample based Instrument MIDI NOTES 21 RIDE Sample based Instr...

Page 10: ...es for individual steps can be set here Parameter lock First select the step to be edited LEDs flash red Save the parameter setting by pressing the INSTRUMENT SEL Select key To change the parameters f...

Page 11: ...that can be adjusted via the DATA1 and DATA2 encoders Selection of Instruments While the sequencer is stopped press a corresponding instrument key the instrument is shown in the display However this...

Page 12: ...Select key in conjunction with the step to be edited Selection of Instruments To enter Record Mode hold the MAN TRG RECORD key and press a corresponding instrument key The LED above the MAN TRG RECOR...

Page 13: ...t by MFB Try these out to test the device functions Pattern Chains 16 chains of patterns can be programmed consecutively These can be selected as follows Press Chain and one of the top black keys Disp...

Page 14: ...he pattern depending on how many bars are turned on All parameter movements can be recorded while the LED is glowing red Accent The accent always corresponds to the set accent level A total of four ac...

Page 15: ...Try the sounds and select the desired sample The Sample key must always be pressed when a changing of samples Flams As with Accent for using Flams Record Mode needs to be turned on for the respective...

Page 16: ...this is the tune parameter Mute LFOs Enter the Mute LFO mode by pressing the LFO key while holding down the shift key The LED above the LFO key is now lit green The respective LFOs can now be muted u...

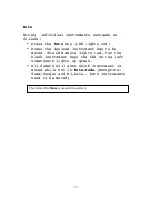
Page 17: ...strument key to be muted The LED above lights red For the black instrument keys the LED on the left underneath lights up green All faders will show which instrument is muted while not in Mute Mode Exc...

Page 18: ...ed BAR A B C D Each BAR key has a corresponding LED A glowing red LED indicates which bar area can currently be edited The order in which the bars are played can be adjusted by holding one bar key in...

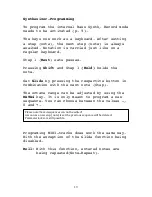
Page 19: ...ressing the respective button in combination with the next note Step The octave range can be adjusted by using the DATA4 key It is only meant to program a new sequence You can choose between the value...

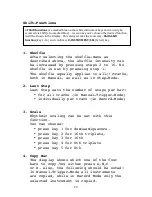
Page 20: ...ress key 1 for demisemiquavers press key 2 for 16th triplets press key 3 for 16th press key 4 for 8th triplets press key 5 for 8th 4 Copy Bar The display shows which one of the four bars to copy You e...

Page 21: ...3 7 Clear Bar Select the bar you want to delete Note that in Record Mode only the selected instrument and in Manual Trigger Mode all instruments are deleted 8 Pattern DUMP To transfer patterns from Ta...

Page 22: ...automatically 12 MIDI Clock Setup The transmission and reception of MIDI data is turned on and off here To confirm press Select If Shift is pressed additionally the entry is only valid for the curren...

Page 23: ...rs MIDI controller data nor MIDI clock Data being received on the MIDI input will be passed on to the output If you only want to pass on incoming MIDI clock data see MIDI Clock Setup 16 MISC Submenu K...

Page 24: ...please select your MIDI Interface in the Sample Tool If you have connected it using the USB Hubs Tanzb r 2 will show up automatically as an option to select Sample Number indicates in which slot you...

Page 25: ...DATA3 and DATA4 key The Display will indicate that the device can now be updated Open the Bootloader Select your MIII interface Then select syx Update file Start the Update The LEDs glowing up red one...

Page 26: ...CAY 1 TUNE 2 Instrument Note Channel KICK2 38 3 Parameter DECAY 8 Instrument Note Channel SNARE1 52 3 Parameter SNAPPY 11 SNAPPY DECAY 15 TUNE 14 Instrument Note Channel SNARE2 53 3 Parameter SNAPPY 1...

Page 27: ...6 3 Parameter TUNE 95 CUTOFF 50 DECAY 42 Instrument Note Channel OPEN HIHAT 58 3 Parameter DECAY 45 Instrument Note Channel CLOSED HIHAT 57 3 Parameter DECAY 44 Instrument Note Channel CRASH1 2 49 50...

Page 28: ...28 Tanzb r 2...

Reviews: