


Loading and saving patterns using USB, USB-Firmware-Update
Given the appropriate driver has been installed and the MFB-301 Pro has been
connected to a Windows computer using the USB connection, a terminal software
can be used to save and load patterns from and to the unit. To do so, press
Bank
1
, release the button and press
Play
to initiate the transfer to the computer. Or,
press
Bank 1
, release the button, press
REC
, release the button and then press
Play
to initiate the transfer to the MFB-301 Pro. More detailed descriptions as
well as information how to carry out firmware updates are soon to be found on
our website.
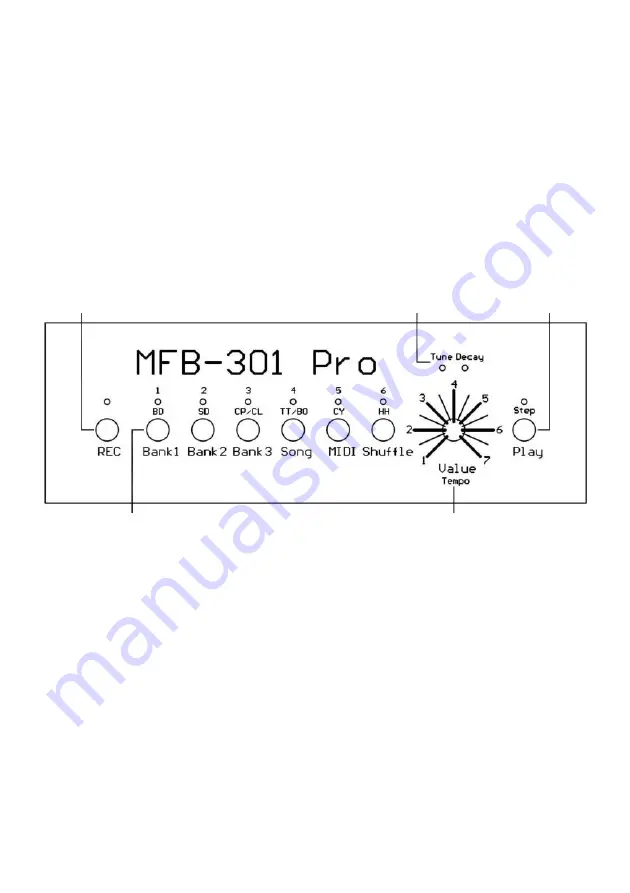
Control Elements
Record/Shift-button
Functional display Play/Step-button
Sound-/Multi-function buttons 1-6
Value input control
MIDI-Implementation
MIDI-Note
Instrument/Function
CC-Number
Function
Note # 36 (C)
BD
CC# 03
BD Tune


