


Pan Shortening - Continued
Page 4 of 5
brake lever hole and then remove the short sections of the tubes. Then put a hose clamp around the front
of the remaining emergency brake tubes so they will come together just behind the brake handle when
the pan halves are shoved together.
If you cannot get shortened cables, the full length cables will be used and coiled up inside the tunnel. In
this case cut the emergency brake tubes just behind the front tunnel cut leaving the short section
attached under the rear of the brake handle. Next cut the emergency brake tubes about eight to ten
inches inside the rear pan section and remove the loose pieces of tubing. Use the sawsall to enlarge the
rear tunnel access hole (not larger than the size of the cover plate) so that it is possible to get your hand
in there later to coil the cable and put on cable clamps.
It is now possible to push the two pan halves together. Keep the halves well
supported so that they do not fall and bend the tubing. While pushing the
halves together, carefully pull the clutch, accelerator, and fuel lines out of
their respective openings. When the halves are together, check for any
mismatches that may need to be ground off with a welding grinder. It is
now time check for alignment again. Use the bubble level to adjust the top
of the tunnel at the front and rear as was done earlier.
Level the front of the chassis by using the straight edge across the top of the front shock towers. Level the
rear of the car using a straight edge across the rear cast suspension mounts. Make the crisscross
measurements to verify that the chassis is straight.
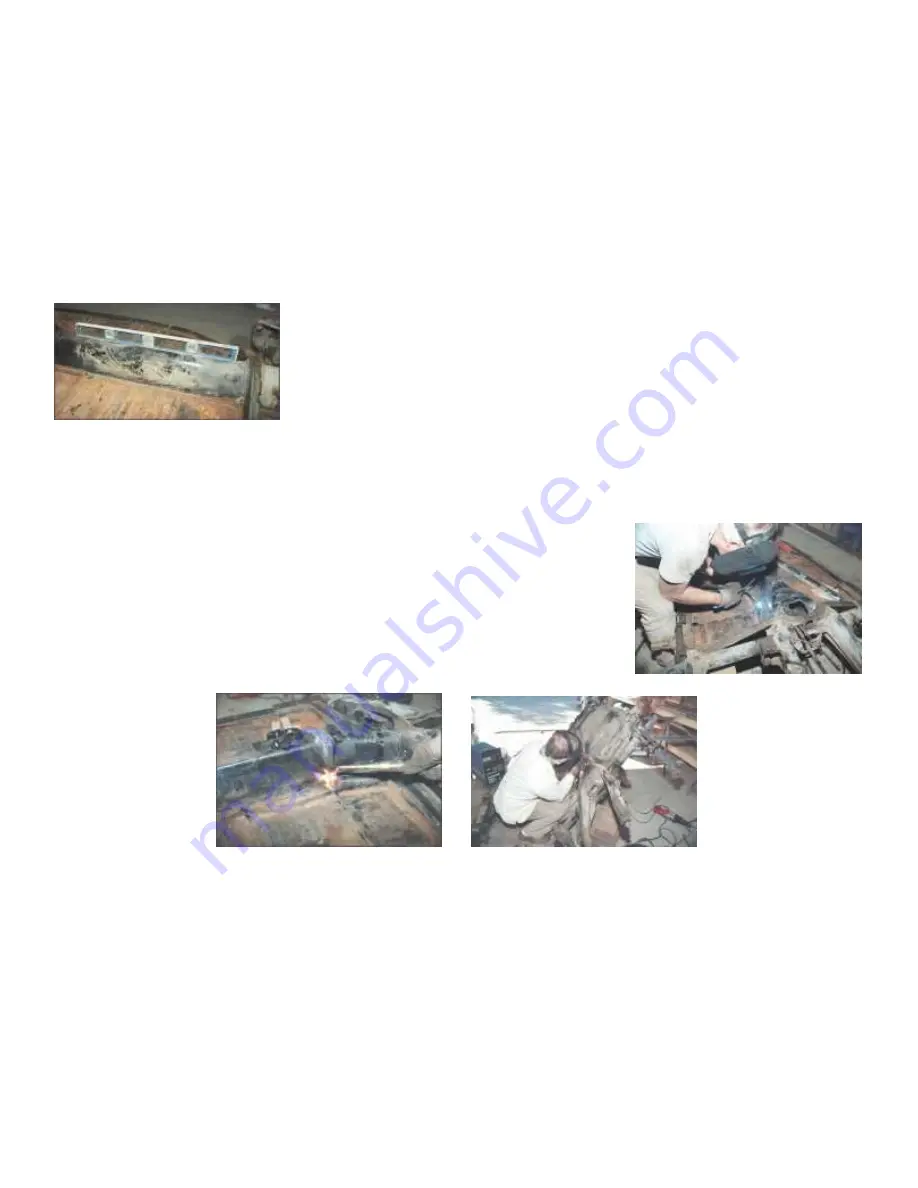
Once the halves are tightly together and aligned, the welding process can begin. Tack weld the top center
of the tunnel and then the straight sections of the tunnel sides where they are evenly matched. Now use
an oxygen-acetylene torch to heat the mismatched sections and beat them into place with a hammer.
Alternate between welding and heating with the torch until the tunnel is completely welded on the top
side. There may be up to 1/2" gap where the two floors meet at the bottom edge of the tunnel. This will
require some extra heat and a 5 pound hammer to get the edges close enough to weld. Now turn the
chassis over and weld the bottom edge of the tunnel together.
The thin sheet metal floor can now be welded; however, a dart must be cut out of the rear corner before
the outside edges of the pan will come together. Draw a line from the rear outside corners of the rear pan
sections down along the inside radius of the corner to the bottom of the floor pan. Then extend the line
straight and parallel to the outside edge forward to the cut between the halves. Use the sawsall to cut
along this line so that the rear corner is loose but not cut all the way off. Now fold the loose corner in until
There should be no more than 1/16 inch separation at the tunnel joint. If
there is more than that, slide the halves apart and use the welding
grinder to remove excess metal. At the corners there will be up to 1/2"
mismatch due to the difference in the shape between the front and rear
halves. We will heat the corners with a torch and bend them into place
during the welding. Put the halves back together and re- measure. The
halves can be put together under tension by using pipe clamps between
the hand brake hole tension by attaching a "come-along" under the pan
from the front suspension to a chain attached to the rear forks.


