ASSEMBLY INSTRUCTIONS FOR DUMP BED MOUNTING
(35300)
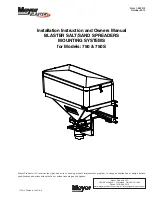
Note: This mounting is designed to support a BLASTER 750 & 750S spreader when mounted to a 2 or 3 yard dump truck with a tailgate.
1.) Start by placing the spreader on the ground face down, locate the PS & DS Upright Weldment (2 & 3) and eight 3/8"-16 x 1-1/4"
Bolts (5), sixteen 3/8” Flatwashers (10) and eight 3/8-16 Locknuts (8). The PS & DS Upright Weldment (2 & 3) come with a series
of pre-drilled holes these are to allow for flexibility in the height of the spreader when mounted and the adjustability of the Lower
Supports (4). Place the PS & DS Upright Weldment (2 & 3) onto into the spreader frame making sure that the same pattern of
mounting holes is used for each side. Bolt the PS & DS Upright Weldment (2 & 3) to each side.
2.) Using two 1/2"-13 x 1-1/2" Bolts (6), four 1/2” Flatwashers (11), and two 1/2-13 Locknuts (9), attach Channel Weldment (1) to one
of the PS & DS Upright Weldment (2 & 3) so that the channels are rearward of the spreader framework. Repeat this step on the
other side. Fully tighten all bolts.
3.) With assistance from another person, lift the entire spreader and mounting frame assembly and place centered onto vehicle.
The Chennel Weldment should seat fully down onto the tailgate. Thread four 1/2"-13 x 3" Bolts (7) into each tailgate Channel
Weldment (1) and tighten evenly until all slack is removed. Once again, go through and fully tighten all bolts to provide a good
gripping action on the tailgate.
4.) The Lower Supports (4) provided with this kit have several long slots. These are to allow for adjustment when installing. First
examine the rearward portion of the vehicle frame for existing hole that may be used. If there are no holes present new ones will
have to be drilled. Loosely attach the Lower Supports (1) to the lower portion of the PS & DS Upright Weldment (2 & 3) using two
1/2"-13 x 1-1/2" Bolts (6), four 1/2” Flatwashers, and two 1/2-13 Locknuts (9) for each side. Align the Lower Support (1) to the
hole or holes in the vehicle frame and attach with two 1/2"-13 x 1-1/2" Bolts (6), four 1/2” Flatwashers, and two 1/2-13 Locknuts
(9) for each side.
Double check that the spreader is sitting level and square, and that all fasteners have been sufficiently tightened. Plug the
spreader into the wire harness and the unit is ready to be used.
WARNING:
Do not raise the dump with the spreader or any of the mounting components attached.
Item
Part No.
Qty.
Description
35300
Blaster Dump Body Mount
1
35301
2
• Channel Weldment
2
35305
1
• PS Upright Weldment
3
35304
1
• DS Upright Weldment
4
35306
2
• Lower Support
35307
1
• Hardware Bag
5
22730
8
•• Bolt 3/8-16 x 1-1/4” SS
6
22742
12
•• Bolt 1/2-13 x 1-1/2” SS
7
22736
8
•• Bolt 1/2-13 x 3” SS
8
22735
8
•• Locknut 3/8-16 SS
9
22732
12
•• Locknut 1/2-13 SS
10
22734
16
•• Flawasher 3/8” SS
11
22733
24
•• Flawasher 1/2” SS
Parts List
Parts indented are included in the assembly under which they are indented.
DUMP BED MOUNTING
COMPONENTS (35300)
1
2
3
4
5
6
7
8
9
10
11
1
4
5
6
6
7
8
9
9
10
10
10
11
11
11
11
11


