background image

-10-

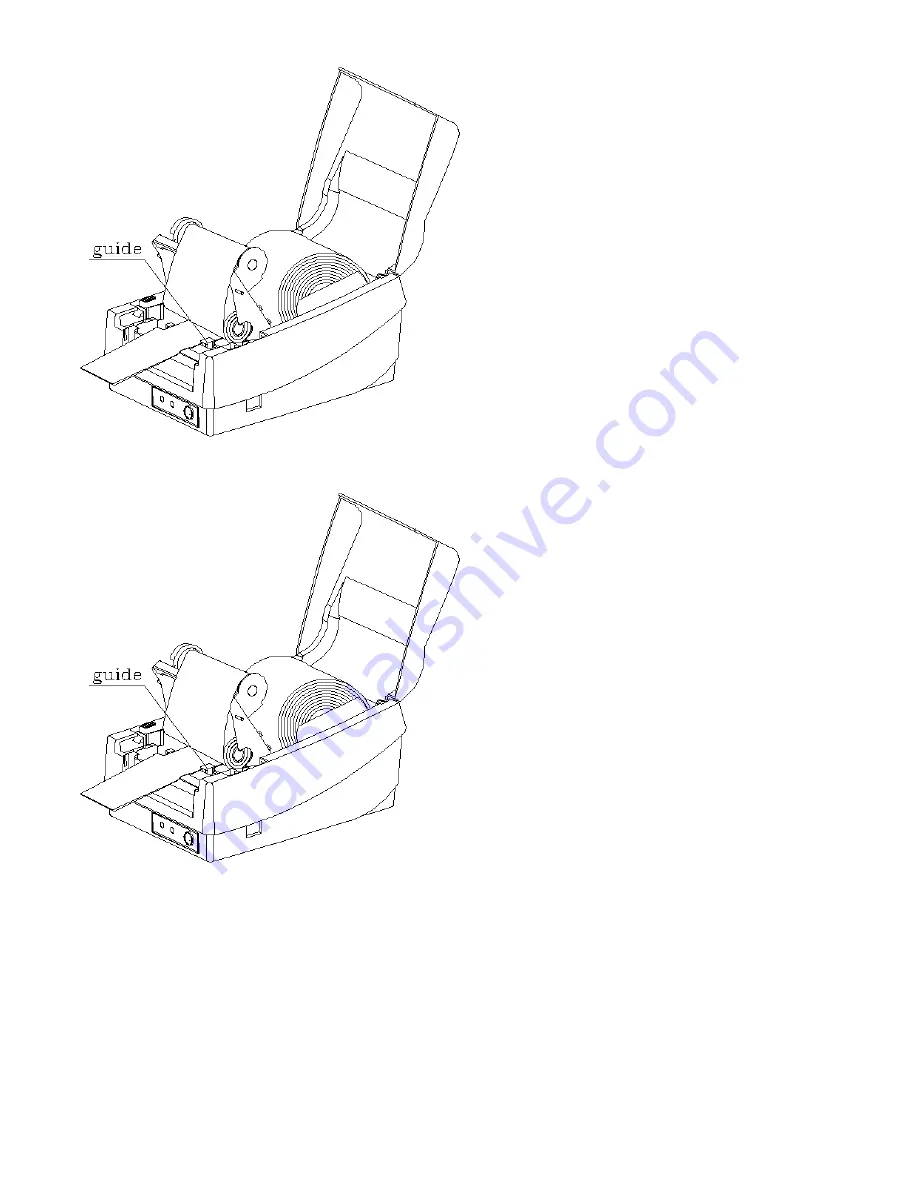
Loading Media When Dispenser  is Equipped

1.

Follow the same procedure as above for steps 1~5.

2.

Peel off, remove 6-inch labels and route the label backing through the 

dispenser  bar

 into roller gap between the 

feeding 

r oller

 and 

dispenser  r oller

.

3.

Turn on the power to “

1

” position.

4.

Press “FEED” button and the label backing will advance to dispensing position.

Summary of Contents for BRAVA

Page 1: ...OUND 110 Direct thermal and thermal transfer BRAVA Direct thermal Meteor s r l Via Delle Macchine 24 30038 Spinea VE Italy Tel 390415412600 Fax 390415412231 E mail meteor meteorbarcode it Web www meteorbarcode it ...

Page 2: ...spenser and Cutter provide the alternatives of fan fold label and continuous paper handling This printer is a compact highly integrated high performance and high resolution on site labeling system The User s Manual will help you understand basic operations of the printer such as setup installation configuration and maintenance Before reading the manual you should first identify your printer model ...

Page 3: ...aphics depend on the printer emulation The emulation is a printer programming language through which the host can communicate with your printer There are two printer programming languages for models 204 214 314 they are PPLA and PPLB Printer Programming Language A PPLA Specification Model BRAVA Model SOUND Model SOUND 300 DPI General fonts 7 alpha numeric fonts OCR A and OCR B ASD smooth fonts 6 8...

Page 4: ...n be more than 30 inches whereas if you print many graphics the maximum can be about 10 inches in length under standard 512K RAM The dispenser cutter expansion RAM and flash memory options are all installed at factory As the extension RAM font board and flash modules use the same connector they cannot function simultaneously Unpacking and Inspection This printer is packed in a heavyweight carton a...

Page 5: ...f test pattern Press to continue printing when READY LED is blinking Press to resume printing 3 READY indicator Shows the printer status Green printer is ready to operate Blinking printer is paused press FEED button to continue operation 4 POWER indicator Shows the power and error status Off printer power off Green printer power on Blinking error has occurred 6 Power jack Connected to power adapte...

Page 6: ...he media and ribbon access The location should be near the host or terminal Consider the distance between host and printer for the communication cable serial or parallel cable Clear the ground and isolate from other electrical cables for the power adapter Connecting the Power Cord 1 Leave the power switch at the O position 2 Connect the power supply plug to the power jack and the other end to your...

Page 7: ...the printer with any standard Centronics cable to the parallel port of the host computer 2 Alternatively you can connect the printer with a serial cable to the RS232C port of your computer or terminal for PC compatibles the RS232C port is COM1 COM2 or COM3 Note Using Centronics allows for a much higher communication speed than the use of a serial ...

Page 8: ...detect it 2 The default settings can be read from the self test page Loading the Ribbon 1 Lift the printer top cover and keep it at the open position 2 Release the print head module and raise it to the vertical position 3 Unwrap the ribbon roll and place the supply roll into the supply holder of the print head module first insert the left end of the ribbon core into the holder shaft then insert th...

Page 9: ...eft and slide in the guide snug with the media 5 Pull out 6 inches of media and thread the end of the media between the guides adjusters located under the print mechanics Slide in the right guide snug adjuster with the media Thread the media over the roller until 2 of the media shows out of the printer ENSURE THAT THE LABELS ARE FACING UP 6 Press the print head module down firmly until it snaps in...

Page 10: ...ove for steps 1 5 2 Peel off remove 6 inch labels and route the label backing through the dispenser bar into roller gap between the feeding roller and dispenser roller 3 Turn on the power to 1 position 4 Press FEED button and the label backing will advance to dispensing position ...

Page 11: ...secure 6 Close the top cover Loading Media When Cutter is Equipped Follow the same procedure as Loading Media except for step 5 After you thread the media over the roller find the horizontal gap at the cutter module and route the media through this gap ...

Page 12: ...ump mode you just press the feed button again Notes This step is veryimportant and must always be carried out after installation and everytime the media type is changed Failure to do so will result in the gap and label empty detection being incorrect Self Test Pattern for PPLB Resetting the Printer to Factory Default Settings If you would like to reset the printer to its factory defaults after cer...

Reviews: