COPYRIGHT © 2008 MERIT ENTERTAINMENT
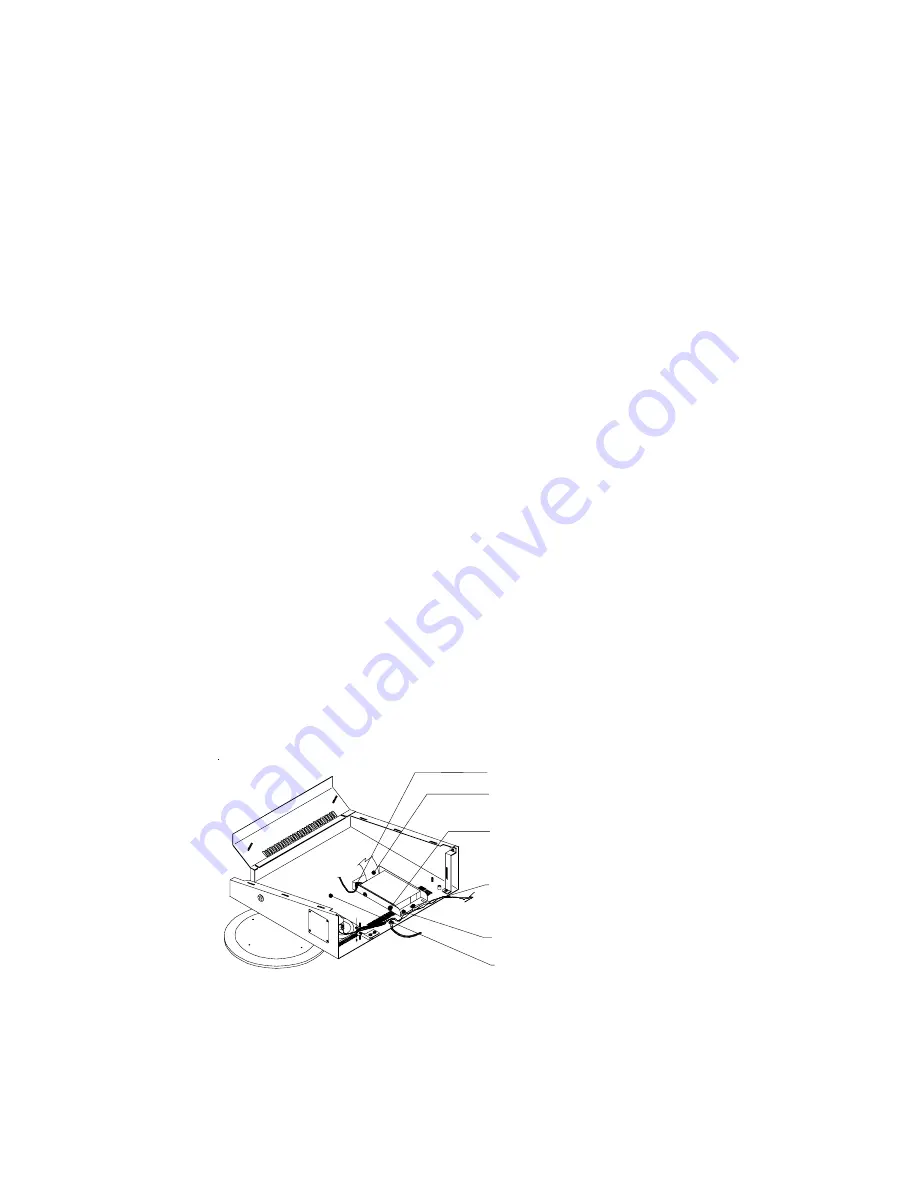
HARD DRIVE
HARD DRIVE RIBBON CABLE
HARD DRIVE POWER CONNECTOR
(4) SCREWS SECURING
HARD DRIVE
TO MOUNTING PLATE
BASE OF CABINET
SCREW SECURING
HARD DRIVE
MOUNTING PLATE
Force Classic Games
Hard Drive Removal
1.
If you are connected to TournaMAXX
or TournaCHAMP, you must perform an
Update From Server
before remov-
ing the hard drive so that no informa-
tion is deleted.
2.
Turn off and unplug the game.
3.
Unlock and open the lid.
4.
Remove the screw securing the hard
drive mounting plate to the game and
remove the hard drive assembly as
much as the cabling will allow. See
Figure 2.
5.
Disconnect the 4-pin power connector
and the ribbon cable from the hard
drive, then remove the hard drive as-
sembly from the game.
6.
Remove the 4 screws and shoulder
washers securing the hard drive to the
mounting plate. See Figure 2.
Hard Drive Installation
7.
Fasten the new hard drive assembly
to the existing mounting plate with the
4 screws and shoulder washers. See
Figure 1.
FIGURE 2 - FORCE CLASSIC CHASSIS
PM0513-13 MEGATOUCH FORCE 2009 EDITION 2
8.
Connect the 4-pin power connector in
the game to the mating 4-pin connector
attached to the hard drive adapter. See
Figure 1.
9.
Carefully reconnect the ribbon cable in
the game to the new hard drive as
shown in Figure 1. The red stripe on
the cable should be on the opposite
side as the power connector. You may
need to create extra slack in the cable
in order to connect it.
10. Fasten the hard drive mounting plate to
the game with the mounting screw. See
Figure 2.
11. Continue with
Security Key Installa-
tion
if you are installing a security key.
12. Close and lock the lid.
13. Plug in and turn on the game. The game
will reboot twice to configure the hard-
ware. When prompted, perform a
touchscreen calibration.
14. If you are connected to TournaMAXX
or TournaCHAMP, you must re-enter the
dial-in settings, make the initial call into
the server and then perform two
Up-
dates From Server
. Refer to the
MegaNet® manual for information.


