background image

28

Configuring the DSP33 loudspeakers using a computer

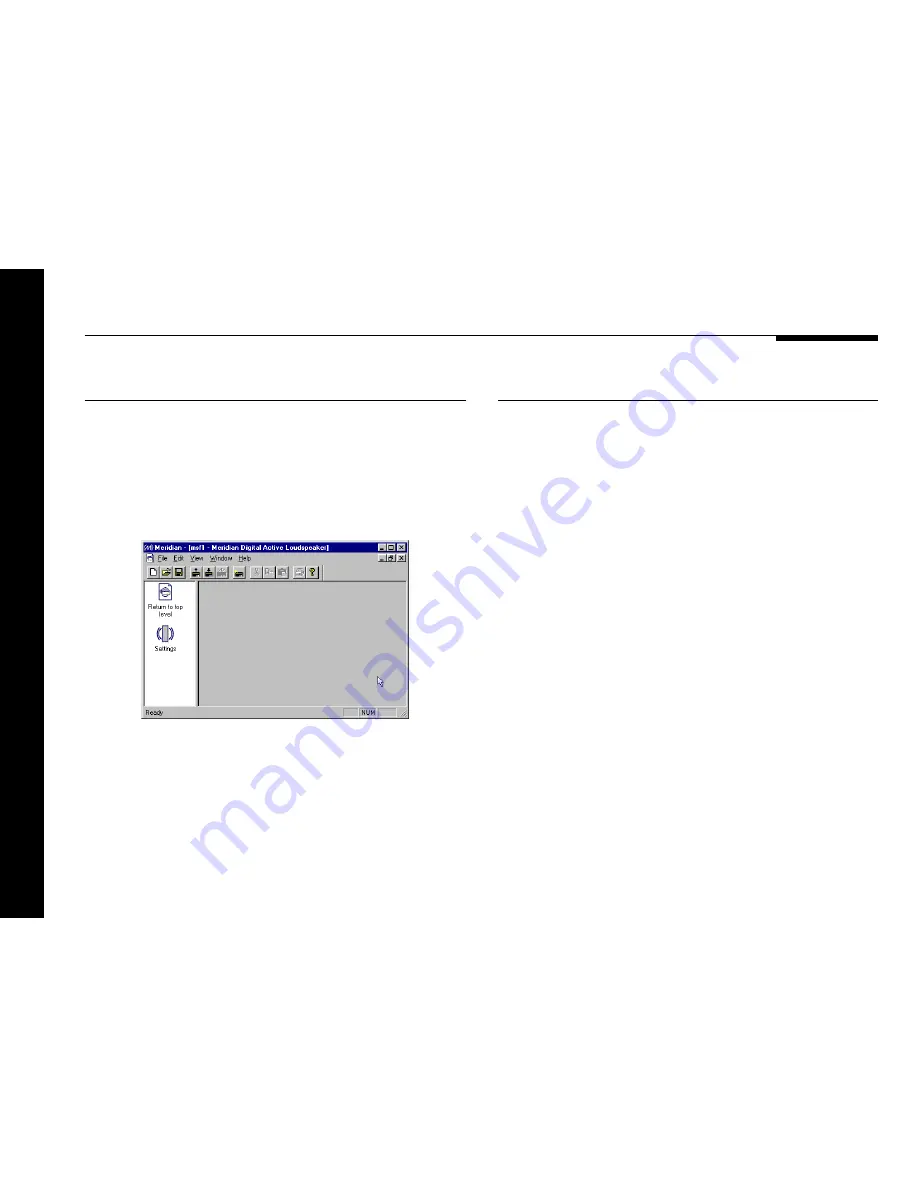
To display the settings

Double-click the 

Digital active loudspeaker

 icon, to open it

and display the settings it contains.

The left-hand panel of the 

Meridian

 window will change to show

the following two icons:

Settings

 is the initial configuration in the settings file.

Double-clicking

 Return to top level

 takes you back to the

previous level.

To display or edit the settings

Double-click the 

Settings

 icon.

The 

Meridian

 window will change to show the two categories of

settings contained in the settings file: 

Sources

 and 

Setup

.

The options available in each case are explained in the following

sections.

At this stage you may find it useful to maximise the Meridian

Configuration program window so you can see all the options on

each screen.

Summary of Contents for DSP33

Page 1: ...SP33 Digital Loudspeaker System u s e r g u i d e...

Page 2: ...i Preface Meridian DSP33 Digital Loudspeaker System User Guide...

Page 3: ...ambs PE18 6ED England Copyright 1999 Digital Gramophone and Wireless Ltd Boothroyd Stuart Meridian Meridian Meridian Digital Theatre Meridian Lossless Packing MHR and MLP are registered trademarks of...

Page 4: ...ystem 9 Describes how to unpack and install the digital loudspeakers and explains how to connect them to your equipment Unpacking 10 Positioning the digital loudspeakers 11 Connecting the loudspeakers...

Page 5: ...ing the DSP33 loudspeakers using a computer 23 Describes how to configure the digital loudspeakers using the Meridian Configuration program The Meridian Configuration program 24 Running the Meridian C...

Page 6: ...speaker that produces extremely high quality sound from a compact enclosure and is ideal either as part of a stereo system or a full home theatre For instructions on setting up the loudspeakers turn...

Page 7: ...bass drivers crossover To perform filtering or adjustment of the frequency response eg treble or bass To provide volume control to 48 bit precision To provide bass extension by boosting the bass at m...

Page 8: ...loudspeaker amazing mid range transparency Mounting options The DSP33 is designed to be used either vertically or horizontally mounted and uses fully shielded drive units so that it can be placed abo...

Page 9: ...tion of units using a single remote and ensure that they will work together as a fully integrated system The communications system also allows you to extend your hi fi system into two or three rooms w...

Page 10: ...33 loudspeakers can be used in conjunction with a Meridian Surround Processor to create a compact surround system with superb music and cinema sound The DSP33 provides an unusually good response for s...

Page 11: ...optional 512 Remote Eye or via the RS232 interface using the optional RS232 lead Other applications Other applications include High quality multimedia PC speakers with RS232 control of volume etc Surr...

Page 12: ...tic output Typically 104dB spl 1m Acoustic noise 15dB spl 1m Frequency response In room response within 3dB 60Hz 20kHz lower at moderate volumes Crossover Linear phase 30 at 2 3kHz Drive units Woofers...

Page 13: ...he 861 568 or 561 Other applications and some advanced features may require one or more of the following accessories which can be purchased from your Meridian dealer Meridian System Remote 512 Remote...

Page 14: ...ou should connect them to your other audio equipment and the siting constraints Before you begin installation you should ensure that your digital loudspeaker system is the correct voltage for your loc...

Page 15: ...against such interference in home installations EEC This product has been designed and type tested to comply with the limits set out in EN55013 and EN55020 The digital loudspeaker system is supplied i...

Page 16: ...of heat producing equipment such as a power amplifier The DSP33 cabinet acts as a heatsink and requires adequate ventilation Ensure that air can flow around it To avoid interference Do not position th...

Page 17: ...the tweeters of the three speakers to be approximately the same height The plinth allows the centre channel to tilt towards the listener for optimum imaging To wall mount the digital loudspeakers The...

Page 18: ...ion of the digital loudspeaker The following procedure can be used to reset the configuration of the DSP33 loudspeaker to the default settings without needing a computer using the R reset plug supplie...

Page 19: ...itable cables are available from Meridian We do not recommend using audio cables which do not have adequate shielding or the correct impedance or cables intended for UHF applications as these do not p...

Page 20: ...Controller Connect one of the COMMS sockets on the Meridian source or control unit and the MAIN digital output to one of the digital speakers using the M5 lead supplied Link the two digital speakers...

Page 21: ...own on the left Use the comms part of an M5 lead to connect one of the COMMS sockets on the Meridian Surround Controller to the digital speaker you have chosen as the master typically the centre speak...

Page 22: ...ed the optional Meridian 512 Remote Eye and a D5 lead to allow you to control the volume and balance using the Meridian System Remote Connect one of the COMMS sockets on the Meridian source and the di...

Page 23: ...d in the next chapter Connect the DSP33s together with the S5 lead supplied as shown in To connect two DSP33 Loudspeakers in a Meridian system page 15 Connect one end of the phono part of the M5 lead...

Page 24: ...d via the controller For more information refer to the user guide for the preamplifier or control unit and you can ignore this chapter However the DSP33 Digital Loudspeaker System can also be connecte...

Page 25: ...it completely off at the back panel and disconnect it from the AC power supply To select a source Press the appropriate source key on the remote eg DVD This will bring the digital loudspeakers out of...

Page 26: ...al Loudspeaker System 21 s of nd can the n of h To restore the sound Press Mute again on the remote Alternatively the sound will be restored if you adjust the volume The back panel indicator on each s...

Page 27: ...he balance Press or on the remote There are 20 settings in each direction To reset the balance to the centre Press Von the remote Note Because the use of the balance control processes the digital sign...

Page 28: ...u can change to suit your own preferences and the other equipment in your system To configure the DSP33 Digital Loudspeaker System you connect the master loudspeaker to a PC and then use the Meridian...

Page 29: ...m systems Sources Lets you customise the operation of each of the sources including the audio input used for the source and additional information about the type of each source The Meridian Configurat...

Page 30: ...onnect Disconnects the program from the attached product Add Product Adds a product to the current settings Copy Copies text or settings onto the clipboard Paste Pastes text or settings from the clipb...

Page 31: ...enu to display the Options dialogue box Select the port you want to use and click the OK button To select which loudspeaker to configure In any system incorporating one or more DSP33 loudspeaker you w...

Page 32: ...our name and click the Save button Creating a new settings file This section explains how to create a new settings file using the Meridian Configuration program and how to enter personal information t...

Page 33: ...ation in the settings file Double clicking Return to top level takes you back to the previous level To display or edit the settings Double click the Settings icon The Meridian window will change to sh...

Page 34: ...se the appropriate Front or Centre speaker boundary drop down menu to choose the appropriate option Option What it means Free Flat frequency response Boundary Speaker closer than 0 5m 2 to a wall Sub...

Page 35: ...out of standby Set the Start volume to 65 to leave the volume unchanged as on other Meridian products Set the Start volume to a value other than 65 to set the volume to that value Advanced options Th...

Page 36: ...ng RS232 control Choose a name from the Name drop down menu This section describes how to use the Meridian Configuration program to configure the sources provided by the digital active loudspeaker To...

Page 37: ...ning room or for a misbalanced recording The Tilt can be adjusted between 10dB and 10dB in 0 5dB steps Normally settings between 2 0dB and 1 0dB will give the most natural results Bass The Bass settin...

Page 38: ...source is connected to another Meridian unit set Comms type to 1C for a Meridian CD player 2C for a Meridian FM tuner and 3C for a Meridian DVD player Otherwise set it to None If you have two Meridian...

Page 39: ...click the Save toolbar button to save the changes you have made to the settings file to your PC hard disk To store the settings to the DSP33 loudspeaker Click the Store button The settings will then...

Page 40: ...solutions to typical problems that may occur when setting up the digital loudspeaker s If you are still not able to resolve a difficulty with the help of this guide and the suggestions in the followi...

Page 41: ...at this may be deliberate by your dealer Unit goes silent when played hard DSP33 has a temperature sensing system on board which prevents overheating of the electronics The sound will continue when th...

Page 42: ...is normally indicates that the DSP33 is overheating and that it has shut down to cool down If the DSP33 is cold it may indicate a fault Meridian Configuration program repeatedly fails to talk to the l...

Page 43: ...38 Troubleshooting Only the master loudspeaker plays Check the S5 cables are connected correctly Sound is odd or mono Check the channel selector switches on both loudspeakers are correctly set...

Page 44: ...arantee The DSP33 Digital Loudspeaker System is guaranteed against defects in material and workmanship for two years from the date of purchase The guarantee is void if the DSP33 Digital Loudspeaker Sy...

Page 45: ...40 Troubleshooting...

Page 46: ...nning 25 toolbar buttons 25 Meridian Digital Compact Theatre 5 Meridian High Resolution MHR 3 Muting the sound 21 O Options View menu 26 Options dialogue box 26 P Phase 22 Positioning 11 R Radio inter...

Page 47: ...Index 42 T Tilt 32 Toolbar buttons 25 Troubleshooting 35 U Unpacking 10 V Volume adjusting 21 muting 21...

Reviews: