18
19
BASIC SETTINGS
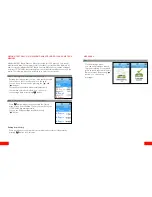
Step 3a: Auto Set mode
In Auto set mode, by pressing
“Agree” button, the meter sets
automatically to the local time-
zone. This includes daylight
saving.
Step 3b: Manual Set mode
In Manual Set mode you can adjust
the current year, month, day and
time by pressing “ ”, ” ”, and
” ” buttons.
Step 4: Entering the Time Format
In this screen the set time and the current time
format is displayed. You can set the time format
by pressing time format button.
OK
Cancel
BASIC SETTINGS
Step 5: Setting the Time Format
The meter provides two options for your convenience.
You can choose from “12-Hour” or “24-Hour” option.
12 Hour format is displayed as “HH:MM AM/PM”
while 24 Hour format is displayed as “HH:MM”.
Step 6: Setting the Date notation
The meter provides three options
for your convenience. You can
choose from “yyyy/mm/dd” or
“mm/dd/yyy” or “dd/mm/yyyy”
option.
For example, “yyyy/mm/dd”
format is displayed as
“2014/01/17”.


