19
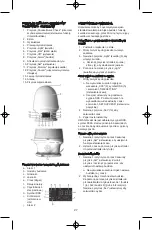
KEY TO THE MAIN COMPONENTS OF THE
APPLIANCE
1. "Snooze/Quick Check" button (snooze/alarm
funtion control)
2. Screen
3. Display
4. Right arrow buttons
5. "Light" button (light)
6. Zizz" button (Short time alarm)
7. "Off" button (switch off)
8. "Alarm" button
9. Forward arrow/Back arrow
10. "Set" button (adjust)
11. "Dimmer" button (light dimmer)
12. "Sound" button (set/mute sound)
13. Left arrow buttons
14. Antenna
15. Button to release screen
Display and control buttons
a. Alarm 1
b. Alarm times
c. Volume
d. Brightness
e. Clock
f. Natural sound
g. Radio frequency
h. RDS symbol
i. Short time
alarm
(countdown)
j. Alarm 2
USING THE APPLIANCE
The appliance can be used as a standard lamp,
or as a sunrise alarm clock simulating the sunrise
for 30 minutes.
Using the appliance as a standard lamp
1. Place the appliance on a table.
2. Plug in and switch on the power.
3. Press the “Light” (5) button to switch on the
light.
o Press the arrow buttons on the right side
(4) to adjust the brightness.
4. Press the “Light” button again to switch off
the light.
Setting the clock automatically
1. Plug in.
o The display shows "0.00" flashing (3),
RDS symbol (h) and "TIME SETTING"
o Time is set by the RDS signal. After a
couple of minutes the display shows the
actual time and "SET SUCCESS".
2. Press the "Set" button (10) to confirm time.
3. The clock has now been set.
NOTE: If there is no RDS signal the RDS symbol
will disappear after approx. 60 seconds and the
clock must be set manually, as described below.
Setting the clock manually
1. Press and hold the "Set" button down for 3
seconds to activate clock setting.
2. Use the Forward arrow/Back arrow buttons
(9) to set the time.
Setting the alarm clock
1. Press and hold the "Set" button down for 3
seconds. Release and press once more to
activate alarm clock setting.
o The alarm settings (a, j and i) flashes on
the display.
2. Select one of the three alarm settings: Use
the Forward arrow/Back arrow buttons to
select AL1 (alarm 1) (a), AL2 (alarm 2) (j)
or the short time alarm (i). Press the "Set"
button to confirm selection.
3. If AL1 or AL2 selected, repeatedly press the
Forward arrow/Back arrow buttons to set
the alarm time (b). Press the "Set" button to
confirm time.
o Each button press alters the time by one
minute.
4. If you have selected the short time alarm,
you must not set the alarm time now. The
preset number of minutes is used (see under
short time alarm below).
5. Select the wake-up sound. Press the
Forward arrow/Back arrow buttons to select
natural sound or FM radio. Press the "Set"
button to confirm selection.


