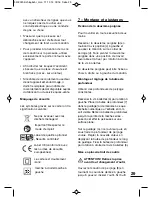
Undo the thumb screw (b) by turning it
counterclockwise. Place the depth
stop (7) into the guide (a) such that
either the numbers or the millimeter
scale is visible. Draw the depth stop out
as far as the tip of the drill placed in the
chuck – to do so place the drill on an
even surface.
Read the figure shown on the guide (a)
and subtract the desired drilling depth
from this figure. The new value is set by
sliding the depth stop along the guide.
Fix the depth stop by turning the thumb
screw (b) clockwise.
Inserting/removing bits
CAUTION! Always unplug before
changing bits.
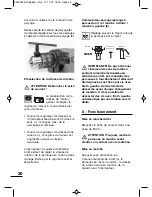
Open the drill chuck (8) by rotating the
toothed ring to the left until the tool can
be inserted. In the event that tools are
stuck, use the drill chuck key.
Tension the drill chuck (8) at all drilled
holes evenly using the drill chuck key (9).
Selecting speed
WARNING! Pull out power plug.
The speed selector
allows you to adjust
the number of
revolutions of the tool to the type of
material being drilled.
• Turn the speed selector on the On-Off
switch (4) in the (–) direction. The
maximum number of r.p.m. is
reduced.
• Turn the speed selector in the (+)
direction: The number of r.p.m. is
increased up to the maximum speed.
With the On-Off sliding switch the
number of r.p.m. can be varied
continuously within the selected
maximum speed.
Switch for drilling/hammer drilling (1)
and Right/Left directional switch (5)
Setting as illustrated with motor
off.
IMPORTANT! Do not change
drilling direction when the drill is
in rotation; wait until the drill has
come to stop. The chucks of reversible
drills are always fixed by a screw with
a left hand thread. This screw must be
loosend before the drill chuck can be
removed and is accessible through the
front of the chuck. To loosen a screw
with a left hand thread, turn in a
clockwise direction.
8 – Operation
Switching on/off
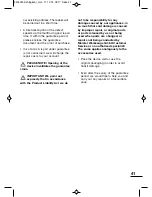
Insert the plug in a 230 V~ socket.
I
0
Drilling
Impact Drilling
Forward
Reverse
39
5402020-Schlagbohr_man 11.12.14 09:17 Seite 39


