background image

Change Audio Language

If a DVD has more than one audio language, press 

AUDIO 

to change between them.

1. Press 

AUDIO 

to cycle through available audio languages.

2.  The screen shows the audio language’s number. Press 

ENTER 

to confirm your

selection. Press 

AUDIO 

again to hide the screen message.

Some audio languages can be only be selected from the DVD menu and can not
be changed with the SUB-T button. Audio language availability depends on the
design of the DVD.

Direct Selection

When a DVD, VCD or Audio CD is playing, press the numeric keys on the remote control to
jump directly to a specific chapter or song for playback.
To enter double-digit numbers, press the 

+10 

button. For example, to enter “32” press

+10, 

then 

3, 

then 

2.

PBC Playback Control

Only VCDs edition 2.0 or above have this function. Different VCDs will have different PBC
functions, depending on the design of the disc. Please refer to the instruction manual
for the disc for more information.
1. Press 

MENU/

PBC 

to turn on/off the PBC function. The OSD shows “PBC on” or “PBC

off”.

2.  If the VCD has a PBC menu, press 

PREV

and 

NEXT

to change pages in the menu.

3.  In PBC menus, all selections must be made with the numeric buttons.
4.  When playing VCD 2.0 edition discs, set PBC to “off” for optimal operation.
5.  When PBC is on, press 

TITLE 

to enter the PBC menu.
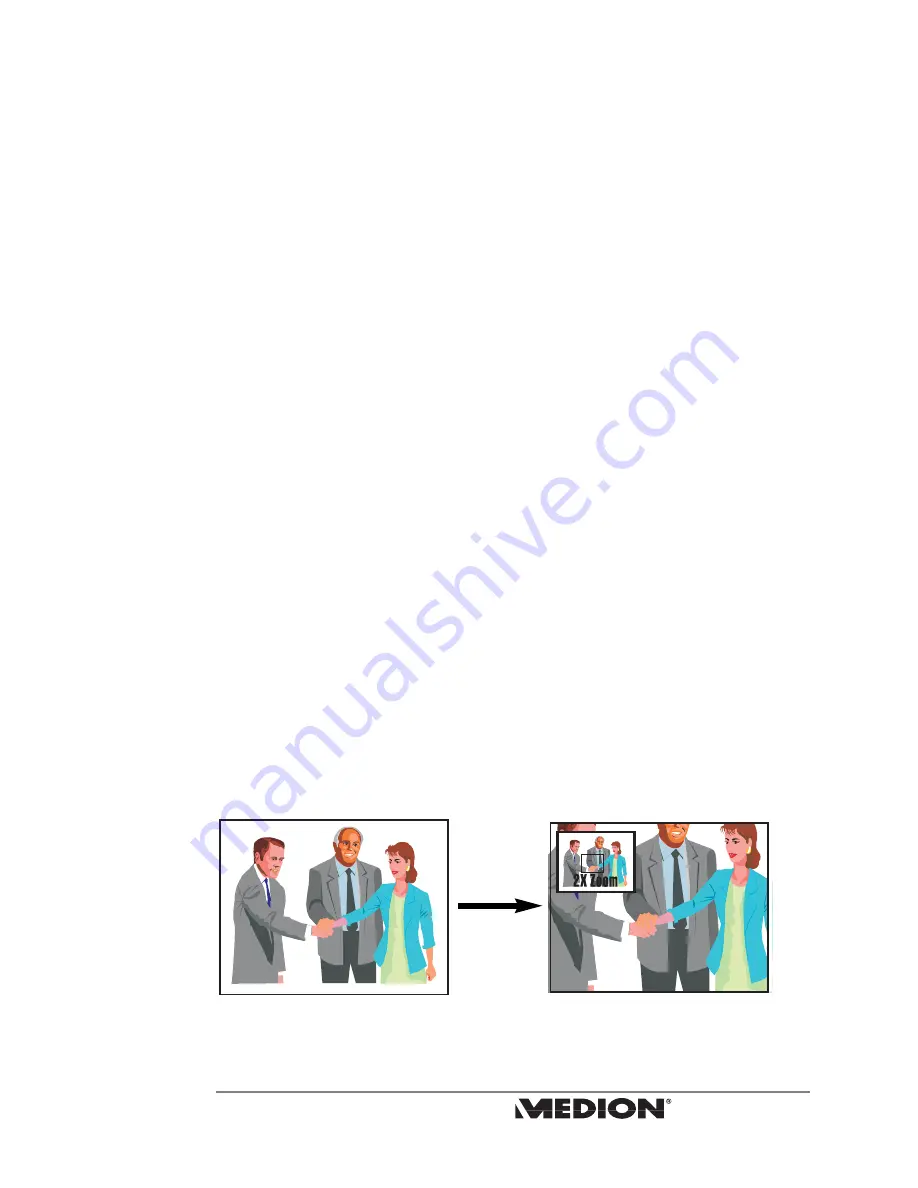
Zoom

1.  When playing a DVD or VCD, press 

ZOOM 

to cycle through the zoom settings: 

x2 > x4 > x8 > normal

3. An inset screen in the upper left corner shows the entire viewable area.
2.  While zoomed, use the 

buttons to move the zoomed portion within the

viewable area.

ZOOM

31

MD 40570 DVD Recorder
User’s Manual

advanced playback functions

Summary of Contents for MD 40570

Page 1: ...MD 40570 DVD Recorder User s Manual 2003 Medion All rights reserved...

Page 2: ...as been tested and found to comply with the limits for a Class B device pursuant to Part 15 of the FCC rules These limits are designed to provide reasonable protection against harmful interference in...

Page 3: ...the ventilation holes in the DVD video recorder cabinet Doing so may damage the DVD video recorder or DVD video disc Do not place your DVD video recorder on a soft surface the ventilation holes can be...

Page 4: ...expose you to an electrical shock or other hazardous situation or cause serious damage to your DVD video recorder Your DVD video recorder must be serviced by a qualified technician only 8 Keep any li...

Page 5: ...r for condensation to evaporate Note to CATV System Installer This reminder is provided to call the CATV system installer s attention to Article 820 40 of the National Electrical Code Section 54 of Ca...

Page 6: ...corder 5 Disc cleaning Finger prints or dirty spots on the disc will reduce the reflection which will lead to a poor signal With a poor signal the playing performance will decrease Please use a soft c...

Page 7: ...R or DVD Player 17 Tips 18 Control Buttons and Display 19 Front Panel Buttons 19 Display Window 19 Remote Control 20 Remote Control Buttons 21 Basic Playback Functions 23 Preparation 23 Primary Settin...

Page 8: ...ze a New Disc 38 Scheduled Disc Recording 39 Scheduling a Recording 39 Stop an In Process Scheduled Recording 39 Recording Quality 40 Correct a Scheduled Recording 40 Cancel a Scheduled Recording 40 T...

Page 9: ...odel number Serial number Features This DVD recorder can play in NTSC and PAL under progressive or interlace scan output This unit can be connected with a Dolby Digital or DTS compatible amplifier rec...

Page 10: ...idity dust etc Please contact your supplier for details Copy Protection This DVD video recorder supports Macrovision copy protection This will prevent copy protected materials from being recorded norm...

Page 11: ...nd your TV to OUT 3 VIDEO IN AUDIO IN These jacks are the same as the ones on the front of your DVD recorder Use them to connect to another video device that you wish to record such as a DVD player or...

Page 12: ...hanging connections This chart shows the basic connections necessary for using your DVD recorder with a TV Other types of connections are shown on the following pages Before you get started we recomme...

Page 13: ...nectors to connect the DVD recorder to your TV s AV input jacks Connect one end of the provided TV antenna cable to ANTENNA OUT on the DVD recorder Connect the other end to the antenna RF input on you...

Page 14: ...You can do this by connecting the red and white portions of the AV cable but NOT the yellow portion This will play stereo sound through your TV if your TV is capable of producing stereo sound You can...

Page 15: ...jack on your TV Component Video Connect the component cable green blue and red connectors to the COMPONENT VIDEO OUT on the rear panel of the DVD recorder and the corresponding component video in con...

Page 16: ...AV Amplifier or TV Analog 5 1 Audio For analog audio connect analog AUDIO OUTPUT and VIDEO OUTPUT on your DVD recorder to analog AUDIO INPUT and VIDEO INPUT on your AV Amplifier or TV Optical and coax...

Page 17: ...nt panel Connect a VCR or DVD Player To record from a VCR or general DVD player connect the AUDIO VIDEO OUTPUT from the VCR or general DVD player to the AUDIO VIDEO INPUT of the DVD recorder Do not co...

Page 18: ...eds However you only need one video connection and one audio connection between your DVD recorder and your TV 3 If your antenna CATV connection is attached to your DVD recorder and your DVD recorder i...

Page 19: ...current status of DVD recorder Display Window 1 Dolby Digital sound display 2 DTS sound display 3 Title Display the current title DVD 4 Track Display the current track VCD 5 Chapter Display the curre...

Page 20: ...the battery compartment Please make sure the terminals are placed correctly following the instructions printed in the battery compartment Point the remote control at the remote receiver on the DVD rec...

Page 21: ...iew angle for playback see page 30 20 OPEN CLOSE Opens or closes disc tray 21 1 2 3 For menu song selection or for time password input 22 CLEAR Press clear to erase the last number entered 23 10 Plus...

Page 22: ...te distance is reduced please change both batteries at the same time If the DVD recorder won t be operated for an extended period remove the batteries from the remote control Otherwise the remote cont...

Page 23: ...TV screen shows the following message Press the direction keys to choose the menu language then press ENTER to confirm 2 Time and date Use the direction keys to move the cursor Use the direction keys...

Page 24: ...layback on VCD a PBC displays on the screen If there is no PBC function on VCD CD the disc plays immediately Skip Playback DVD Press NEXT to skip to the next chapter Chapter 1 Chapter 2 Press PREV to...

Page 25: ...k While rewinding or fast forwarding you will not be able to hear the audio portion of the track Slow Motion 1 Press SLOW to slow down playback Pressing the button multiple times cycles through the fo...

Page 26: ...English 1 2 Normal 1 1 AC 3 Stereo English 00 00 00 C 001 T 001 disc playback osd Title If there are multiple titles on the DVD this menu allows you to jump directly to a desired title Chapter If ther...

Page 27: ...SD display PBC PBC On 1 2 Normal 1 3 Off 00 00 00 T 001 1 3 Stereo disc playback osd Title If there are multiple titles on the DVD this menu allows you to jump directly to a desired title Time Counter...

Page 28: ...control to access the repeat function 2 Press ENTER to enter select mode then use the buttons to select how much of the DVD you would like to repeat No repeat Repeat current track Repeat entire disc...

Page 29: ...sc in the recorder The recorder will automatically play the first file Press STOP 2 Press PROGRAM to enter the Program List screen shown to right The top window shows the tracks on your disc and the b...

Page 30: ...t a title and press ENTER to confirm DVD Menu DVD only Some DVDs have complex content with many subtitle languages audio languages video angles etc The DVD menu can be used to acess these features 1 I...

Page 31: ...en 2 PBC Playback Control Only VCDs edition 2 0 or above have this function Different VCDs will have different PBC functions depending on the design of the disc Please refer to the instruction manual...

Page 32: ...the bookmark 5 Press BOOKMARK again to exit the bookmark menu Jump to Bookmark 1 Press BOOKMARK to enter the bookmark menu 2 Use the buttons to select a bookmark 3 Press ENTER to start playback from t...

Page 33: ...a selection Press ENTER to enter into second sub menu or press to return to the previous page 3 In the second sub menu use the buttons to make a selection and press ENTER to confirm your selection 4 P...

Page 34: ...inalize 2 Erase Confirm Cancel 6 Recording 1 Record Speed HQ SP LP EP SLP 2 Auto Chapter On Off 7 Schedule Language There are four items for which you can change the language OSD MENU AUDIO SUBTITLES...

Page 35: ...nt to play for more information Channel Search You must perform a channel search in order for the DVD recorder to recognize your broadcast or cable channels for display and recording If you did not pe...

Page 36: ...utputs Dolby Digital or DTS digital audio in surround sound Date and Time Before scheduling any recordings the time must be set as follows 1 Highlight Date and Time and press ENTER to enter setup 2 Us...

Page 37: ...Chapter When Auto Chapter is on the DVD recorder automatically inserts chapters into DVDs that you record These chapters appear approximately every five minutes This allows you to jump to specific se...

Page 38: ...n play DVD R music CDs and MP3s you can not use it to create these types of discs You can only use it to record video whether a TV broadcast or a home movie to DVD R or DVD RW Disc Types DVD RW discs...

Page 39: ...he buttons to move the cursor to the stop field and use the buttons to select the time that you want to end your recording 7 Set the source Use the buttons to move the cursor to the source field and u...

Page 40: ...s SETUP to close the setup menu Cancel a Scheduled Recording 1 Press SETUP on your remote control to enter the setup menu Use the buttons to highlight Schedule then press ENTER to confirm 2 Use the bu...

Page 41: ...witch to DVD mode The recorded title will appear on the screen Press ENTER to view your recorded video After recording the following messages will also be stored Record date and channel source Record...

Page 42: ...part of a videotape or an interrupted TV signal Recording from a DV Camcorder 1 Connect the red yellow and white AV output connectors from your DV camcorder to the AV input connectors on the front of...

Page 43: ...R Wait approximately 15 seconds for the disc to be erased PLEASE WAIT will be displayed on the screen while your disc is being erased Play Full Title If there is a hidden chapter in a title this featu...

Page 44: ...DVD player in advance to confirm that it can play DVD R or DVD RW discs Insert Chapter Use this feature to insert chapters into your DVD disc for easier navigation 1 Play the title that you would lik...

Page 45: ...elect Show Title and press ENTER to permanently un hide the title New Picture You can choose any frame in a title to use as the index scene for that title The index scene is displayed on the title men...

Page 46: ...le Cause Solution The unit turns off by itself Automatic power off function the power is automatically turned off after 20 minutes have passed in stop mode Turn the power back on The disc tray can t b...

Page 47: ...does not work No batteries in remote control Dead batteries Remote control not being pointed at the remote sensor Put in new batteries see page 20 Replace batteries see page 20 Point the remote contro...

Page 48: ...the recording schedule and cancel one of the scheduled recordings see page 39 This DVD recorder can record only to DVD R or DVD RW discs see page 38 Audio or subtitle language is not the one selected...

Page 49: ...ess The DVD recorder s Time and Date is not set properly The time set for your recording is in the past The 8 memory slots for setting recordings are already filled There is no signal from the selecte...

Page 50: ...Asia Region 4 Central South America Australia New Zealand Region 5 Former Soviet Union India Pakistan Africa Region 6 China Technical Specifications Technical specifications subject to change without...

Page 51: ...ital photo is sometimes referred to as a JPEG as this is the most common type of format for digital images MPEG MPEG is a type of compression for video There are different types of MPEG MPEG 1 is gene...

Page 52: ...WARRANTIES ARE EXCLUSIVE AND NO OTHER WARRANTY OR CONDITION WHETHER WRITTEN OR ORAL IS EXPRESSED OR IMPLIED AND MEDION SPECIFICALLY DISCLAIMS ANY IMPLIED WARRANTIES INCLUDING ANY IMPLIED WARRANTY OF M...

Page 53: ...send in repair Unit Exchange In locations where Unit Exchange is available MEDION will send you a replacement product You must return the defective product to MEDION using the shipping carton that the...

Reviews: