background image


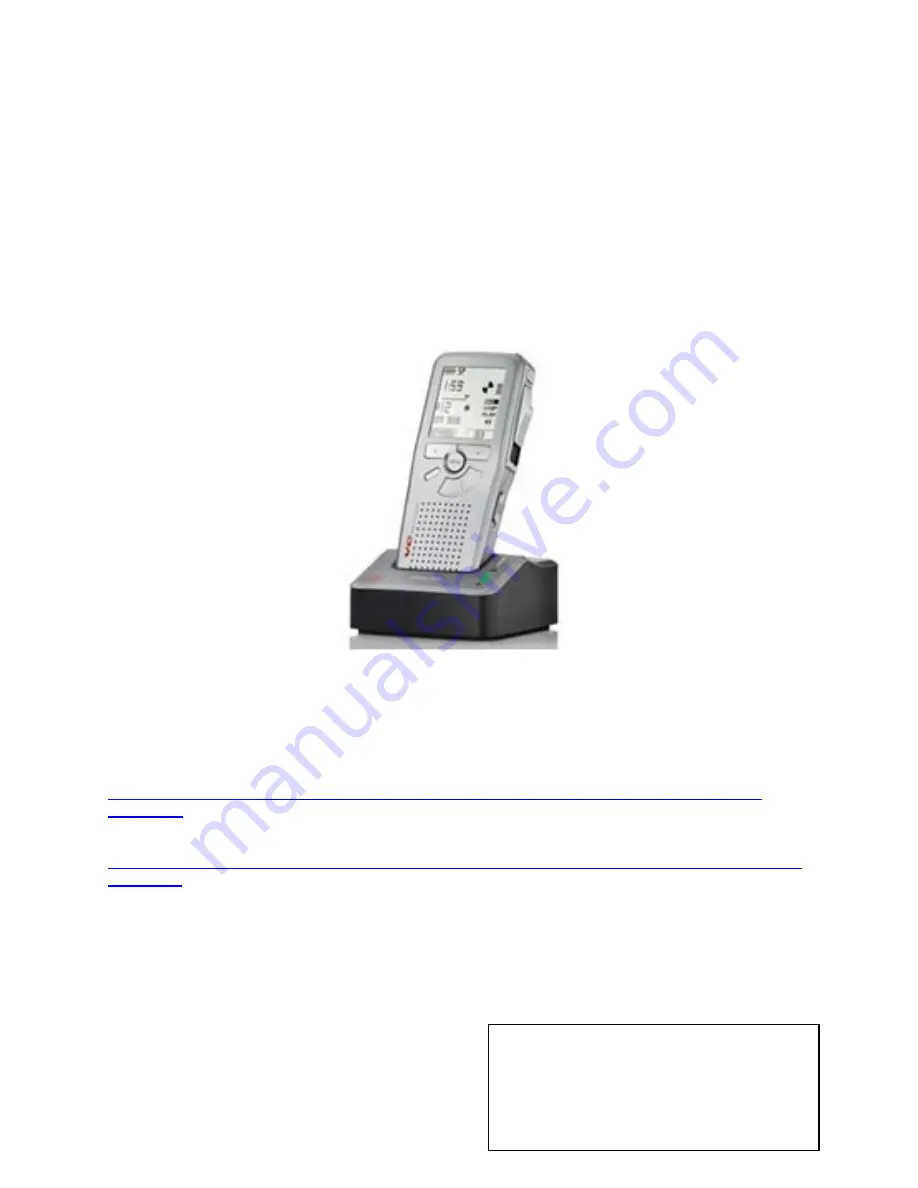
Philips Pocket Memo Digital Recorder 

Philips SpeechExec Pro Dictate Software 


User Manual 

(Revised June 14, 2012) 


Download a copy of this manual: 

http://www.tncourts.gov/docs/documents/administrative-office-courts/dcr-handheld-recorder-install-
procedures


Download a copy of the Quick Reference: 

http://www.tncourts.gov/docs/documents/administrative-office-courts/dcr-handheld-recorder-cheat-sheet-
roxio-users


For More Information, please contact 

Administrative Office of the Courts 

Technology Division 

(800) 448-7980 

(615) 741-2687 

Summary of Contents for Pocket Memo Digital Recorder

Page 1: ...s gov docs documents administrative office courts dcr handheld recorder install procedures Download a copy of the Quick Reference http www tncourts gov docs documents administrative office courts dcr handheld recorder cheat sheet roxio users For More Information please contact Administrative Office of the Courts Technology Division 800 448 7980 615 741 2687 ...

Page 2: ...ation 20 General configuration 20 Automatic Conversion 20 Rules 21 Author Profiles 21 Subfolder creation 21 Delivery 22 DPM DT Configuration 22 Download 22 Download Dictations 22 Automatic conversion 23 Delivery after download 23 Path of DPM 23 Program Options 24 Recorder Player 24 Audio Device Settings 24 Recording 25 Options 25 Transfer of Settings to your DPM Device 26 Record 26 Understanding t...

Page 3: ...eriodically once a month to make sure recorder is fully charged and to ensure settings have not changed on the recorder A test may be performed by creating a recording file It must be verified that the file will automatically download onto the DCR computer The CD may then be burned using Roxio Go to a different computer that does not have the Philips software installed on it and verify that the re...

Page 4: ... deleted Slide Switch Move the slide switch up or down to match the corresponding commands within the display Record Stop Play and Rewind buttons Use these buttons to navigate up down the different display functions These buttons also control the volume during playback Download Indicator LED The indicator lights blink when downloading and turn off when download is complete Charge Indicator LED The...

Page 5: ...ck top of the recorder and already formatted Recharge the batteries Using the docking station 1 Locate the main power supply and attach the correct prong 2 Connect the power supply cord to the back off the docking station and into the wall socket 3 The Recorder is in the OFF position 4 Insert the recorder into the docking station The bottom of the recorder slides down press firmly until it locks i...

Page 6: ...2 The language will already be selected and highlighted INT for international language 3 Look at the recorder display for OK and press the corresponding smart button Next the recorder will prompt you to set the date and time 4 Press the plus or minus buttons to change the value for the year month day or time settings 5 Press the corresponding smart buttons to advance to the left or right of the en...

Page 7: ...ngs 6 Press the Back smart button to get out of the submenu and main menu Volume Setting 1 Press the Menu button while the recorder is on the Stop position 2 Press the plus or minus buttons to scroll to the Setup menu option Press the Menu button again or the Enter smart button to go to the submenu 3 Press the plus or minus buttons to scroll to Volume and press the Menu button again or the Enter s...

Page 8: ...enu option in the submenu list 5 Then press the Menu button again or the Enter smart button to go into the menu option selected 6 Press the plus or minus buttons to select the function 7 Press the OK smart button to save settings 8 Press the Back smart button to get out of the submenu and main menu lists Philips SpeechExec Software The software program will guide the User through device configurat...

Page 9: ...program does not start to install automatically after a minute or so click on the My Computer icon on the computer s desktop Locate and open the CD DVD drive Look for an icon called autorun exe and double click this icon to start the installation process 3 Click on Install 4 Select the setup language English from the drop down options and click OK 5 Close all open applications before continuing th...

Page 10: ...Page 10 of 33 6 Accept the license agreement and then click Next 7 Enter the product key found inside the Software CD case 8 Enter TNDCR in the First name field and then click Next ...

Page 11: ...Page 11 of 33 9 Verify that Typical is selected as the Setup Type and then click Next 10 Click on the Install button 11 Click on the Finish button ...

Page 12: ...lips SpeechExec Pro Dictate The program is looking for an Internet connection but will not find it therefore you will see the following message Click on Continue 13 The SpeechExec program opens Select File then Exit Double click on this icon on your desktop The program will try again to connect to the Internet 14 The system generates the following warning message because it is attempting to connec...

Page 13: ... an offline option for activation from the drop down options Someone in the courthouse should have internet access therefore select Website 14 Click the Start offline activation button 15 The system will prompt you Are you sure you want to activate the product offline Click on the Yes button 16 The system tries again to locate an interent connection The system displays that it could not find Inter...

Page 14: ... another machine which does have Internet If you cannot locate another machine that has Internet then call the help desk 1 800 448 7980 and they will help you with this activation process 20 Open Internet Explorer and on the address bar enter http www license dictation philips com 21 First you will enter the product key found in the Software CD case below the bar code Then click on the Login butto...

Page 15: ...MANENT and then click on the Activate license 23 Enter the Activation short code that you wrote in the white space above the Product Key in the case Do not fill out any of the personal information just click on the Activate button Enter activation short code ...

Page 16: ... this response code to a file on the Internet computer b Click the Save to File button Save within My Documents create a folder and enter a file name for your file then click save Just in case the number is written incorrectly c Close out of Internet Explorer 25 Return to the DCR computer where you are installing the software Click Close on the Activation short code generated window that was left ...

Page 17: ...tings on the software program that need to be configured Looking at the menu bar these settings are found under Settings General Settings or click the Settings icon 1 In the left pane of the General Setting window is a main menu list of settings that can be configured Selecting a menu item will open a submenu list The right pane will display which settings can be configured for the menu item selec...

Page 18: ...pane c Click on DPM 9600 as the Select DPM device type Next click Ok 9 At the Settings for DPM screen verify you have the first two checkboxes marked Click Next to continue 10 At the Appearance screen verify that within the Display Mode the Advance display is marked and within the Lower Area that File name is selected Click Next to continue ...

Page 19: ...ownload file type as EOL End of Letter files Only the EOL finished files will be downloaded b Verify whether the user wants this option Delete files on the DMP recorder after download is finished c Click Next to continue 15 At the DPM buttons screen all options are selected click Next to continue 16 At the Barcode settings screen click Next to continue since will we will not work with barcodes 17 ...

Page 20: ...ires less storage space than the DSS Pro Click the Apply button if enabled Automatic Conversion Click on Automatic Conversion from the Dictation submenu 1 Check the checkbox to Convert automatically when opening finishing a dictation in both the Open and Finish Dictation sections with the following settings Click on the Configure link to set these settings 2 The Select Auto Format window opens Sel...

Page 21: ...n click the Modify button Change author name and nothing else then click OK 2 Next click the Apply button to save modifications Subfolder creation Click on Subfolder creation from the Rules submenu 1 On the automatic subfolder creation screen verify the checkbox is checked Create a subfolder in the destination folder based on property values Then click on the Properties link 2 This will open the s...

Page 22: ...tion Download from the General Settings menu Download 1 At the DPM automatic download section verify Automatic download is marked Download Dictations Click on Download Dictations from the DPM DT Configuration submenu 1 At the Rename dictations section check the checkbox Rename file with configured dictation properties 2 Click the Configure link 3 Verify Created is checked the Separator is set as U...

Page 23: ...V as the File type a Check the check box to Show all sound file formats b Then select the PCM format from the Format drop down list c Select the 8 000 kHz 16 Bit Mono attribute from the Attribute drop down list Then click OK 4 Next click the Apply button to save settings made Delivery after download Click on Delivery after download from the DPM DT Configuration submenu 1 Uncheck all check boxes fo...

Page 24: ...m Options Click on Program Options from the DPM DT Configuration submenu 1 Verify that the following boxes are checked for the DPM settings 2 Click the Apply button to save changes made Recorder Player Click on Recorder Player Audio Device Settings from the General Settings menu Audio Device Settings 1 Select the Realtek High Definition Audio for Playback and Microphone DPM3 Audio Control for Reco...

Page 25: ... 16 Bit Mono for the attribute If not set this way then click the Configure link to set those settings 2 Verify this recording option is checked Recorder can enter Record Standby mode Next click the Apply button to save settings Options Click on Options from the Recorder Player submenu 1 Verify the all the options are checked 2 Click the Apply button to save settings ...

Page 26: ...g the ON OFF switch to the ON position Always look at the recorder display to see if you need to press the New smart button The New smart button will not display if this is your first recording or if you have finished a recording and have pressed the EOL button 2 If new displays in the middle of the display then you are ready to record Move the slide switch to the REC position and begin recording ...

Page 27: ...ding 1 With the slide switch on the STOP position press the plus or minus buttons to move to the end of the recording file The triangle moves to the end of the position bar on your display 2 Move the slide switch to the Record position to begin recording from where you left off 3 If you want to overwrite part of the recording then move the slide switch to rewind and playback until you locate your ...

Page 28: ... the plus or minus buttons to locate file to be deleted 2 Press the Menu button 3 Press the plus or minus buttons to scroll to menu option Delete dictation Then press the Enter smart button to select the function 4 Press the OK smart button to accept deletion Delete Part of a Recording 1 While the recorder is on the STOP position press the Menu button 2 Press the plus or minus buttons to scroll to...

Page 29: ...bar File Exit If you use the X in the upper right corner it minimizes the program but places it in your system tray at the bottom of your computer Just double click that icon to maximize the program System Tray Download Recording Files The recorder will be configured to download files automatically but if the file is too large you may have to download the files manually If the system does an autom...

Page 30: ...finish is checked this way you will not have to delete recording file manually Then click the Download button Note You have the option to select or deselect the files you want to download 6 A DPM file download has been completed confirmation box will display and your file will be listed in the dictation window This file has been automatically converted into a wave file format wav 7 The DPM recorde...

Page 31: ... Select Source section You have three icons below Select Source click on the folder icon This will display your folders and drives on your computer 4 Locate the drive and file folder where your recording files reside and click on that folder 5 The folder opens and the recording files display to the right in their own section 5 Click once on the recording files you want to burn Then click on the Ad...

Page 32: ...files will appear in the bottom half of the screen in the Data Disc Project section 7 Look at the menu bar and click on Burn 8 The Burn Setup dialog opens just click the OK button This starts the burning of the CD process ...

Page 33: ...sk 10 You can play this CD in a CD player or computer using Media Player to playback the court hearing for transcription 11 Last message when closing Roxio is to save the project Click No Note There will not be any transcription software and or foot pedal for transcription Use Windows Media Player to play back recording for transcription ...

Reviews: