background image


|  DMR HD  User Manual 3.2  

January 2009

Setting Up the DMR HD

Setup

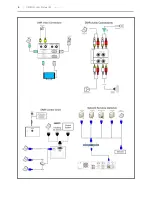
Use this information when you first purchase the DMR HD and 
when you are ready to install the hardware at your site.  This 
section shows the back panel and explains how to connect the 
separate input connections to the unit.  


Use this information when you first purchase the DMR HD and 
when you are ready to install the hardware at your site.  To 
turn on the unit ensure the power supply switch is in the ON 
position then start the unit by pressing the POWER button.    

Logging In

This section describes the procedure for a first time 
login, and the DMR HD access rights.


The default IP address is: 

192.168.1.253


Web Portal Access:

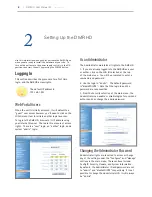
When the unit is initially accessed, it will default to a 
“guest” user access however, you’ll need to click on the 

LOGIN menu item to initiate another login launcher.  

To log into the DMR HD, browse to its IP address using 

your Internet browser.  There are three levels of access 
rights.  There is a “user” login, an “author” login, and a 
system “admin” login.

As an Administrator  

The Administrator maintains all rights to the DMR HD.  

1. If you are already logged into the DMR HD as a user 
or author, click on the LOG IN selection at the top 

of the main menu.  You will be prompted to enter a 
username and password.

2. Use the login id “admin”.  The default password 
is “MediaPOINTE”.  Note that the login id and the 
password are case sensitive.

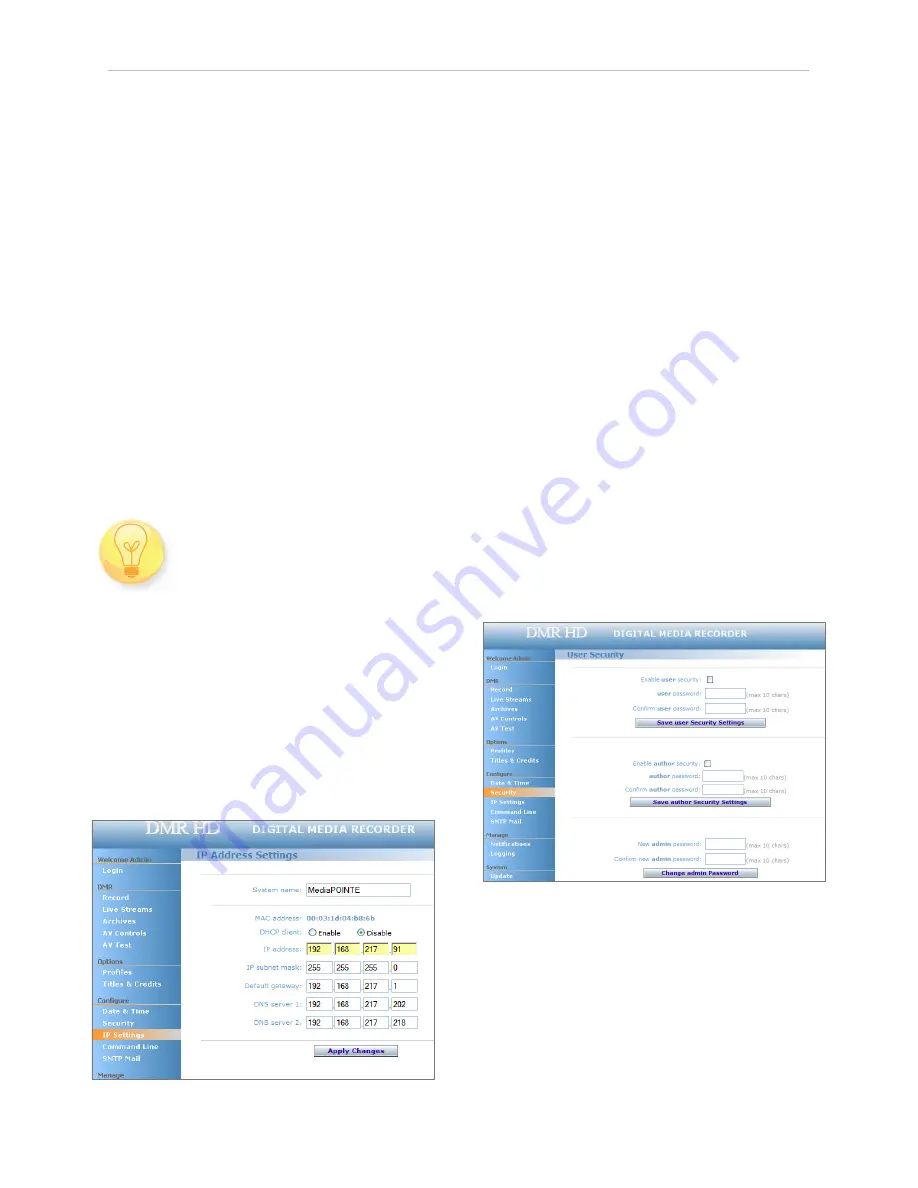
3. From the Security selection of the main menu, the 
Administrator can enable or disable logins for users and 
authors and can change the admin password.

Changing the Administrator Password

Administrator rights are required to access or change 

any of the settings under the “Configure” and “Manage” 

sections in the main menu. These sections include: 

Config IP, Security, Update, and System Information. 
By default, the Administrator ID and password are set 

to “admin” and “MediaPOINTE” respectively. It is not 
possible to change the Administrator ID. It will always 
be “admin”. 

Summary of Contents for DMR HD

Page 1: ...An Advanced Media Design Technology Digital Media Recorder HD User Manual DMR HD...

Page 2: ...on in this document is believed to be accurate and reliable however Advanced Media Design Inc assumes no responsibility or liability for any errors or inaccuracies that may appear in this document nor...

Page 3: ...r any heat producing equipment i e radiators stoves or amplifiers or in a heated place Unplug the unit during lightning storms when it will not be used for extended periods of time or before you have...

Page 4: ...D 2 RCA Video Cable 2 S Video Cable 1 Male VGA RGBHV Cable 1 CAT 5e LAN Cable 1 RCA Stereo Audio Cable 1 AC Power Cable 1 Male DVI D Cable 1 IR Remote Control plus 2 AAA batteries 1 Rack Mount Kit Doc...

Page 5: ...equipment MediaPOINTE disclaims any and all implied warranties of merchantability or fitness for a particular purpose MediaPOINTE s sole liability for breach of this warranty will be at its option to...

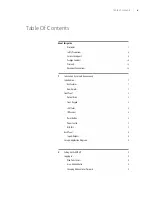
Page 6: ...Introduction Overview Requirements Introduction 1 Key Features 1 How It works 1 Front Panel 2 Optical Drive 2 Front Keypad 2 LED Status 2 IR Receiver 2 Reset Button 2 Power Switch 3 USB Port 3 Back P...

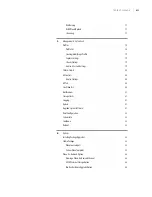
Page 7: ...Mail 11 Command Line 11 Telnet TCP IP 11 RS 232 11 3 Control Operation Web Portal 12 Overview 12 Toolbar 12 Folder ManagementTable 12 On Screen Menu Front Control Panel 13 External Control 13 RS 232...

Page 8: ...0 AV Controls 20 Display Settings 20 AVTest 20 LiveVideoTest 20 Notifications 21 Storage Limits 21 Logging 21 Update 21 Upgrade System Software 21 Reset Configuration 22 System Info 22 Shutdown 22 Reb...

Page 9: ...conference locations over your corporate network Conduct customer or employee training across vast geographical areas Discuss research engineering architecture product design or process analysis when...

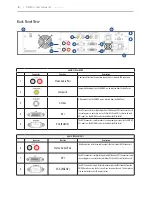
Page 10: ...is required to use this feature DMR HD Front Panel 3 LED Status The LED indicators are used to describe system states actions and error conditions The valid LED states are described in the table belo...

Page 11: ...ar of the unit 1 Ensure power supply switch is in the ON position on back panel 2 Start the unit by pressing the POWER button 7 USB Port The USB port can be used to offload media from and to the DMR H...

Page 12: ...HD can be selected from theWeb Portal 5 VGA RGBHV The HD15 connector is used to connect a analog computer signal to the DMR HD DVI input 1 on the DMR HD can be selected from theWeb Portal AUDIO VIDEO...

Page 13: ...port on the back of the unit can be used for upload or offload of video content and for network configuration of the DMR HD For more information on USB network configuration see Appendix B 12 RS 232...

Page 14: ...DMR HD User Manual 3 2 January 2009...

Page 15: ...DMR HD...

Page 16: ...e to its IP address using your Internet browser There are three levels of access rights There is a user login an author login and a system admin login As an Administrator The Administrator maintains a...

Page 17: ...d in the user password field Enter a user password in the user password field and confirm it by clicking the Save user Security Settings button The next time the DMR HD is accessed anyone logging in w...

Page 18: ...of the DMR HD USB ports at any time The unit will look for the presence of this configuration file and will implement the settings from the file Use a simple ASCII text editor to create the file Netw...

Page 19: ...rom email address Confirm any changes to the SMTP mail configuration by clicking Save SMTP settings button Command Line The DMR HD has a Command Line interface that can be accessed from Telnet or RS 2...

Page 20: ...the main menu will show a list of all current recordings in the Root directory Toolbar When logged in as either author or admin selecting the Archives selection from the main menu will provide the ma...

Page 21: ...used between the DMR HD and the COM port on your PC the pin out is shown here Terminal session settings required for RS 232 control are 9600 8 None 1 with No Flow Control DB 9 Female Function DB 9 Fe...

Page 22: ...est displayres limit reboot usersec displayratio listfiles record volume help or list profiles resetconf Infra Red The Infra Red IR receiver for the remote control is located on the front of the DMR H...

Page 23: ...parameters will be as specified in the profile that was chosen To stop the recording and create an archived file press the Stop button to begin the indexing process The RED LED on the front of the un...

Page 24: ...the email attachment RemoveMedia Will remove the selected media from the email attachment Close Mail Will close the Mail AttachmentWindow Default Folder A recording initiated from IR the remote relay...

Page 25: ...he browsing computer using the Download Manager Select the Download Manager icon from the main menu to bring up the Download Manager Toolbar Disk Burning The disks are burned as Data Disk Content can...

Page 26: ...gs in profile Copy Will create a copy of a profile that can be customized Edit Profile Will allow a user defined profile to be edited To create a custom profile copy one of the 8 Originals Delete Prof...

Page 27: ...recording will be initiated in the normal manner ON recording will be initiated in the normal matter but will also begin when specified Codec enters a call Target Device Set the DMR HD s recording mo...

Page 28: ...nnected output devices without the need for live input sources There are four audio test tones for confirming the audio outputs of the DMR HD There are three test images for confirming video output to...

Page 29: ...order to keep the DMR HD up to date with all of the latest features you may want to update the system software from time to time Follow the following steps to upgrade the DMR HD software 1 Contact you...

Page 30: ...sically push the power switch on the front of the unit No communication is possible with the DMR HD when it is powered down Reboot Select the Reboot button to power off the DMR HD and then turn the un...

Page 31: ...Video Source Inputs 1 Composite 1 S Video 1 DVI 1VGA RGBHV 2 Composite 2 S Video 1 DVI 1VGA RGBHV Custom Input Selection No Yes CustomVideo Templates No Yes Resolution Output Up to 1920 x1080 Up 1920...

Page 32: ...n the play icon under Actions and a window will open and display the stream The following tables describe AMD devices play stream VOD capabilities AESOP External Storage Option An additional external...

Page 33: ...An Advanced Media Design Technology Technical Support 805 214 7911 support mediapointe com Main Office 667 Rancho Conejo Blvd Newbury Park CA 91320 805 480 3700 www mediapointe com DMR HD...

Reviews: