


Copyright Media Technologies 1999 - 2008
Page 8 of 19
5
ALIGNING THE VIDEO WALL IMAGE
Different types of video wall display monitors will require different processor alignment settings to
fit the image on the array. Your processor will have been shipped with a rough default alignment
which will require adjustment using the control software supplied on the software CD.
Important information on aligning video walls using 16:3 plasma and LCD monitors
can be found
in “technote_using_plasma.pdf” supplied on the software CD in the ‘HANDBOOK’
directory.
Consult
“technote_using_plasma.pdf”
and decide which mode you will run your monitors (e.g.
Letterbox or Full Screen Mode for 16:9 monitors). Install the software as described previously and
connect the PC to the processor using the RS-232 cable supplied.
If you have a multiple-processor configuration to implement a large video wall array, go to
Page 10 instructions for video wall arrays.
Click Align and select the required split (e.g. X = 4, Y = 4).
You can use the software context-sensitive help function to use this feature (press ‘F1’ when you are
in the Align menu).
There are three alignment adjustments: Column, Row and Monitor (this is a fine adjustment).
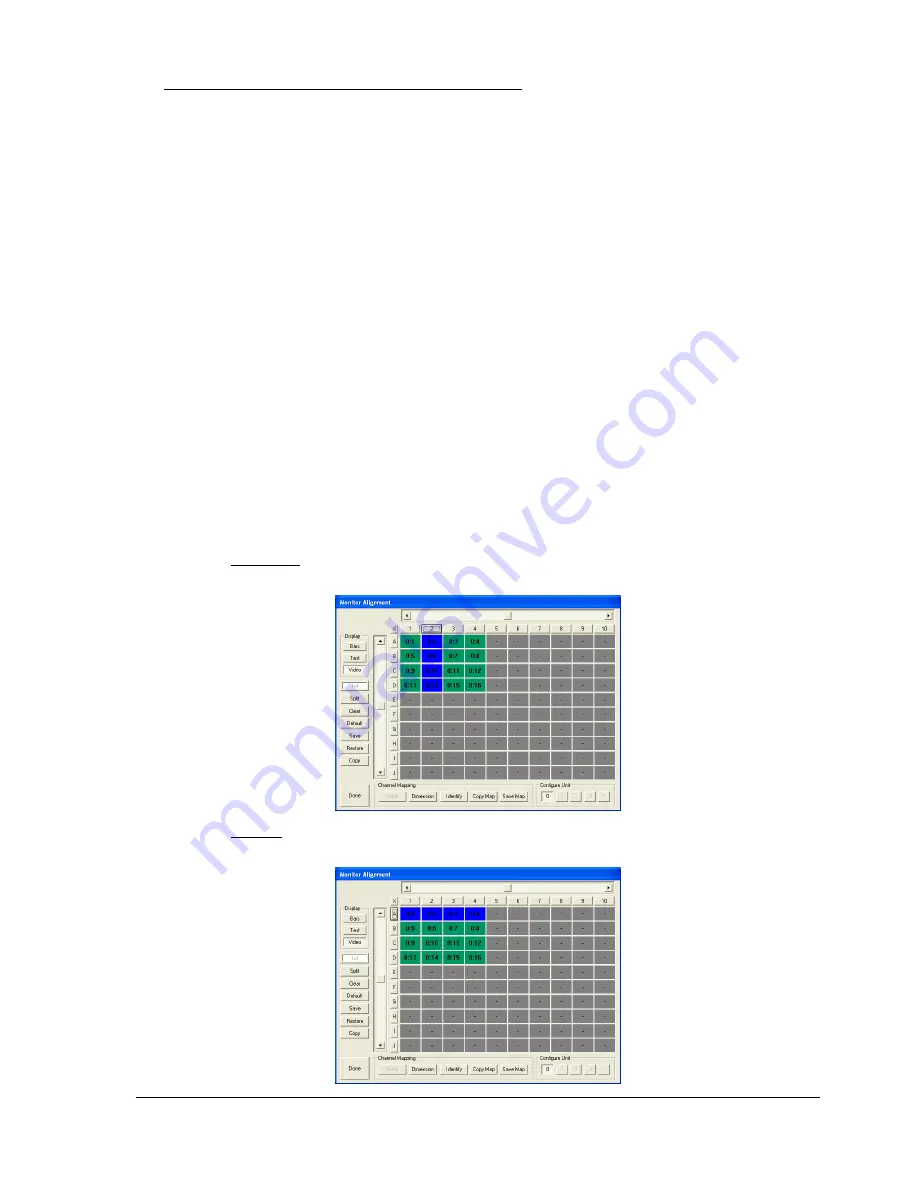
To adjust the horizontal position of a column of monitors, click on the rectangle above the column
as shown below. Adjust left and right using the horizontal slider control.
To adjust the vertical position of a row of monitors, click on the rectangle to the left of the row as
shown below. Adjust up and down using the vertical slider control.


