55
Looking at or near the
Sun
will cause
irreversible
damage to your eye. Do not point this telescope at or near the
Sun. Do not look through the telescope as it is moving.
APPENDIX B: THE MOON
The Moon option of the Object menu allows you to observe the moon in a way never
possible before. You will be able locate many specific features of the lunar surface,
including hundreds of craters, mare, valleys, and mountains. One special feature
allows you to view all six Apollo landing sites. While you won't be able to see details
such as any of the lunar landers or lunar excursion modules left behind by the astro-
nauts (the best earth-based telescopes can only resolve features of about a half-mile
across), you'll be able pinpoint the landing sites and study the terrain surrounding
these sites.
When Autostar II syncs to a lunar feature, the telescope switches to Selenographic
coordinates,
i.e., lunar latitude and longitude.
To observe the Apollo 15 landing site using the Moon option:
1. Initialize and align the telescope system as previously described.
2. Press "5" on the Autostar II keypad. "Solar System: Mercury" displays.
3. Press a Scroll key until "Solar System: Moon" displays. Press ENTER.
4. "Moon: Overview" displays. Press GO TO. The telescope slews to the Moon.
5. With "Moon: Overview" on Autostar II's display, use the Scroll keys to browse
through the menus options. Five categories of features are available: Landing
Sites, Craters, Mountains, Mare and Lakes, and Valleys and Rills.
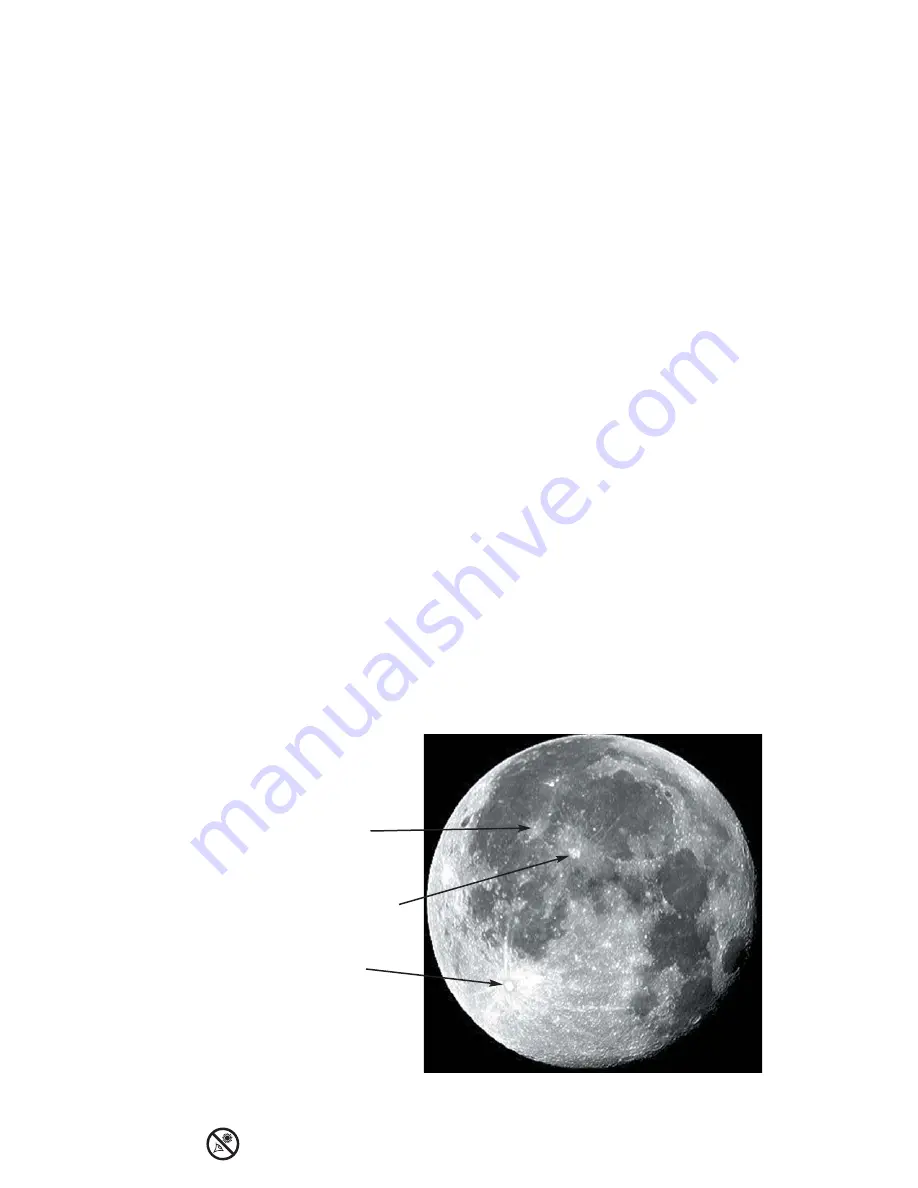
6. Select a distinct lunar crater with which you are familiar, such as Copernicus or
Kepler, from the Craters option and press ENTER.
7. Then press GO TO to slew to that feature. Center the feature in the eyepiece
and hold down ENTER for more than two seconds to ENTER TO SYNC. The
telescope is now synced to Selenographic coordinates.
8. Press MODE twice to return to the features list. Press a Scroll key until "Moon:
Landing Sites" displays.
9. Press ENTER. "Landing Sites: Apollo 11" displays.
10. Press a Scroll key until "Landing Sites: Apollo 15" displays.
11. Press GO TO. The telescope slews to the Apollo 15 site.
12. Press MODE to return to the previous menu option. Continue to press MODE to
exit this menu.
Use this method to find other lunar features and points of interest. When you have
selected a feature, press the "?" key or use the Scroll keys to display detailed infor-
mation about the feature. Press MODE to return to the menu options.
Copernicus
Kepler
Tycho
Figure 56: Some easily recognized lunar craters.
Summary of Contents for MAX-ACF
Page 59: ......


