84
11. Mise en service
2. Appuyez sur la touche
CUE (11)
pendant la lecture, l´appareil retourne au point CUE et se met
en mode Pause.
3. Appuyez et maintenez la touche
TIME/STOP (6)
enfoncée pendant plus de 3 secondes. L´appa-
reil arrête la lecture.
d) Sélection d’une plage
Avec la
touche respective de saut de titre
/ (8)
, vous pouvez sélectionner un titre du
CD. Le lecteur de CD saute au début de la plage choisie.
En maintenant enfoncée la touche de saut de plage, le lecteur de CD fait défiler les
numéros des plages jusqu’à ce que vous lâchiez la touche.
Touche de saut de plage
En appuyant sur la touche
, vous sélectionnez le début de la plage suivante. Si vous appuyez
sur la touche pendant la dernière plage du CD, la lecture saute à la première plage du CD.
Touche de saut de plage
En appuyant sur la touche
la lecture revient au début du titre actuellement lu. Si vous appuyez
deux fois sur la touche, la lecture saute au commenncement du titre précédent. Si vous appuyez
sur la touche pendant la première plage du CD, la lecture saute à la dernière plage du CD.
La plage sélectionnées est appelée dans le mode dans lequel le lecteur de CD se trou-
vait, avant que la touche de saut de plage ait été actionnée.
Exemples :
• Si vous appuyez sur la touche de saut de plage en mode Pause, le lecteur de CD revient au
début de la plage sélectionnée et reste sur pause.
•
Si, pendant la lecture, vous appuyez sur la touche de saut de plage, le lecteur de CD se met au
début de la plage sélectionnée et démarre la lecture.
•
Si le mode de lecture Titre unique (AUTO CUE SINGLE) est réglé, le lecteur de CD se met tou-
jours en mode Pause lors de la sélection d’un titre.
L’appareil se met automatiquement au début de la plage après chaque sélection de plage
au point CUE.
e) Recherche automatique SEARCH
Ce type de recherche est utilisé pour trouver rapidement un endroit dans une plage. Appuyez sur
la
touche de recherche SEARCH
ou
(7)
. L’appareil commence la recherche en
marche arrière ou avant. Pendant la recherche, il est possible d’entendre la lecture.
Si l’une des touches de recherche SEARCH est maintenue enfoncée pendant quel-
ques instants, la vitesse de recherche s´accroît. Avec cette fonction, il est possible
de travailler sur plusieurs plages. Il est possible d’appuyer sur cette touche pendant
la lecture ou en mode Pause. En mode Pause, après avoir appuyé sur une touche de
recherche, l’appareil passe au « mode stutter ».
f) Sélection d’un passage dans une plage
La
molette JOG (20)
sert à retrouver avec exactitude un certain passage dans une plage. Un
réglage précis d’un point CUE à l’aide de la molette est très facile pendant la fonction pause com-
me la plage est balayée en petits pas (Frames) et la recherche s’effectue en pas audibles. Pour
effectuer une recherche en avant, tournez la
molette JOG
dans le sens des aiguilles d´une montre.
Pour effectuer une recherche en arrière, tournez la
molette JOG
dans le sens inverse des aiguilles
d´une montre.
45
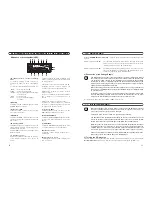
(30) BRAKE button
With the BRAKE function, you delay the speed
between the transition from break to playback
and vice versa. This produces the effect of a
record player that is slowly starting up when
you start playback on the CD player. (Or the
effect of a record player that is slowly winding
down when putting playback on break.)
The BRAKE effect can be used independently of
other effects or together with other effects.
The display shows „BRAKE“ when the function
is activated by pressing the BRAKE button.
The parameters for the BRAKE
function can be set; for a descrip-
tion see „Parameter Setup“ in
one of the following chapters in
this manual.
(31) RELAY button
Alternating track playback between the two CD
drives is activated with the RELAY function.
This means that the playback of one CD drive
starts as soon as the other one has finished
playback.
The RELAY button activates/deactivates the
relay function. The LED above the button will
light when it is activated.
A detailed description of this fun-
ction can be found under „RELAY
function“ in one of the following
chapters in this manual.
(32) PROGRAM button
Use this button to program the playing order of
selected tracks. You can program a playlist of
up to 30 tracks in the order of your choice.
A detailed description of this fun-
ction can be found under „Pro-
gram Track Sequence“ in one of
the following chapters in this
manual.
(33) BPM button
The button BPM serves to display the beats
per minute. The beats per minute can be
determined automatically or manually. Display
of the beat makes it easier to match two
tracks (for fading/mixing).
Automatic BPM function:
Briefly press the button BPM. The automatic
determination of the beats per minute is activat-
ed and the display shows BEAT together with the
corresponding display of the determined value
(top right on the display). To leave the automat-
ic BPM function, briefly press the button BPM.
The display BEAT will go out.
Manual BPM function:
Keep the button BPM pressed for 3 seconds
and the device switches to manual function.
The indication BEAT blinks on the display. In
this function, press the button BPM with each
beat and the device determines the corre-
sponding beats per minute.
To leave the manual BPM function, press the
BPM button once again for 3 seconds. After-
wards, you have to briefly press the button
once again to leave the BPM function com-
pletely.
(34) System connection socket of the control
unit 1
The data between the control unit and the
driveunit is transmitted via this socket. Con-
nect the REMOTE CONTROL 1 socket with the
corresponding system connection socket (41)
of the drive unit.
(35) System connection socket of the control
unit 2
The data between the control unit and the
driveunit is transmitted via this socket. Con-
nect the REMOTE CONTROL 2 socket with the
corresponding system connection socket (46)
of the drive unit.
Disc drive unit:
(36) ON/OFF switch “POWER”
Turn the CD player on/off with this key. The
appliance is switched on when the switch has
been pressed down (position „ON“). The red
LED above the switch is lit and the display
appears. If the switch is not depressed (posi-
tion OFF), the device is turned off.
Attention! In order to completely
separate the device from the
mains, you have to unplug the
mains plug.
(37) CD compartments
Insert your audio CD in the respective CD com-
partment.
8. Connection and Control Elements

