MB OfficeCenter 316 Online Manual Download Page 6

1

PRINT

6

C O N T E N T S

I N D E X

Basic Printing

(part 2)

If the tray runs out of paper during printing

Add paper to the tray or press the [TRAY SELECT] key (

) to 

select a different tray, and then press the [ON LINE] key (

) to 

resume printing.
Note that if "Auto tray switching" (in the user programs) is 
enabled on a 2-tray model and "Auto Select" is selected in 
"Paper Source" in the printer driver, the machine will 
automatically switch to the other tray and continue printing.

Pausing a print job

To pause a print job during printing, press the [ON LINE] key 
(

) on the operation panel to switch the machine off-line. 

Printing will be paused and the ON LINE indicator will blink.

To cancel a print job, press the [CLEAR] key (

) or the 

[CLEAR ALL] key 

(

)

.

To resume printing, press the [ON LINE] key (

) to switch the 

machine online.

When "Paper Source" is set to "Auto Select"

If "Paper Source" is set to "Auto Select" in the "Paper" tab of the 
printer driver setup screen and the correct size of paper for a 
print job is not loaded in the machine, the printing procedure will 
vary depending on the "Use Close Paper Size" setting in the user 
programs (see "USER PROGRAMS" in the Operation Manual).

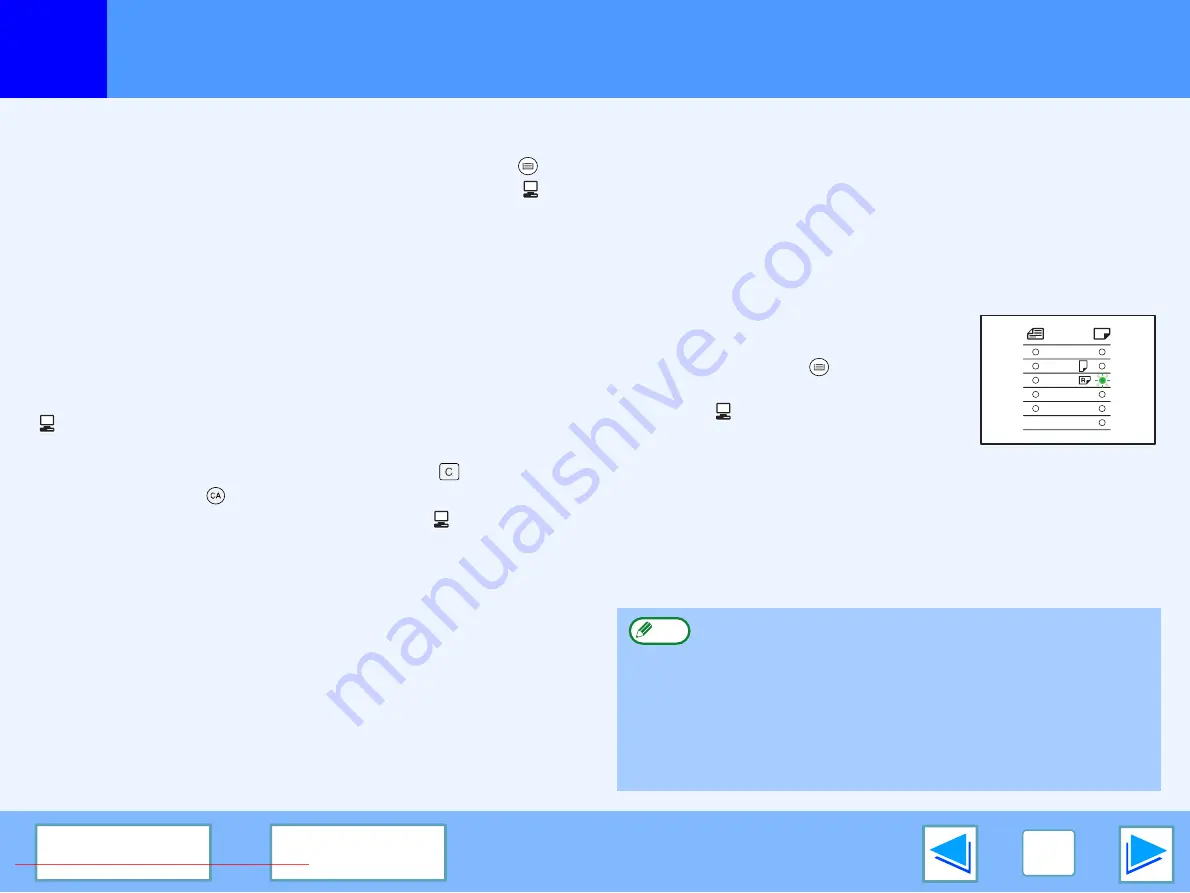
When "Use close paper size" is disabled

The PAPER SIZE indicator on the 
operation panel will blink. Press the 
[TRAY SELECT] key (

) to manually 

select the tray and then press the [ON 
LINE] key ( ). 

* The paper sizes that appear in the operation panel will vary by 

country and region.

When "Use close paper size" is enabled

Printing will take place using a size of paper that is close to the 
size of the print image.

Before printing make sure that the paper size set in "Set 
Tray Status" of the printer driver is the same as the size 
of paper loaded in the tray. (See "CONFIGURING THE 
PRINTER DRIVER" in the Software Setup Guide.) When 
printing, if you select the paper tray with the correct size 
of paper for the document to be printed, printing will take 
place correctly (select the paper tray in "Paper source" in 
the "Paper" tab of the printer driver setup screen).

A3
A4
A4
A5
B4

EXTRA

Note

Downloaded From ManualsPrinter.com Manuals

Summary of Contents for OfficeCenter 316

Page 1: ...MB OfficeCenter 316 320 Online Manual Click this S tart button Start Downloaded From ManualsPrinter com Manuals...

Page 2: ...tion on the following topics please refer to the Operation Manual for the digital multifunctional system Basic machine procedures adding paper replacing the toner cartridge using peripheral devices Co...

Page 3: ...ections the linked areas are not underlined Example Contents To return to the previous page click the button on the menu bar of Acrobat Reader Using Bookmarks Bookmarks have been created on the left s...

Page 4: ...ions the linked areas are not underlined Example Contents To return to the previous page click the button on the menu bar of Acrobat Reader Using Bookmarks Bookmarks have been created on the left side...

Page 5: ...rom the application s File menu The Print dialog box will appear 4 Make sure that MB OfficeCenter XXX is selected as the printer If you need to change any print settings click the Preferences button P...

Page 6: ...the correct size of paper for a print job is not loaded in the machine the printing procedure will vary depending on the Use Close Paper Size setting in the user programs see USER PROGRAMS in the Ope...

Page 7: ...ect Settings 2 Click Printers and Other Hardware and then click Printers and Faxes In Windows 2000 click Printers 3 Click the MB OfficeCenter XXX printer driver icon and select Properties from the Fil...

Page 8: ...int settings Drop down list Allows you to make a selection from a list of choices Image of paper trays The tray selected in Paper Selection in the Paper tab appears in blue You can also click on a tra...

Page 9: ...setup screen and select 2 Up or 4 Up for N Up Printing on the Main tab See Basic Printing for details on how to open the printer driver If you select the Border checkbox borderlines will be printed ar...

Page 10: ...setup screen and select 2 Up or 4 Up for N Up Printing on the Main tab See Basic Printing for details on how to open the printer driver If you select the Border checkbox borderlines will be printed ar...

Page 11: ...setup screen and select 2 Up or 4 Up for N Up Printing on the Main tab See Basic Printing for details on how to open the printer driver If you select the Border checkbox borderlines will be printed ar...

Page 12: ...setup screen and select 2 Up or 4 Up for N Up Printing on the Main tab See Basic Printing for details on how to open the printer driver If you select the Border checkbox borderlines will be printed ar...

Page 13: ...Follow the instructions in the status window to solve the problem Tab Click a tab to bring it to the front The Options tab allows you to select display options for the Print Status Window Document Nam...

Page 14: ...server Client Settings Downloaded From ManualsPrinter com Manuals CONTENTS INDEX Clien p Follow the procedure below to install the printer driver in the client 1 Click the start button and click Cont...

Page 15: ...g box 6 Click Printers and Other Hardware in the control panel and click Printers and Faxes In operating systems other than Windows XP double click the printer icon 7 Click the MB OfficeCenter XXX pri...

Page 16: ...server Client Settings Downloaded From ManualsPrinter com Manuals CONTENTS INDEX Clien p Follow the procedure below to install the printer driver in the client 1 Click the start button and click Cont...

Page 17: ...ton 6 Select Browse for a printer and click the Next button 7 Select the printer to be shared in the network and click the Next button The contents of this window will vary depending on your network e...

Page 18: ...s 2 Click the MB OfficeCenter XXX printer driver icon and select Properties from the File menu The printer properties will appear 3 Click the Ports tab and click the Add Port button The Printer Ports...

Page 19: ...iver 8 How to Use the Online Manual 3 I Image Orientation 11 Introduction 2 M Main 8 N N up printing 9 O ON LINE 5 Outline of the Print Status Window 13 P Pausing a print job 6 Print 5 Print Status Wi...

Reviews: