


Copyright Maxford USA 2019
7.
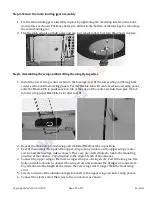
Carefully adjust the tension on each of the flying wires to hold the wings in
to each other. (This is very important! If the wings are
the airplane may not be controllable in
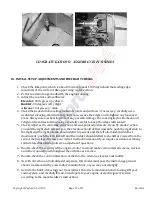
Step 6. Install the engine and engine cowl
1.
Use the specific dimensions of your engine to locate and drill holes into the
mount’s firewall, then attach the engine with the standoffs,
provided with your engine.
2.
Test fit your engine with cowl to
motor box in position. It has to be
the cowl to access the speed needle
exhaust pipe(s) to exit the cowl.
3.
Mount the cowl with the self
Page 11 of 13
Carefully adjust the tension on each of the flying wires to hold the wings in
important! If the wings are twisted by misadjusted flying wires,
the airplane may not be controllable in flight.)
Step 6. Install the engine and engine cowl
Use the specific dimensions of your engine to locate and drill holes into the
mount’s firewall, then attach the engine with the standoffs, screws, washers and/or nuts
Test fit your engine with cowl to determine the position of motor box, and then
motor box in position. It has to be glued solidly for safety reason. Test fit then
access the speed needles, and cut any necessary opening(s) for the muffler
exhaust pipe(s) to exit the cowl.
Mount the cowl with the self-tapping screws supplied.
RS190529
Carefully adjust the tension on each of the flying wires to hold the wings in proper alignment
twisted by misadjusted flying wires,
Use the specific dimensions of your engine to locate and drill holes into the wooden engine
screws, washers and/or nuts
and then glue the
glued solidly for safety reason. Test fit then drill a hole in
, and cut any necessary opening(s) for the muffler and