Operating Instructions -
11
ENGLISH
ç
To connect the monitor to your PC ........................
1.
Make sure that the PC and monitor are unplugged.
IMAGE SETTINGS USING THE OSD MENU
The OSD menu appears in a window on the screen. It allows you to select the image settings you want to change.
2.
There are 6 OSD submenus, each corresponding
to a separate category. Select the icon representing
the desired category by turning the OSD dial (
in
figure 3) and pressing the OSD button
ENTER
(
in
figure 3).
3.
The chosen OSD submenu is called up. Select the
function icon using the OSD dial (see next section
OSD Menu Functions).
4.
Press the OSD button
ENTER
to activate the function.
5.
Change the selected function setting with the OSD
dial. The current setting is displayed as a horizontal
bar in the OSD submenu.
6.
Press the OSD button
MENU/EXIT
to store the new
setting. If you want to change additional settings,
repeat steps 2-5.
7.
To close the OSD menu, press the OSD button
MENU/EXIT
in the OSD main menu.
The OSD menu will automatically disappear if no
changes are made for more than 10 seconds (default
setting). The current settings will be saved.
CONNECTING AND STARTUP
Signal cable
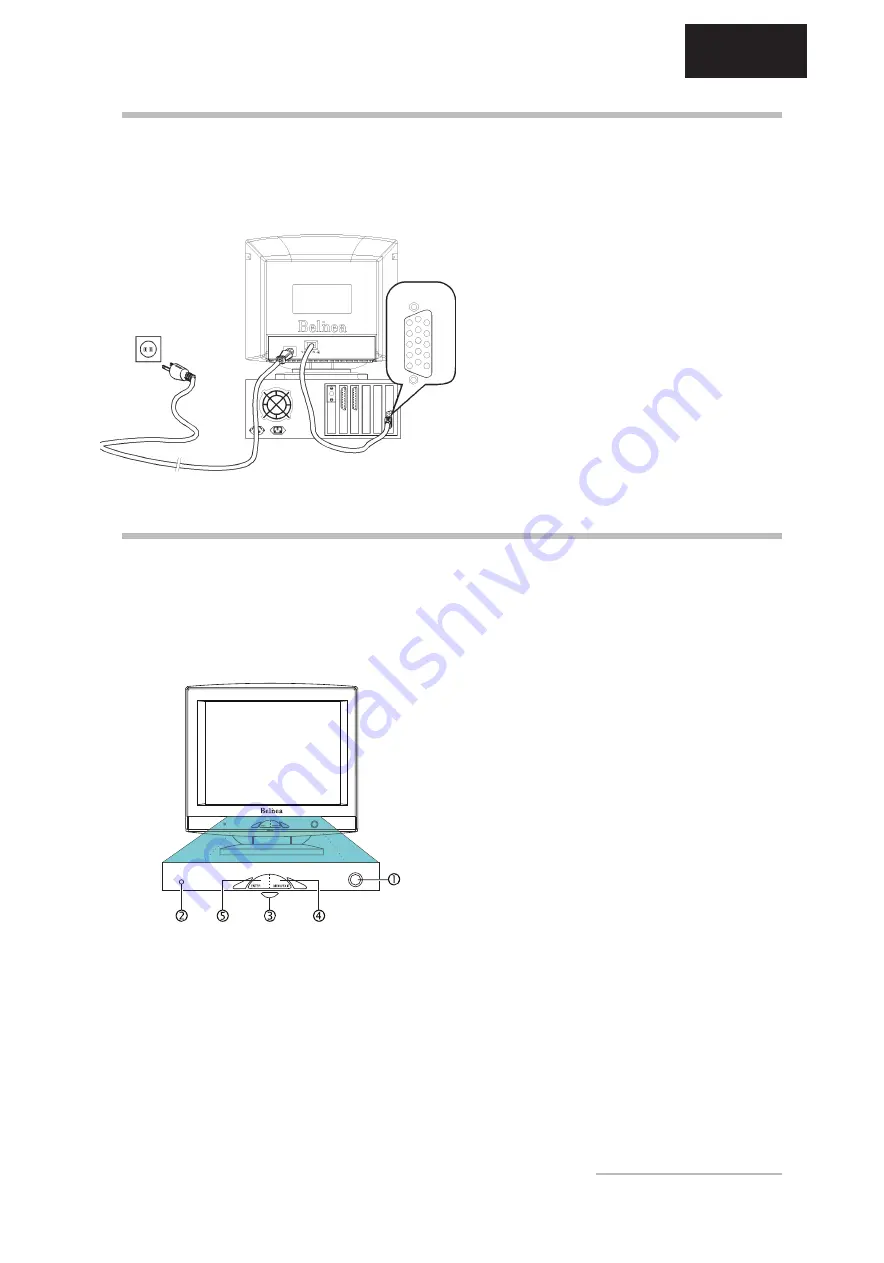
Figure 2.
Connecting the monitor to the PC
Figure 3.
Monitor features
2.
As shown in figure 2, connect the signal cable to the
computer and the power cable to a grounded wall
outlet.
3.
First, turn on your PC, and then turn on your
Belinea monitor by pressing the power button (see
in figure 3). The status indicator (see
in figure
3) should light up green.
4.
Adjust the image to meet your requirements (see the
following sections Image settings using the OSD
menu and OSD Menu Functions).
5.
If there is no image displayed on the monitor, please
check the following:
Are the PC and monitor turned on?
Is the signal cable between the graphics card on
the PC and the monitor properly attached?
Is a screen saver active?
If there is still no picture displayed on the monitor,
please contact your Belinea dealer.
contrast menu, while turning it counter-clockwise displays
the OSD brightness menu. Then turn the dial left to
increase, or right to decrease the contrast/brightness.
Shortcut for adjusting contrast and brightess
You can adjust the contrast and brightness directly by
turning the OSD dial (
in figure 3) while the OSD menu
is not active. Turning the dial clockwise displays the OSD
ç
How to open the OSD menu ....................................
1.
Press the OSD button
MENU/EXIT
(
in figure 3) to
display the OSD menu on the screen.
All manuals and user guides at all-guides.com


