.13.
.12.
4. Installation
4. Installation
AC-BACK
L
N
PE
AC-GRID
L
N
PE
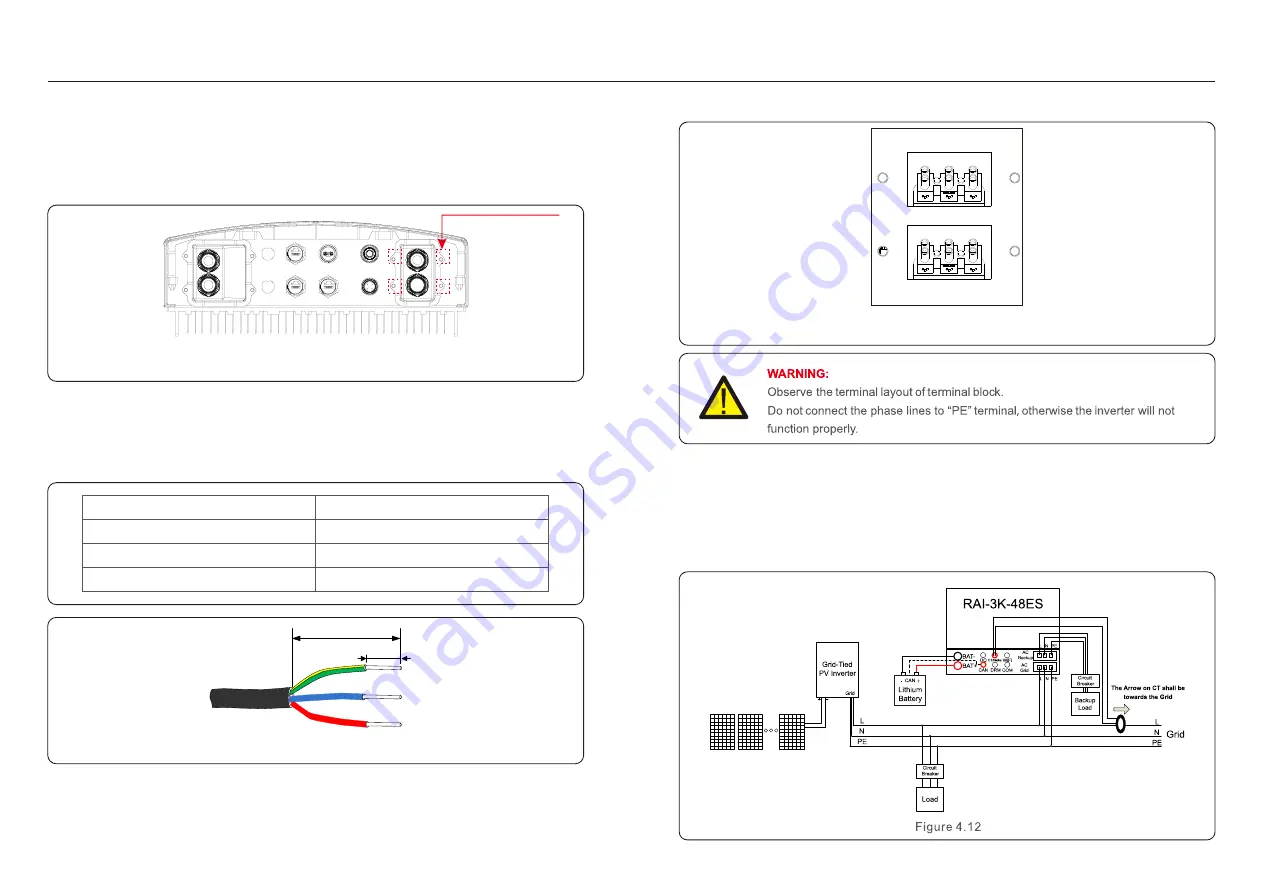
There are two AC terminals and the assembly steps for both are the same
(AC backup port and AC grid port).
4.4 Assemble
the
AC
Cables
Step 1. Please unlock the 4*M4 screws on the AC ports protection cover as shown in the below
figure.
Step 2. Insert the AC grid cables and AC backup cables into the corresponding water-proof swivel
nut on the cover, (Break the plastic film on it). Make sure you use a cable within the correct
specifications as shown in the table below.
Remove a length of 40mm of the cable jacket and strip the wire insulation to a length of 10-12mm.
Figure 4.9
Step 3. Fasten the AC cables onto the terminals on the inverter. Please make sure the correct
polarity. Ensure that the correct conductor is fastened (0.7 N.m. torque) to the correct terminal.
Describe
Wire diameter
6~12mm
6mm
²
12mm
Traverse cross sectional area
Exposure Length
Numerical value
40 mm
10 mm - 12 mm
PE
L
N
Step 4. Lock the 4*M4 screws and fix the cover onto the inverter.
M4 cross screws
Figure 4.10
Figure 4.11
DO
CT/Meter
WIFI
CAN
DRM
COM
4.5 CT Installation
RAI-3K-48ES-5G inverter requires a CT to measure the power flow to/from the grid.
This will provide information to the RAI-3K-48ES-5G inverter about when to charge or discharge
the battery thus maximizing the self-consumption rate.


