background image

TABLE OF CONTENTS

Safety Symbols ...............................................................................Page 3

Safety Information ..........................................................................Page 4

Important Safety Instructions  .......................................................Page 5

Personal Safety Precautions..........................................................Page 5

Preparing To Charge .......................................................................Page 6

Charger Location ............................................................................Page 6

Dc Connection Precautions ...........................................................Page 6

Follow These Steps When Battery is Installed in Vehicle ............Page 6

Follow These Steps When Battery is Outside Vehicle .................Page 7

Grounding and AC Power Cord Connections ..............................Page 7

Assembly Instructions ....................................................................Page 8

Control Panel ..................................................................................Page 8

Operating Instructions ....................................................................Page 9

Maintenance and Care .................................................................Page 11

Error Codes ...................................................................................Page 11

Troubleshooting ............................................................................Page 12

Specifications ...............................................................................Page 12

Warranty ........................................................................................Page 13

Summary of Contents for 260-9511

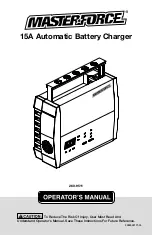
Page 1: ...To Reduce The Risk Of Injury User Must Read And Understand Operator s Manual Save These Instructions For Future Reference 260 9511 0099002171 00 15A Automatic Battery Charger ...

Page 2: ...c Connection Precautions Page 6 Follow These Steps When Battery is Installed in Vehicle Page 6 Follow These Steps When Battery is Outside Vehicle Page 7 Grounding and AC Power Cord Connections Page 7 Assembly Instructions Page 8 Control Panel Page 8 Operating Instructions Page 9 Maintenance and Care Page 11 Error Codes Page 11 Troubleshooting Page 12 Specifications Page 12 Warranty Page 13 ...

Page 3: ...cteristic of current Class II construction Double insulated construction Read the operator s manual To reduce the risk of injury read and understand the operator s manual Wear safety glasses Operation of the charger can result in damage to unprotected eyes Warning symbol Alerts user to warning message Electric shock symbol Connect only to properly grounded outlets Replace defective cords or wire i...

Page 4: ...esult in electric shock fire and or serious personal injury SYMBOL MEANING SAFETY ALERT SYMBOL Indicates DANGER WARNING or CAUTION May be used in conjunction with other symbols or pictographs Failure to obey this safety warning WILL result in death or serious injury to yourself or to others Always follow the safety precautions to reduce the risk of fire electric shock and personal injury Failure t...

Page 5: ...om outlet before attempting any maintenance or cleaning Turning off controls will not reduce this risk 1 11 RISK OF EXPLOSIVE GASES a WORKINGINVICINITYOFALEAD ACID BATTERY IS DANGEROUS BATTERIES GENERATE EXPLO SIVE GASES DURING NORMAL BATTERY OPERATION FOR THIS REASON IT IS OF UTMOST IMPORTANCE THAT YOU FOL LOW THE INSTRUCTIONS EACH TIME YOU USE THE CHARGER b To reduce risk of battery explo sion f...

Page 6: ... 3 5 Study all battery manufacturer s spe cific precautions while charging and recommended rates of charge 3 6 Determine voltage of battery by referring to car owner s manual and make sure that output voltage selec tor switch is set at correct voltage If charger has adjustable charge rate charge battery initially at lowest rate 4 CHARGER LOCATION 4 1 Locate charger as far away from bat tery as DC ...

Page 7: ...polarity of battery posts POS ITIVE POS P battery post usually has a larger diameter than NEGATIVE NEG N post 7 2 Attach at least a 24 inch long 6 gauge AWG insulated battery cable to NEGATIVE NEG N battery post 7 3 Connect POSITIVE RED charger clip to POSITIVE POS P post of battery 7 4 Position yourself and free end of cable as far away from battery as possible then connect NEGATIVE BLACK charger...

Page 8: ...percent of charge of the battery being charged and either 6 or 12 the voltage of the battery determined by the charger If you manually stop the charging process by pressing the Rate button before the battery is fully charged the display will show OFF NOTE During charging the display will go into sleep mode and will not show the percentage of charge or voltage of the battery To turn the display bac...

Page 9: ...y is properly connected The clamps will not spark if touched together CHARGING A BATTERY IN THE VEHICLE 1 Turn off all the vehicle s accessories 2 Keep the hood open 3 Clean the battery terminals 4 Place the charger on a dry non flam mable surface 5 Lay the AC DC cables away from any fan blades belts pulleys and other moving parts 6 Connect the battery following the pre cautions listed in sections...

Page 10: ...ins both 6 and 12 volt batteries keeping them at full charge NOTE The maintain mode technology allows you to safely charge and maintain a healthy battery for extended periods of time However problems with the bat tery electrical problems in the vehicle improper connections or other unantici pated conditions could cause excessive current draws As such occasionally monitoring your battery and the ch...

Page 11: ...ation mode If the desulfation is not successful after 10 hours the charger will go into abort mode bAd bAT F02 The charger cannot desulfate the battery The battery could not be desulfated have it checked or replaced bAd bAT F03 The battery was unable to reach the full charge voltage May be caused by trying to charge a large battery or bank of batteries on too low of a current setting Try again wit...

Page 12: ...ress the display button but do not see the percentage of charge When first connected to a battery the display shows voltage only This is normal The percentage of charge is only displayed during charging The display shows bAd bAt F01 The battery voltage is still below 10V for a 12V battery or 5V for a 6V battery after 2 hours of charging The battery may be defective Make sure there are no loads on ...

Page 13: ...s warranty 1 excludes expendable parts including but not limited to blades brushes belts bits light bulbs and or batteries 2 shall be void if this product is used for commercial and or rental purposes and 3 does not cover any losses injuries to persons property or costs This warranty does give you specific legal rights and you may have other rights which vary from state to state Be careful battery...

Page 14: ...Page 14 NOTES ...

Page 15: ...Page 15 NOTES ...

Page 16: ... 2020 Menard Inc Eau Claire WI 54703 03 2020 ...

Reviews: