Martin MAC 2000 Wash XB, User Manual
The Martin MAC 2000 Wash XB is a powerful lighting fixture for professional use. Enhance your event with this versatile wash light. User manual available for free download on manualshive.com, providing detailed instructions on how to maximize the MAC 2000’s capabilities. Illuminate your space with ease.
Share
Download


Reviews:
No comments
Related manuals for MAC 2000 Wash XB

HF Series
Brand: Panasonic Pages: 9

MT
Brand: Above All Pages: 4

D30R
Brand: Baker Pages: 82

2370
Brand: Rain-Flo Irrigation Pages: 16

Symphony NK-6
Brand: Nabtesco Pages: 26

EPIRB2
Brand: Ocean Signal Pages: 2

RadioPRO 4 RP4-MZ11
Brand: PAC Pages: 5

Side Winder Slide
Brand: Swing-N-Slide Pages: 2

CA04801001E
Brand: Eaton Pages: 38

VERSADJUST
Brand: Bison Pages: 4

MHL 108 WASH 150.509
Brand: Beamz Pages: 32

Protos 3
Brand: SYNBIOSIS Pages: 2

Grael
Brand: Compumedics Pages: 16

LCG-UV18
Brand: LCG Pages: 11
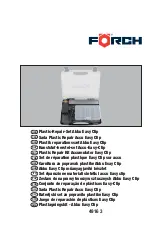
4916 3
Brand: Forch Pages: 36

VORTEX Tracheo
Brand: Pari Pages: 318

Pow Air Vac
Brand: Panblast Pages: 5

InnuPure C16
Brand: Analytic Jena Pages: 62


