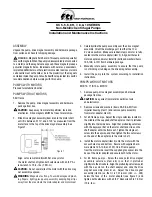
background image

Owner’s Manual -  

CMA12-48SD

6

UNIT LOCATION AND MOUNTING:

Choose a location that places the condensing 

unit as close to the indoor unit as possible. The 

maximum unit separation and vertical lift (compressor 

above evaporator) must be taken into account 

[See 

Fig 1]

. Do not exceed allowable pipe lengths.

NOTE: 

Oil traps must be installed every 10ft. when 

the outdoor unit is installed above the indoor unit.

Install the outdoor unit on a rigid surface, able to 

withstand the unit’s weight, such as a concrete slab.

If the installation location allows the unit to be 

exposed to strong winds (such as sea side 

applications), ensure that the unit has a barrier from 

the wind 

[See Fig. 2]

. This will assist with the proper 

operation of the fan by obstructing strong gusts of 

wind from entering the unit’s cabinet.

Avoid areas where water, snow, or ice may fall 

from a roof onto the unit. In climates where snow 

is a consideration, locate the unit away from areas 

prone to drifting. Ensure the location of the unit will 

not be subject to snow drifts, heavy accumulation 

of snow or leaves or other seasonal debris. If 

unavoidable, provide 

an

 awning for the unit. 

OUTDOOR UNIT INSTALLATION

An awning can be built over the outdoor unit to 

prevent direct sunlight or rain exposure or snowfall. 

Ensure that the awning is at least 2 ft. above the 

top of the unit’s housing.

During heating and defrost modes, the condensate 

should be properly drained away from the unit.

Insure free flow of air into and out of the unit. 

Inlets/outlets should stay clear of obstructions such 

as walls and shrubs. Minimum clearances must be 

adhered to 

[See Fig. 4 & 5 on page 7]

.

Do not locate two or more units in a way that will 

block air flow or in a way that hot air from one unit 

will blow into a nearby unit 

[See Fig. 3]

.

Fig. 1

*Minimum pipe length must not be less that 15 feet.

** “P” trap risers every 10 ft. when outdoor unit is installed

above indoor unit.

Summary of Contents for COMFORT-AIRE CMA12SD-0

Page 1: ...INSTALLATION OPERATION MAINTENANCE MANUAL Horizontal Side Discharge Condensing Units Models CMA12SD 0 CMA18SD 1 CMA24SD 1 CMA30SD 1 CMA36SD 1 CMA48SD 1 517 787 2100 www marsdelivers com...

Page 2: ...ance TABLE OF CONTENTS Safety Precautions 3 General Operating Instructions 4 General Product Information 5 Outdoor Unit Installation 6 7 Unit Wiring 8 Wiring Diagrams 9 12 Refrigerant Piping 13 Leak T...

Page 3: ...uit Otherwise it will cause lower capacity abnormal high pressure in the refrigeration cycle explosion and injury 1 This equipment must be properly grounded and installed with a ground leakage circuit...

Page 4: ...e frequent starts call your service contractor 4 For energy conservation reasons you may want to set your thermostat at a higher temperature when you are away Do not raise the temperature setting by m...

Page 5: ...ar metering devices are acceptable for use but bleed style thermostatic expansion valves should be used where specific AHRI Match ratings require or where oversized coils or other application specific...

Page 6: ...of onto the unit In climates where snow is a consideration locate the unit away from areas prone to drifting Ensure the location of the unit will not be subject to snow drifts heavy accumulation of sn...

Page 7: ...and outlets are not obstructed See Fig 4 Anchor the outdoor unit with a 10mm 3 8 inch diameter bolt and nut tightly on a concrete or rigid surface See Fig 5 Anchoring is especially recommended in seas...

Page 8: ...compressor and other electrical components and voids the warranty NOTE The supply voltage must be consistent with the rated voltage of the air conditioner not to exceed 10 Ensure the unit is properly...

Page 9: ...48SD 9 Owner s Manual CMA12 48SD 9 OUTDOOR UNIT WIRING CONNECTION continued NOTE Please refer to the installation instructions of the 24V thermostat used in conjunction with this unit for additional...

Page 10: ...Owner s Manual CMA12 48SD 10 Owner s Manual CMA12 48SD 10 OUTDOOR UNIT WIRING CONNECTION continued...

Page 11: ...Owner s Manual CMA12 48SD 11 Owner s Manual CMA12 48SD 11 OUTDOOR UNIT WIRING CONNECTION continued...

Page 12: ...Owner s Manual CMA12 48SD 12 Owner s Manual CMA12 48SD 12 OUTDOOR UNIT WIRING CONNECTION continued...

Page 13: ...s service valves are shipped in the closed position and should not be opened until final connections leak testing and evacuation are completed The recommended procedure for leak test evacuation and r...

Page 14: ...temperature and humidity all have an effect on the system pressures and superheat conditions Charge must be added for the interconnecting tubing Use of piston style metering device is typical Where T...

Page 15: ...original consumer The consumer must retain a receipted bill of sale as proof of warranty period Without this proof the express warranty begins on the date of shipment from the factory REMEDY PROVIDED...

Page 16: ...DOOHU LV UHVSRQVLEOH IRU YHULI LQJ GLPHQVLRQDO GDWD RQ WKH DFWXDO SURGXFW SULRU WR EHJLQQLQJ DQ LQVWDOODWLRQ SUHSDUDWLRQV QFHQWLYH DQG UHEDWH SURJUDPV KDYH SUHFLVH UHTXLUHPHQWV DV WR SURGXFW SHUIRUPDQ...

Reviews: