background image

24

ENGLISH

Setting the Digital Audio
Output To Be Compatible
with Your AV Component

– DVD

This player is capable of digital audio output for Dolby Digital,
DTS, MPEG, and signals with a sampling rate of 96 kHz.
Make settings in the Setup screen 

Audio 1

 menu to reflect

the capabilities of the components that you have made digital
connections to.

Notes

• If you have already completed the Setup Navigator screen

operations, the settings on this page have already been set by
the player.

• If you have made only stereo line connections (analog) using the

supplied audio cord, it is not necessary to make any changes in
this menu.

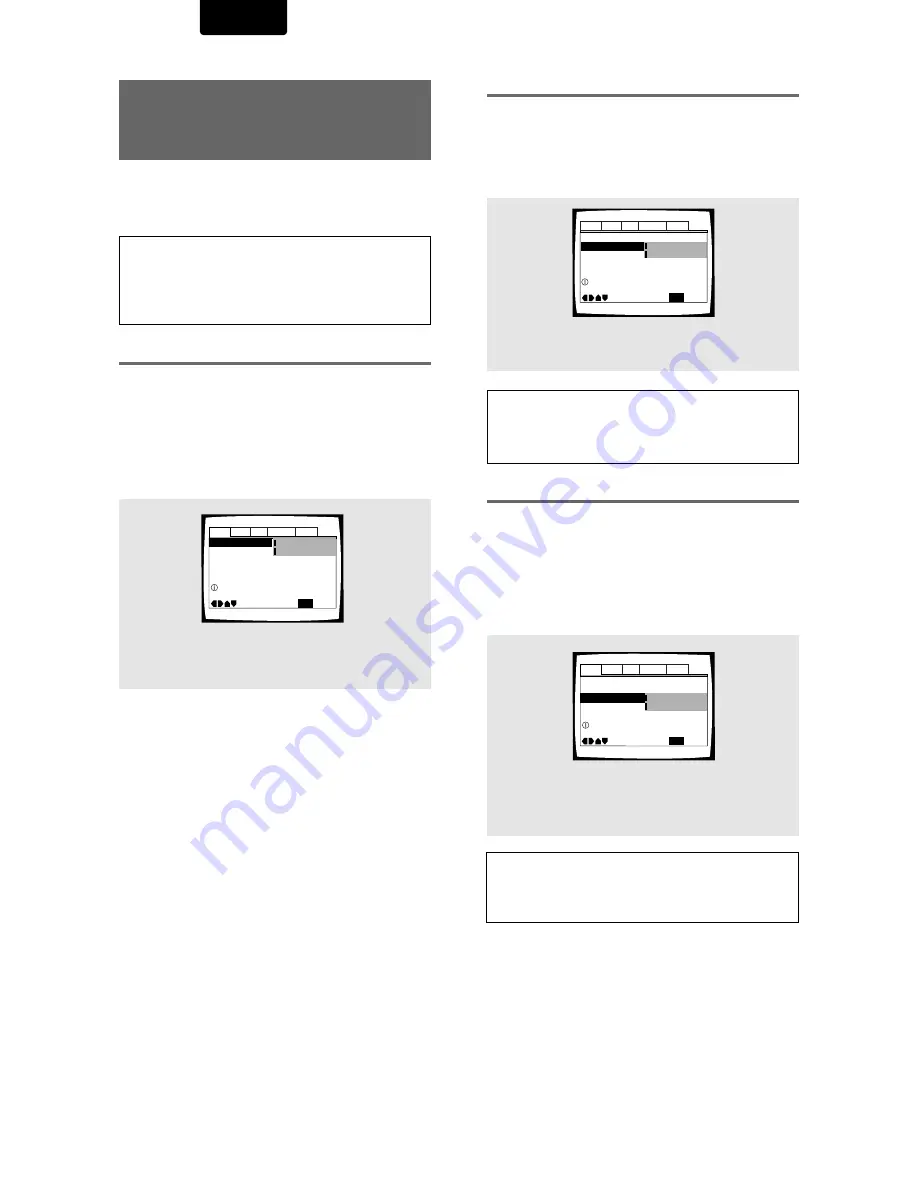
Dolby Digital Out

This player is capable of outputting the Dolby Digital
surround sound audio signal. When the player is connected
to an AV component that has a built-in Dolby Digital decoder,
select

[Dolby Digital]

. This player can also convert the Dolby

Digital signal to a digital Linear PCM signal, the same digital
signal output from a CD. Select 

[Dolby Digital

3

3

3

3

3

PCM]

when

you have made connections to an amplifier or receiver with a
Dolby Pro Logic decoder or a Digital Analog Converter
(DAC).

Audio1

Audio2

General

Language

Video

DTS Out - 

96kHz PCM Out – 96kHz 

3

 48kHz

MPEG Out – MPEG 

3

 PCM

Move

Exit

Dolby Digital 

3

 PCM

Dolby Digital 

SETUP

Dolby Digital Out 

Change Dolby Digital output mode

Dolby Digital Out –

DTS Out 

96kHz PCM Out - 96kHz>48kHz

MPEG Out – MPEG 

3

 PCM

Move

Exit

DTS

Off

Dolby Digital

SETUP

Change DTS output mode

Audio1

Audio2

General

Language

Video

MPEG Out - PCM

Dolby Digital Out –

DTS Out –

96kHz PCM Out 

Move

Exit

96kHz

96kHz

3

 48kHz

Dolby Digital
Off

SETUP

Change 96 kHz output mode

Audio1

Audio2

General

Language

Video

DTS Out

This player is capable of outputting DTS digital audio for
DVDs recorded in DTS. When this player is connected to an
AV component that has a built-in DTS decoder, select 

[DTS]

.

If your system is not equipped to decode DTS, select 

[Off]

.

Refer to the operating instructions supplied with your audio
components if you are unsure about compatibility with DTS.

96 kHz PCM Out

This player is capable of outputting digital signals with a
sampling frequency of 96 kHz. If you have made connections
to a component capable of processing this signal rate, select

[96 kHz]

 for the signal to be output as is. As some

components are incapable of processing digital signal input
with sampling rates of 96 kHz, selecting 

[96 kHz

3

3

3

3

3

48 kHz]

compresses the signal to a standard signal with a sampling
rate of 48 kHz.

Settings:

Dolby Digital*
Dolby Digital 

3

3

3

3

3

 PCM

*

Factory setting

Settings:

Off*
DTS

*

Factory setting

Note

If you have made digital audio connections to component(s) not
equipped to decode the DTS digital bitstream, be sure to select

[Off]

. If a DTS signal is output without decoding, the output is

digital noise that could potentially cause damage to your speakers.

Settings:

96 kHz 

3

3

3

3

3

48 kHz*

96 kHz

*

Factory setting

Notes

• On DVDs that contain copy protection, the 96 kHz signal may only

be output from the analog audio jacks.

• Changes to the 

[96 kHz PCM Out]

 setting cannot be made when

a disc is playing.

Summary of Contents for DV7110

Page 1: ...Model DV7110 User Guide DVD Player R CLASS 1 LASER PRODUCT LUOKAN 1 LASERLAITE KLASS 1 LASERAPPARAT ...

Page 2: ...led and used in accordance with the instructions may cause harmful interference to radio communications However there is no guarantee that interference will not occur in a particular installation If this equipment does cause harmful interference to radio or television reception which can be determined by turning the equipment off and on the user is encouraged to try to correct the interference by ...

Page 3: ... pin it will only fit into a grounding type power outlet This is a safety feature If you are unable to insert the plug into the outlet contact your electrician to replace your obsolete outlet Do not defeat the safety purpose of the grounding type plug POWER CORDPROTECTION Power supplycords should be routed so that they are not likely to be walked on or pinched by items placed upon or against them ...

Page 4: ...he fun and excitement your equipment offers This manufacturer and the Electronic Industries Association s Consumer Electronics Group want you to get the most out of your equipment by playing it at a safe level One that lets the sound come through loud and clear without annoying blaring or distortion and most importantly without affecting your sensitive hearing Sound can be deceiving Over time your...

Page 5: ...just a few examples Select the type of TV screen you are using and the preferred screen format you d like to use when watching DVDs in the Video menu page 26 Manufactured under license from Dolby Laboratories Dolby and the double D symbol are trademarks of Dolby Laboratories Confidential unpublished works 1992 1997 Dolby Laboratories All rights reserved DTS and DTS Digital are trademarks of Digita...

Page 6: ...e section starting on page 22 are also used in a number of other functions Learning the procedure for operating these menus will make using this player much easier and more enjoyable Play a disc When all the connections and setups have been made you are ready to play a DVD Video CD or CD with the player The section Getting Started Using Your DVD Player starting on page 18 outlines the basic player...

Page 7: ... line Digital Progressive Scan Compatible Video Output 27 Selecting Picture Quality Appropriate for Program Content 28 Viewing from a Desired Camera Angle Multi Angle 29 Setting the Language Options 30 Setting the on screen display OSD language 30 Setting Language and Subtitle Preferences in the Setup Screen Menus 30 Changing the Audio Language Multi Language Function 31 Selecting a Subtitle Langu...

Page 8: ...d up to 17 feet 5 m from the player and within a 30 angle on each side of the sensor Notes Exposing the remote sensor to direct sunlight or strong light may cause faulty operation When using this DVD player as a stand alone player set the REMOTE CONTROL switch on the rear panel to INTERNAL and set the RS 232C switch to RC 5 6 Before Using Checking Accessories Please confirm that the following were...

Page 9: ...n Page 10 0 VIDEO ON OFF button Page 47 1 OSD button Page 46 2 REVERSE SEARCH button Page 20 3 FORWARD SEARCH button Page 20 4 PAUSE STEP button Page 37 5 LEVEL volume control 6 PHONES Jack DIMMER OSD VIDEO OFF FL OFF PAUSE STANDBY LEVEL REPEAT PHONES DVD PLAYER DV7110 STOP POWER ON OFF OPEN CLOSE PLAY V I D E O 1 DIGITAL OUT VCD REMAIN CONDITION TOTAL SURROUND TITLE TRACK AUDIO DVD VIDEO OFF DOWN...

Page 10: ...M switch is not present on the USA model OUTPUT VIDEO DVD 2 DVD 1 CODE CONTROL REMOTE IN OUT S2 VIDEO 2 1 COAXIAL EXTERNAL VIDEO S2 INTERNAL 2 R L 1 CONTROL REMOTE OPTICAL OUTPUT AUDIO COMPONENT OUTPUT VIDEO OUTPUT DIGITAL COMPONENT RS 232C RS 232C CONTROL RC 5 6 RS 232C Y CR PR CB PB y q u i e o 0 1 3 2 w r t u Video out jacks Page 12 14 i S Video out jack Page 14 o COMPONENT Video out jacks Y CB...

Page 11: ...VIDEO ON OFF button Page 47 Foward Slow button Page 20 37 Reverse Slow button Page 20 37 PROGRAM button Page 41 ENTER buttons Page 15 18 19 This remote control supports two remote control codes DVD1 and DVD2 When the unit is shipped from the factory the remote control is set to DVD1 To set the remote control to DVD2 hold down both the 7 Stop button and the 2 number button on the remote control for...

Page 12: ... Notes When making connections to this unit or when changing connections check that the unit is off by pressing Power Switch and unplug the power cord from the power outlet The analog video output on this player uses copy protect circuitry to prevent the video playback on DVDs from being copied If you connect the player to a TV via a VCR or record and play back the contents of a disc with a VCR th...

Page 13: ...ital DTS or MPEG decoder Use a coaxial cable not supplied to connect the DIGITAL OUT coaxial digital output on the player to the coaxial digital input on an AV amplifier or receiver AV amplifier or receiver with built in Dolby Digital DTS or MPEG decoder Analog Audio Connection AUDIO OUT Make analog audio connections to a stereo amplifier or receiver Analog audio connections can also be made to a ...

Page 14: ...ystem The remote control allows to switch the power of this DVD player to POWER ON and Standby mode Note be sure to leave power switch on the Front panel in the power mode RS232C CONTROL switch To control the DVD player with the remote controller set this switch to RC 5 6 Remote switch When using this DVD player independently set this switch to INTERNAL When using this DVD player in a system with ...

Page 15: ...A model Video output changes as follows according to the playback disc s recorded format NTSC PAL PAL NTSC conversion is possible on Video CDs PAL NTSC conversion is not possible on DVDs When the TV SYSTEM switch is set to the AUTO position the disc s format will be output as is When a CD or disc is not loaded the previous video output format will be selected About MOD Modulation PAL SHRINK Most m...

Page 16: ...n the front panel Press the POWER button on the Front panel to turn the power on and press it again to turn the power off Note When it is required to remote control the power mode of this DVD player be sure to leave this switch in the power on mode 2 Press SETUP When SETUP is pressed for the first time the following screen appears Though the Setup Navigator may be used more than once this screen o...

Page 17: ...e are numerous options available please refer to the instructions supplied with the component the player is connected to determine what digital audio formats can be decoded If you have made no digital connections select Not Connected Settings Dolby Digital Dolby Digital DTS Dolby Digital MPEG Dolby D DTS MPEG PCM Not Connected Factory setting Setting compatibility with 96 kHz output The 96 kHz PCM...

Page 18: ...rmed the Setup Navigator procedure described in the previous section or made the necessary settings in the Setup screen menus as outlined in the next section to set up the player to correspond to your home system Having made these settings you are now ready to start using the player to enjoy DVDs Video CDs and CDs Notes Noise is output if you make digital audio connections to a receiver or amplifi...

Page 19: ... menu screen Only number buttons are used to make selections on Video CD menu screens When the Video CD has more than one menu pages can be advanced to or returned to with PREV 4 or NEXT To play Video CDs without displaying menu screens Video CDs with Playback Control PBC display a menu screen when play is started It is possible however to play back Video CDs without displaying menu screens When a...

Page 20: ...hen the desired location has been reached press PLAY 3 Fast reverse scanning Press and hold REV 1 1 1 1 1 during playback Release REV 1 when you reach the desired location Normal playback resumes When the Scan indicator on the screen changes from flashing to lit fast reverse scanning will continue even if the button is released When the desired location has been reached press PLAY 3 DIMMER ENTER R...

Page 21: ...ssing STOP 7 twice causes the disc to return to the beginning when PLAY 3 is pressed again The display shows the disc type DVDs or Video CDs Press PLAY 3 3 3 3 3 Playback starts from the resume position Notes The actual restart position may be slightly before or after the resume position If you want to remove the disc but still want to resume playback from the last stopped position use the LAST ME...

Page 22: ... SETUP Dolby Digital Out Change Dolby Digital output mode Adjusting Audio and Video Settings Audio1 Audio2 General Language Video Dolby Digital Out Dolby Digital DTS Out Off 96kHz PCM Out 96kHz 3 48kHz MPEG Out MPEG 3 PCM SETUP Move Exit Setup audio Digital output format tone adjust continued Using the Setup Screen Menus The procedure on this page describes how to operate the menus on the Setup sc...

Page 23: ...setting up the system or when making adjustments it is convenient to know what settings are applicable to the different disc formats When the settings appear for each menu option the currently selected setting appears with the setting indicator highlighted in one of three colors blue green or yellow These colors correspond to what formats the menu option effects as shown in the table below Note If...

Page 24: ...ge DTS output mode Audio1 Audio2 General Language Video MPEG Out PCM Dolby Digital Out DTS Out 96kHz PCM Out Move Exit 96kHz 96kHz 3 48kHz Dolby Digital Off SETUP Change 96 kHz output mode Audio1 Audio2 General Language Video DTS Out This player is capable of outputting DTS digital audio for DVDs recorded in DTS When this player is connected to an AV component that has a built in DTS decoder selec...

Page 25: ...uage Video Dolby Digital Out DTS Out Off 96kHz PCM Out 96kHz 3 48kHz MPEG Out Move Exit MPEG 3 PCM MPEG Dolby Digital SETUP Change MPEG audio output mode Settings MPEG MPEG 3 3 3 3 3 PCM Factory setting Settings On Digital bitstream is output Off Digital bitstream is not output Factory setting Adjusting the Dynamic Range of the Audio Soundtrack DVD Audio DRC stands for Audio Dynamic Range Compress...

Page 26: ...er Box setting Wide screen format DVD The Letter box presentation places black bars at the top and bottom portions of the screen to provide the full wide screen presentation of a movie on a standard TV 4 3 aspect ratio Pan Scan setting Any setting Wide screen format DVD unnatural squeezed effect If you are viewing a wide screen format DVD on a standard TV and the TV Screen setting is set to 16 9 W...

Page 27: ... possible that the picture will appear stretched when playing discs recorded in 4 3 format This happens when the TV s aspect ratio is set at 16 9 To see the picture in its correct aspect ratio change the TV setting to 4 3 If your TV can be switched between 4 3 and 16 9 set this player to Interlace or Auto progressive In Auto progressive mode 4 3 discs will be played in Interlace mode while discs t...

Page 28: ... Still Picture On Screen Display Move Exit Standard Component Video Interlace 16 9 Wide Field Frame Auto SETUP Progressive DNR Off Setting the position of the on screen display When watching conventional software on a wide screen TV the operation display is at the very top of the screen and may be difficult to see Changing the position of the display lets you see operation indicators clearly even ...

Page 29: ...tup screen Video menu described in the section below Turning the angle indicator on and off When a picture recorded in different angles is played back is displayed on the screen This setting lets you see clearly whether the playback picture is recorded in multiple angles or not Turn the angle indicator on or off in the Angle Indicator setting in the Setup screen Video menu in the Expert menu mode ...

Page 30: ...Español SETUP Setup player s OSD language Audio1 Language Note The OSD Language setting is factory set to English If you want English to be displayed it is not necessary to adjust this setting Settings English français Español Factory setting Selecting an audio language preference The audio language that you normally listen to can be selected from the various audio languages on a DVD Even when the...

Page 31: ...U to display the DVD menu screen and then make your selection Audio 1 English Dolby Digital 5 1CH Audio 2 Spanish HELLO HOLA Dolby Digital 5 1CH Changing Audio Type Video CD CD For enjoyment of karaoke or similar format Video CDs and CDs it is possible to select stereo audio or either right or left channel mono depending on the requirements of the source Press AUDIO repeatedly during playback to s...

Page 32: ...our selection HELLO HOLA Subtitle 1 English Subtitle 2 Spanish Selecting a subtitle language preference The subtitle language that you will normally display can be selected from the subtitles programmed on a disc Even when the subtitle language is changed during playback by pressing SUBTITLE the language selected at this setting will be selected when the disc is changed Make changes to the Subtitl...

Page 33: ...r buttons to select Other and press ENTER The language selection screen appears 2 Use the cursor buttons 2 2 2 2 2 3 3 3 3 3 to select either List of Languages or Code Audio1 Audio2 General Language Video Setup audio language Audio Language SETUP Move Exit ENTER Select Return ja Japanese List of Languages Code 0 2 1 0 0 1 RETURN ja Japanese List of Languages Audio1 Audio2 General Language Video Se...

Page 34: ... Select Selected Subtitle to display the subtitles in the language set in the Subtitle Language setting Make changes to the Subtitles Off setting in the Setup screen Language menu in the Expert menu mode page 23 Selecting subtitles assist subtitles or no subtitles Use this function to turn the subtitles on or off Additionally some DVDs provide assist subtitles that provide additional explanations ...

Page 35: ...the functions the player is capable of performing With DVD an even greater number of possibilities and functions are available Note DVDs differ in content and do not all contain the same information Therefore some functions in this section may not work or have no effect on some DVDs Setting the Parental Lock Level This player lets you set the Parental Lock if the DVD has a parental lock level reco...

Page 36: ... printed on the DVD disc jacket or accompanying documentation If you use the Condition Memory function to save the settings for a particular disc the Parental Lock level is saved as well Because it is saved in memory Parental Lock levels can be set for individual discs according to their content rather than a set level for all DVDs 1 Select Level Change in the Parental Lock setting The screen chan...

Page 37: ... the reverse direction is engaged In the reverse direction the playback speed cannot be adjusted To return to normal playback When viewing still frames or slow playback pressing PLAY 3 restores normal playback operation Frame by frame advance playback Viewing one frame at a time 1 Press PAUSE 8 8 8 8 8 2 Press FWD or REV 1 1 1 1 1 rapidly FWD The picture advances one frame each time the button is ...

Page 38: ...may stop shortly after being performed In this case the mark is displayed Time search is not possible with CDs When performing DVD time search playback may start from a slightly different time than that specified Time search is not possible during when the disc is stopped Search using time search is not possible during PBC playback of Video CDs To perform a direct title or chapter track search usi...

Page 39: ... section repeatedly You can only perform A B repeat within the same title chapter or track To cancel A B repeat play Press CLEAR Playback continues but the repeat function is canceled Return to a specified location on a disc 1 Press REPEAT A B at the desired location 2 When you want to return to the specified location press PLAY 3 3 3 3 3 To clear the specified location Press CLEAR to cancel repea...

Page 40: ...LEAR This returns you to normal playback of chapters tracks in order from the chapter track currently playing Notes With Video CDs random play is not possible during playback when the menu is displayed PBC playback To perform random play start playback without displaying a menu by pressing a track number button while in the stop mode and then press RANDOM Random play of programmed chapters tracks ...

Page 41: ... number Use the cursor buttons 5 2 3 to highlight the number to be placed after the new number and then press the number button s of the number to be inserted The new number is inserted before the previously selected number To stop program play Press STOP 7 Notes When programming chapters chapters not programmed may appear on the screen This is not a malfunction Programming may not be possible wit...

Page 42: ...program To confirm the contents of a program On a CD or Video CD track program press PROGRAM to confirm The program screen displays the current program On a DVD select the program type title or chapter with the cursor buttons 2 2 2 2 2 3 3 3 3 3 The current DVD title or chapter program can then be confirmed on the appropriate program screen To add to a program 1 Press PROGRAM 2 Press a number butt...

Page 43: ... Program Memory to On the player will save your program and recall it the next time you use the same DVD When the program memory exceeds 24 programs will be erased in chronological order from the oldest program in memory 1 Use the cursor button to highlight Program Memory and use the cursor button 3 3 3 3 3 to select On 2 Press ENTER The program is saved in memory Note When a DVD with a program st...

Page 44: ...o CD is removed from the player Resuming playback from where LAST MEMORY was pressed 1 Load a disc that has a Last Memory point memorized Some DVDs will start playback automatically when loaded In this case press STOP 7 to stop playback 2 Press LAST MEMORY while in the stop mode The disc begins playback at the memorized point Last Memory mode may not function for some DVDs If you register more tha...

Page 45: ...ST MEMORY CONDITION MEMORY CLEAR 0 9 8 7 6 5 4 3 2 1 A B OPEN CLOSE REMOTE CONTROLLER RC7010DV VIDEO ON OFF CLEAR CONDITION MEMORY 10 When a disc that has memorized settings is loaded Condition Memory will appear on the screen and the previously memorized settings will be selected Erasing the recorded contents Load a disc that has memorized settings and press CLEAR while Condition Memory is being ...

Page 46: ...19 Play Tr Rate 1 1 1 32 8 9 Play Chapter 1 1 1 19 2 18 0 59 Viewing Disc Information DVD Video CD CD Use OSD to get current information about the disc currently loaded You can get information about the titles and chapters on a DVD or tracks on a Video CD or CD When viewing DVDs you can also check the digital bitstream transmission rate Press OSD during while a disc is playing Press OSD repeatedly...

Page 47: ...Play Track 1 0 03 3 32 3 29 Play All 1 2 0 15 6 32 6 15 Video CD with PBC disabled Play All 5 10 20 19 22 57 2 38 Play Track 5 20 19 4 40 2 38 Play Track 5 20 19 4 40 2 02 Display off Disc information Top Row current track number total number of tracks total elapsed time of Video CD Bottom Row remaining time of Video CD total time of Video CD Track information Top Row current track number total el...

Page 48: ... center Lens cleaners are commercially available but special care should be exercised in their use since some may cause damage to the lens Never play cracked or warped discs The disc revolves in the player at high speed when it is played Never play a cracked scratched or warped disc This may damage the player or cause it to malfunction Never use discs with special shapes CD s with special shapes h...

Page 49: ...the remote control If the disc table opens against strong resistance such as a closed glass door damage to the unit may result Condensation Moisture may form in the operating section of the player if the player is brought from cool surroundings into a warm room or if the temperature of the room rises suddenly When this happens the player s performance will be impaired To prevent this let the playe...

Page 50: ...andic kl Cambodian km Kannada kn Kashmiri ks Kurdish ku Kirghiz ky Latin la Lingala ln Laothian lo Lithuanian lt Latvian lv Malagasy mg Maori mi Macedonian mk Malayalam ml Mongolian mn Moldavian mo Marathi mr Malay ms Maltese mt Burmese my Nauru na Nepali ne Norwegian no Occitan oc Oromo om Oriya or Panjabi pa Polish pl Pashto Pushto ps Quechua qu 0721 0801 0809 0818 0821 0825 0901 0905 0911 0914 ...

Page 51: ... 15h System commands There are 3 types of commands Normal command is to request operation from PC to DVD player Request command is to request player status and Status command is to let the PC know the change of DVD player status Upon reception of a command DVD player will return either OK ERROR or Status ASCII code is used for data and letters are case sensitive The start character and the end cha...

Page 52: ... I6 SETTING ENTER I7 SETTING SETUP I8 SETTING CLEAR I9 Request command ITEM Command Category Class Request Answer POWER STANDBY A A0 POWER ON A A1 PLAY MODE STOP C C0 PLAY MODE PLAY C C1 PLAY MODE PAUSE C C6 PLAY MODE SLOW C C7 DISC NO DISC J J0 DISC CD J J1 DISC VCD J J2 DISC DVD J J3 REPEAT OFF D D0 REPEAT ON D D1 Status command ITEM Category Class Command POWER STANDBY A0 POWER ON A1 TRAY CLOSE...

Page 53: ...switch is set to the correct position for the monitor connection you are using page 14 Connection is incorrect Check that cord connections are correct and that plugs are firmly connected Operation settings of TV or AV amplifier is not appropriate Be sure that your TV receiver or amplifier is set up to view DVD playback The Component Video menu is set to progressive but your TV monitor is not compa...

Page 54: ...rectly page 13 Connection is made to the stereo amplifier s PHONO input terminal Change connection to any input terminal except PHONO The pause mode is engaged Press PLAY 3 to exit the pause mode Stereo amplifier operation is incorrect Check input CD AUX etc selector to determine if it is selected for DVD playback The DVD or CD is recorded in DTS audio DTS audio is only output from the digital out...

Page 55: ...gital Theater System DTS is a surround system different from Dolby Digital that has become a popular surround sound format for movies In order to enjoy the benefits of DTS encoded discs the digital output jack either coaxial or optical of this player needs to be connected to an AV amplifier or receiver or to a DTS decoder to be able to enjoy the surround sound of DTS audio DTS audio is not output ...

Page 56: ...re divided into units referred to as titles and titles are divided into chapters Menu screens do not belong to any title A disc which contains a movie may have only one title with many or no chapter divisions Karaoke discs may have many titles assigning a title to each song on the disc Specifications General System DVD system and Compact Disc digital audio system Power requirements USA model AC 12...

Page 57: ...ar l utilisateur ne se trouve à l intérieur Confier tout entretien uniquement à un personnel qualifié Ce point d exclamation placé dans un triangle équilatéral a pour but d attirer l attention de l utilisateur sur la présence dans les documents qui accompagnent l appareil d explications importantes du point de vue de l exploitation ou de l entretien DANGER D ELECTROCUTION NE PAS OUVRIR ATTENTION A...

Page 58: ...hent sur l écran i pour clarifier les fonctions et expliquer les options disponibles Voici quelques exemples Répondez à quelques questions à la suite de quoi tous les réglages audio et vidéo de même que ceux qui concernent les affichages sur l écran sont automatiquement réalisés par le lecteur grâce à l assistant de mise en oeuvre page 15 Le menu Video est prévu pour choisir le type d écran de tél...

Page 59: ...s dialogues ou encore les signaux sonores que vous souhaitez entendre Choix de l angle de prise de vues page 32 Certains DVD portent plusieurs enregistrements de la même scène filmée sous des angles différents En ce cas il est possible de choisir l angle de prise de vues Cette marque indique que la fonction évoquée n est pas disponible avec tous les disques Audio 1 English Dolby Digital 5 1CH Audi...

Page 60: ...t des DVD peut paraître au tout début un peu difficile C est pourquoi nous vous conseillons de procéder dans l ordre ci dessous de façon à être en mesure d utiliser le lecteur au mieux dès que possible Familiarisez vous avec le lecteur Reportez vous à la page 8 Avant d utiliser le lecteur pour vous assurer que tous les accessoires vous ont été fournis avec le lecteur Si c est votre premier contact...

Page 61: ...layage progressif numérique 525 lignes DVD 27 Réglage de la qualité de l image en fonction du type d enregistrement 28 Choix de l angle de prise de vues même scène sous plusieurs angles 29 Définition des options de langue 30 Définition de l affichage sur l écran OSD 30 Définition des préférences pour la langue des dialogues et celle des sous titres 30 Choix de la langue des dialogues Dialogues en ...

Page 62: ...ne pile usagée Remplacez les deux piles en même temps Si vous envisagez de ne pas vous servir de la télécommande pendant une longue période plus d un mois retirez les piles pour éviter toute corrosion Si les piles ont fui essuyez soigneusement leur logement avant de les remplacer Fonctionnement de la télécommande Dirigez le boîtier de télécommande vers le capteur qui se trouve sur la face avant de...

Page 63: ...O OFF DOWN MIX PROGRESSIVE dts 5 1ch SACD 96KHz 192KHz LAST MENO CHP i o 0 1 2 3 4 5 6 u y t r e q w q Open close button Page 18 21 w DISPLAY Page 10 e REPEAT button Page 37 r PREVIOUS button Page 20 t NEXT button Page 20 y STOP button Page 21 u PLAY button Page 18 20 i Power switch Page 15 18 21 22 o DIMMER button Page 10 0 VIDEO ON OFF button Page 47 1 OSD button Page 46 2 REVERSE SEARCH button ...

Page 64: ...acks Y CB PB CR PR Page 14 0 BITSTREAM PCM Coaxial digital audio out jack Page 13 1 BITSTREAM PCM Optical digital audio out jack Page 13 2 REMOTE Control in out jacks Page 14 3 AC IN power cord connection terminal q RS232C CONTROL switch Page 15 w RS232C Control Connector Page 15 e REMOTE Control Code switch page 11 r REMOTE Control external internal switch Page 14 t Video output selector Page 14 ...

Page 65: ...Slow button Page 20 37 Reverse Slow button Page 20 37 PROGRAM button Page 41 ENTER buttons Page 15 18 19 Cette télécommande prend en charge deux codes de télécommande DVD1 et DVD2 Lors de la sortie d usine de l appareil la télécommande est réglée sur DVD1 Pour régler la télécommande sur DVD2 maintenir enfoncées simultanément la touche 7 Arrêt et la touche numérique 2 de la télécommande pendant au ...

Page 66: ...Remarques Avant de procéder aux raccordements de cet appareil ou à une modification des raccordements vérifiez que l appareil est hors tension en appuyant sur la touche d alimentation et débranchez le cordon d alimentation de la prise électrique Pour empêcher que le signal vidéo fourni par la lecture d un DVD ne puisse être copié le signal appliqué sur la sortie vidéo analogique du lecteur est alt...

Page 67: ...ruit au moment de la lecture d un DVD portant une gravure Dolby Digital DTS ou MPEG En ce cas veillez grâce au navigateur de mise en oeuvre que les réglages soient conformes au système que vous utilisez page 17 Par ailleurs les réglages audionumériques peuvent être réalisés sur la page de menu Audio 1 pages 24 et 25 Sortie numérique optique Le signal audionumérique est transmis sous forme d impuls...

Page 68: ...ble Bornes REMOTE CONTROL IN OUT Connecter le lecteur de DVD à un autre composant audio Marantz via un câble de télécommande vous permet de piloter à distance les divers composants comme un système unique Quand vous effectuez la connexion à un élément équipé d un capteur de télécommande comme le SR 14 SR 18 SR 19 veillez à connecter la borne REMOTE CONTROL IN du lecteur de DVD à la borne REMOTE CO...

Page 69: ...t sur la position AUTO le signal est appliqué en sortie sans modification Dans le cas d un CD et également dans le cas où aucun disque n est en place le système vidéo précédemment utilisé est adopté Quelques mots sur MOD Modulation PAL SHRINK Réduction de l image Les téléviseurs PAL les plus récents sont en mesure de discriminer les signaux 50 Hz PAL et 60 Hz NTSC et d adapter l amplitude du balay...

Page 70: ...nsion appuyez à nouveau sur ce bouton Remarque Si vous devez piloter via la télécommande le mode d alimentation du lecteur de DVD veillez à laisser cet interrupteur en mode d alimentation 2 Appuyez sur la touche SETUP Quand vous appuyez sur SETUP pour la première fois l écran suivant apparaît Bien que l écran Setup Navigateur puisse être utilisé plus d une fois il n apparaît que la première fois q...

Page 71: ... vous reporter au mode d emploi qui est fourni avec chaque appareil auquel le lecteur est relié de façon à déterminer les formats audionumériques qui peuvent être décodés Si vous n avez effectué aucune liaison audionumérique choisissez la valeur Not Connected Valeurs Dolby Digital Dolby Digital DTS Dolby Digital MPEG Dolby D DTS MPEG PCM Not Connected Réglage usine Définition de la compatibilité a...

Page 72: ...s réglages faits tout est prêt pour la lecture des DVD Video CD et CD Utiliser le lecteur de DVD Si l opération demandée est interdite Il peut arriver que vous ayez commandé une opération qui pour une certaine raison est interdite En ce cas une des icônes ci dessous s affiche sur l écran L opération est interdite par le lecteur L opération est interdite par la gravure du disque Remarques Si vous a...

Page 73: ...t du curseur permettent de passer d une option à l autre la touche ENTER de valider un choix Parfois vous pouvez également utiliser les touches numérotées pour effectuer une sélection Ces touches sont commodes pour le choix direct d une option Dans le cas des menus pour Video CD seules les touches numérotées permettent une sélection Si un menu de Video CD comporte plusieurs pages le passage de l u...

Page 74: ...e sur l écran ne clignote plus mais demeure éclairée l examen rapide vers la fin du disque se poursuit même si vous avez relâché la touche En ce cas appuyez sur la touche PLAY 3 lorsque le passage désiré est atteint Examen rapide vers le début du disque Maintenez la pression d un doigt sur la touche REV 1 1 1 1 1 Relâchez la pression sur la touche REV 1 lorsque le passage désiré est atteint La lec...

Page 75: ...ment différent du point d arrêt Si vous désirez retirer le disque mais être malgré tout en mesure d en reprendre la lecture à partir du point d arrêt utilisez la fonction de mémoire de la dernière image page 44 Arrêt de la lecture et mise en veille DVD Video CD CD 1 Appuyez sur la touche STOP 7 7 7 7 7 La lecture s arrêt 2 Appuyez sur la touche OPEN CLOSE Le tiroir s ouvre 3 Retirez le disque Assu...

Page 76: ...s L ensemble des fonctions est traité tout au long de ce mode d emploi Le mode opératoire décrit sur cette page est un exemple général d utilisation des menus Lors des tout premiers réglages Il est recommandé de régler le lecteur en utilisant l option Setup Navigator page 15 Si vous choisissez Auto Start Off quand l option Setup Navigator apparaît vous pouvez toujours régler le lecteur avec l opti...

Page 77: ...r la touche de déplacement du curseur 2 2 2 2 2 pour revenir à la barre de menu et choisir un autre menu 9 Appuyez sur la touche SETUP pour fermer la page La page de mise en oeuvre se ferme Que signifie les couleurs des témoins qui figurent sur les pages de configuration Lors de la mise en oeuvre de l ensemble et lors des choix de détail il est utile de savoir quels réglages s appliquent à quel di...

Page 78: ...aîne Valeurs Off DTS Réglage usine Remarque Si vous avez réalisé une liaison audionumérique entre le lecteur et un ou plusieurs appareils qui ne sont pas conçus pour décoder les signaux numériques DTS veillez tout particulièrement à choisir la valeur Off En effet si un signal DTS qui est un train binaire est appliqué à un appareil qui ne peut pas le décoder ce signal est perçu comme un bruit d ori...

Page 79: ...ssez la valeur MPEG Lorsqu il est relié à un appareil dépourvu de décodeur MPEG choisissez la valeur MPEG 3 3 3 3 3 PCM de manière que le signal numérique soit converti au format PCM c est à dire au format utilisé pour la gravure sur CD Valeurs MPEG MPEG 3 PCM Réglage usine Mise en et hors service de la sortie numérique En fonction de vos préférences et du type de connexions réalisées vous pouvez ...

Page 80: ... possédez un téléviseur ou un moniteur grand écran Format de la gravure sur DVD Apparence en fonction Gravure au format standard Si la gravure sur le DVD est de type standard et le téléviseur de type grand écran des barres noires peuvent apparaître de Valeur Wide Gravure au format Grand écran Sachez que le format Letter Box sur grand écran entraîne parfois la présence d une barre horizontale noire...

Page 81: ...Si vous connectez un téléviseur qui n est pas compatible avec les signaux à balayage progressif et choisissez le réglage du balayage progressif vous ne verrez aucune image Si vous vous trouvez accidentellement dans cette situation réglez le commutateur VIDEO OUT SELECT du panneau arrière sur COMPOSITE S VIDEO Si le téléviseur connecté utilise des prises composites ou S Vidéo choisissez le réglage ...

Page 82: ...ty Valeurs Cinema Image nette et très contrastée avec un fond clair Animation Image aux couleurs vives et claires Standard Aucun effet n est ajouté à l image vidéo Réglage usine Choix du type d image arrêtée Cette fonction permet d obtenir une image arrêtée de très bonne qualité Choisissez la catégorie Expert puis le menu Video et enfin l option Still Picture pour laquelle vous devez sélectionner ...

Page 83: ...ator du menu Video Affichage ou non du témoin d angle multiple de prise de vues Quand survient la lecture d une scène filmée sous plusieurs angles le symbole s affiche sur l écran Grâce à cela vous savez donc si une gravure de la même scène vue sous un autre angle existe sur le disque Pour afficher ou non ce symbole choisissez la catégorie Expert puis le menu Video et enfin l option Angle Indicato...

Page 84: ...l anglais vous convient ne changez rien Définition des préférences pour la langue des dialogues et celle des sous titres Le menu Language contient un certain nombre d options ayant trait aux préférences en matière de langue des dialogues et celle des sous titres Choix de la langue des dialogues Dans le cas d un DVD la langue des dialogues peut être choisie parmi plusieurs langues Le choix que vous...

Page 85: ...ter plusieurs pistes sonores chacune dans une langue différente de plus certaines pistes peuvent être au format Dolby Digital d autres au format PCM d autres encore dans un autre format Appuyez de manière répétée sur la touche AUDIO pour choisir la langue La première pression sur la touche AUDIO affiche la langue des dialogues présentement choisie Les pressions suivantes sur cette touche sélection...

Page 86: ...ppuyez sur la touche MENU pour afficher le menu du DVD puis effectuez votre sélection HELLO HOLA Subtitle 1 English Subtitle 2 Spanish Choix de la langue des sous titres Dans le cas d un DVD la langue des sous titres peut être choisie parmi les langues disponibles sur le disque Le choix que vous effectuez à l aide du menu est le choix par défaut celui qui est adopté lors de la lecture du DVD suiva...

Page 87: ...dopter automatiquement un certain comportement à savoir s il s agit d un film étranger la langue des dialogues est celle de la piste sonore d origine et les sous titres sont dans la langue choisie comme valeur de l option Subtitle Language s il s agit d un film produit dans votre pays la langue des dialogues est celle de la piste sonore d origine et aucun sous titre n est affiché Choisissez le men...

Page 88: ...i la valeur de cette option est On si le disque ne porte aucun sous titre Le réglage effectué grâce au menu est un réglage par défaut Autrement dit même si la valeur de l option est Off vous avez la possibilité d afficher les sous titres en appuyant sur la touche SUBTITLE Pareillement si la valeur de l option est On vous pouvez arrêter l affichage des sous titre en appuyant sur la touche SUBTITLE ...

Page 89: ...e déplacement du curseur 2 3 5 ou les touches numérotées puis la touche ENTER Frappe du mot de passe Quand vous choisissez l option Level Change ou l option Password Change vous êtes invité à taper le mot de passe un nombre de quatre chiffres Procédez alors de la manière suivante 1 Utilisez les touches de déplacement du curseur 5 5 5 5 5 pour choisir un nombre compris entre 0 et 9 ou bien tapez ce...

Page 90: ...e définissez le niveau de tolérance approprié Modification du mot de passe Modifiez le mot de passe chaque fois que cela vous semble nécessaire Sachez toutefois que vous ne pouvez pas changer le mot de passe si vous l avez oublié puisque la page ci dessous n est pas alors accessible 1 Choisissez l option Password Change pour l option Parental Lock La page de frappe du mot de passe s affiche Tapez ...

Page 91: ...du défilement ralenti des images appuyez sur la touche PLAY 3 Défilement image par image 1 Appuyez sur la touche PAUSE 8 8 8 8 8 2 Appuyez rapidement sur la touche FWD ou REV 1 1 1 1 1 FWD L image suivante apparaît chaque fois que vous appuyez sur cette touche REV 1 L image précédente apparaît chaque fois que vous appuyez sur cette touche Pour revenir à la lecture normale A partir de l avance imag...

Page 92: ...méro du chapitre ou de la plage musicale Remarque La recherche directe d un titre d un chapitre ou d une plage musicale portant un numéro supérieur à 20 n est pas possible Pour localiser un titre un chapitre ou une plage musicale portant un numéro supérieur à 20 employez la méthode décrite sur cette page et faisant appel à la touche SEARCH MODE DIMMER ENTER RETURN T C RANDOM REPEAT MENU TOP MENU A...

Page 93: ...le passage REPEAT A B que vous venez de définir Le passage A B à répéter doit appartenir tout entier au même titre au même chapitre à la même plage musicale Pour annuler la répétition du passage A B Appuyez sur la touche CLEAR La lecture continue mais la répétition est annulée Retour à un point donné du disque 1 Le moment venu appuyez sur la touche REPEAT A B 2 Quand vous désirez revenir à ce poin...

Page 94: ...r la touche NEXT une autre sélection au hasard a lieu et sa lecture commence Appuyez sur la touche PREV 4 la même sélection est reprise depuis le début Pour abandonner la lecture au hasard Appuyez sur la touche CLEAR La lecture normale reprend à partir de la sélection en cours Remarques La lecture au hasard n est pas possible pendant la lecture d un Video CD commandée par menu PBC Pour obtenir la ...

Page 95: ...grammer une pause au début ou à la fin d un programme ni plusieurs pauses consécutives Pour effacer un chiffre Utilisez les touches de déplacement du curseur 5 2 3 pour mettre en valeur le chiffre incorrect puis appuyez sur la touche CLEAR Le chiffre est effacé Le cas échéant les chiffres suivants sont déplacés Pour insérer un chiffre Utilisez les touches de déplacement du curseur 5 2 3 pour mettr...

Page 96: ... un programme Dans le cas d un Video CD ou d un CD appuyez sur la touche PROGRAM Le contenu du programme s affiche Dans le cas d un DVD choisissez le type de programme titre ou chapitre à l aide des touches de déplacement du curseur 2 3 Le programme de lecture de titres ou de chapitres s affiche et vous avez alors toute faculté de le vérifier Pour ajouter quelque chose à un programme 1 Appuyez sur...

Page 97: ...le lorsque ultérieurement vous introduisez le même disque Si vous créez un programme alors que la mémoire en contient déjà 24 le plus ancien programme est effacé 1 Utilisez la touche de déplacement du curseur pour mettre en valeur l option Program Memory puis les touches de déplacement du curseur 3 3 3 3 3 pour choisir la valeur On 2 Appuyez sur la touche ENTER Le programme est mis en mémoire Rema...

Page 98: ...ST MEMORY 1 Mettez en place un disque pour lequel le point d interruption de lecture a été mis en mémoire La lecture de certains DVD commence aussitôt qu ils sont mise en place en ce cas appuyez sur la touche STOP 7 pour arrêter la lecture 2 Le disque étant arrêté appuyez sur la touche LAST MEMORY La lecture du disque à partir du point d interruption commence Certains DVD ne permettent pas l emplo...

Page 99: ...e lecture sont en mémoire La mention Condition Memory s affiche et le jeu de réglages mis en mémoire est utilisé Pour effacer les conditions en mémoire Introduisez le disque concerné puis appuyez sur la touche CLEAR tandis que la mention Condition Memory est affichée Le contenu de la mémoire est effacé Remarques Les réglages en mémoire peuvent être employés à tout moment La mémoire peut contenir 1...

Page 100: ... une autre série d informations qui dépendent bien entendu du disque DVD Information sur les titres TITLE Rangée supérieure numéros de titre et de chapitre temps écoulé depuis le début du titre en cours de lecture Rangée inférieure temps restant avant la fin du titre durée totale de lecture du titre Information sur les chapitres CHAPTER Rangée supérieure numéros de titre et de chapitre temps écoul...

Page 101: ... et les chapitres d un DVD ou les plages musicales d un Video CD ou d un CD appuyez une nouvelle fois sur la touche DISPLAY pour arrêter l affichage Les informations relatives aux titres chapitres et plages musicales s affichent sur l écran Si des informations existent mais ne peuvent pas être affichées faute de place utilisez les touches de déplacement du curseur 2 3 Video CD et CD DVD Informatio...

Page 102: ...z pas les disques dans un endroit où ils sont exposés à la chaleur par exemple sur le siège d une voiture stationnant en plein soleil REMARQUE CONCERNANT LA LECTURE DES DISQUES Tous droits réservés L utilisation en public la diffusion sur les ondes et la copie sont interdites par les lois en vigueur Pour utiliser l appareil correctement et pendant longtemps NE DÉPLACEZ PAS L APPAREIL PENDANT LA LE...

Page 103: ... fait d allumer le téléviseur ou la radio alors que l appareil est sous tension peut entraîner de l interférence lignes sur l écran du téléviseur ou des parasites Il ne s agit toutefois pas d une anomalie de fonctionnement de cet appareil du téléviseur ou de la radio Dans un tel cas éteignez l appareil PRÉCAUTION CONCERNANT LE CORDON D ALIMENTATION Saisissez le cordon d alimentation par la fiche N...

Page 104: ...kk Greenlandic kl Cambodian km Kannada kn Kashmiri ks Kurdish ku Kirghiz ky Latin la Lingala ln Laothian lo Lithuanian lt Latvian lv Malagasy mg Maori mi Macedonian mk Malayalam ml Mongolian mn Moldavian mo Marathi mr Malay ms Maltese mt Burmese my Nauru na Nepali ne Norwegian no Occitan oc Oromo om Oriya or Panjabi pa Polish pl Pashto Pushto ps Quechua qu 0721 0801 0809 0818 0821 0825 0901 0905 0...

Page 105: ...t sert à faire connaître à l ordinateur le changement de l état du lecteur DVD A la réception d une commande le lecteur DVD renvoie OK ERROR ou état Un code ASCII est utilisé pour les données et une distinction est faite entre les lettres majuscules et minuscules Le caractère de début et le caractère de fin sont ajoutés comme indiqué ci dessous pour l envoi de commande et le renvoi d état Le code ...

Page 106: ...deo ON OFF E1 AFFICHAGE Dimmer E2 MEMOIRE CONDITION MEMORY F0 MEMOIRE LAST MEMORY F1 MENU TOP MENU G0 MENU MENU G1 MENU RETURN G2 NUMERIQUE 0 H0 NUMERIQUE 1 H1 NUMERIQUE 2 H2 NUMERIQUE 3 H3 NUMERIQUE 4 H4 NUMERIQUE 5 H5 NUMERIQUE 6 H6 NUMERIQUE 7 H7 NUMERIQUE 8 H8 NUMERIQUE 9 H9 NUMERIQUE 10 HA REGLAGE ANGLE I0 REGLAGE SUBTITLE I1 REGLAGE AUDIO I2 REGLAGE Direction UP I3 REGLAGE Direction DOWN I4 ...

Page 107: ...pas correct Assurez vous que le commutateur VIDEO OUT SELECT est sur la position convenable compte tenu des raccordements au téléviseur page 14 Les raccordements sont incorrects Vérifiez les raccordements et assurez vous que les fiches sont introduites à fond dans les connecteurs Le fonctionnement les réglages du téléviseur ou de l amplificateur audiovisuel ne sont pas convenables Assurez vous que...

Page 108: ... utiliser diverses entrées sur l amplificateur mais jamais l entrée PHONO Le lecteur est en pause Appuyez sur la touche PLAY 3 ou la touche PAUSE 8 pour libérer la pause Le fonctionnement de l amplificateur stéréophonique n est pas correct Vérifiez la position du sélecteur d entrée CD AUX etc et assurez vous qu elle convient aux signaux DVD Le DVD ou le CD portent une gravure DTS Les signaux DTS n...

Page 109: ...er System DTS est un système de correction d ambiance sonore différent de Dolby Digital qui jouit désormais d une grande faveur de la part des réalisateurs de films Pour profiter pleinement des disques DTS et en particulier des pistes son DTS la sortie numérique de cet appareil coaxiale ou optique doit être reliée à l entrée numérique d un amplificateur audiovisuel ou d un décodeur DTS Le signal D...

Page 110: ...utes les lignes en un seul passage et offre une image plus stable sans papillotement par rapport à la vidéo à balayage entrelacé pour une fréquence de balayage donnée Référez vous aussi à Vidéo à balayage entrelacé Code régional restrictif numéro de région A chaque lecteur de DVD et à chaque disque DVD vendus dans une région donnée du globe sont attribués des codes qui en restreignent l utilisatio...

Page 111: ... S A 1 P O Box 11 2833 Beirut Lebanon LITHUANIA Accapella Ltd Ausros Vartu G 5 Pasazo SKG 2001 Vilnius Lithuania MALAYSIA Wo Kee Hong Electronics Sdn Bhd Suite 8 1 Level 8 Menara Genesis No 33 Jalan Sultan Ismail 50250 Kuala Lumpur Malaysia MALTA Doneo Co Ltd 78 The Strand Sliema SLM07 Malta MAURITIUS SKR Electronics Ltd P O Box 685 Bell Village Port Louis Mauritius MILITARY MARKET EUROPE PASCO Gm...

Reviews: