background image


Warnings for charging: 

1. A new battery may be empty and not charged before you get the device. 

2. To achieve the best performance  of the battery, it is better to charge 

it up to 8 hours in the first three times, but not over 16 hours. 

3. In normal charging with DC charger, please make sure to charge it 

for 2 – 2.5 hours to get it fully charged. 

A new battery will reach its best performance after a number   

cycles of charging and discharging.  


If the device is not used for long time, it is better to charge  


it to full capacity every 2 or 3 months during storage.  


If not using the device for a long time, it is wise to take out  


the battery.  


11.2 Charger Application:


DC Charger: 

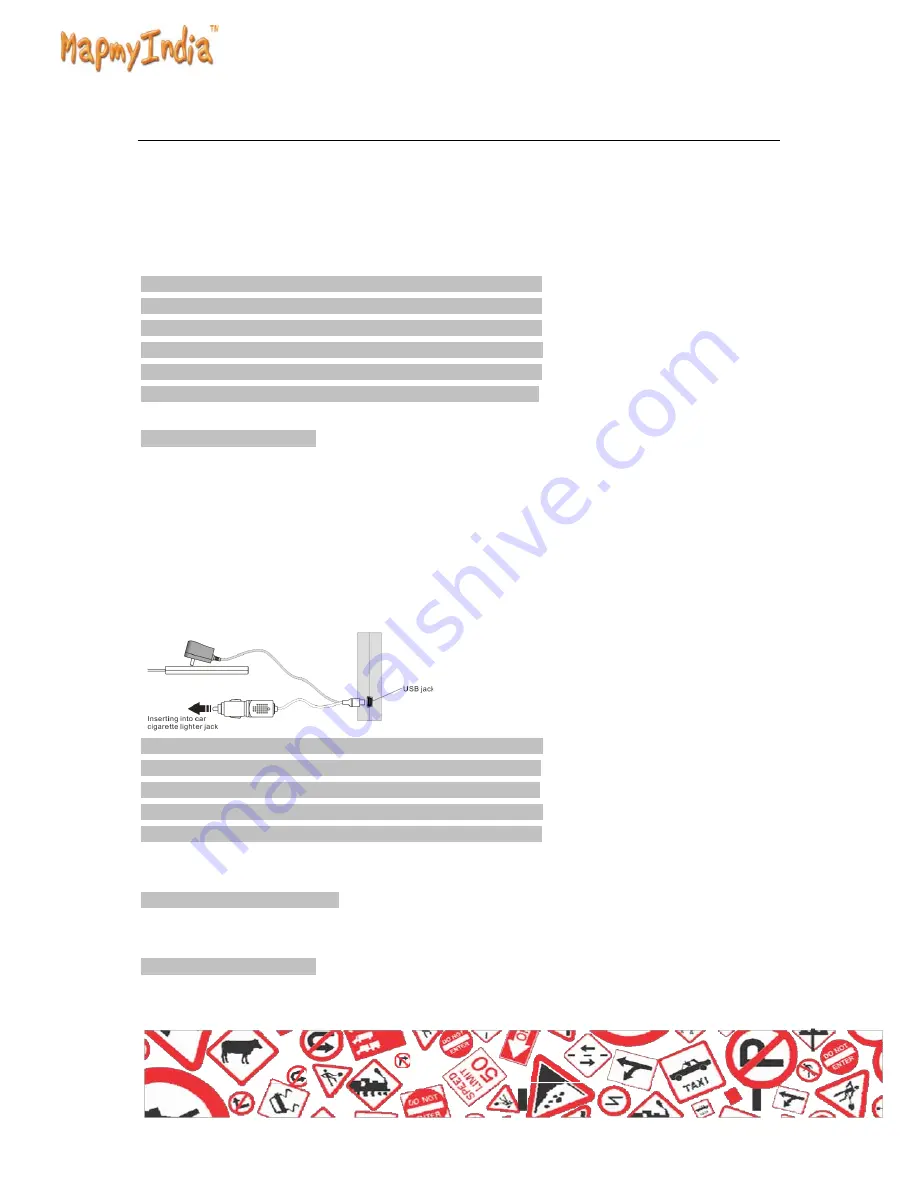
Take out the DC charger, plug it into the wall outlet with AC 220V(100V 

~240V),  then plug in the DC jack into the device DC-in jack.(see the 

illustration  below). 


Car Lighter Charger: 

Please insert the car charger into car cigarette lighter jack, then plug 

into the USB jack(see the illustration  below). 


When you use car charger, please start car engine first, then    

connect it to the device to avoid possible damage to the  


device due to overloaded pulse current during ignition.  


Please pull it out when you stop the engine, and plug it in  


again after next ignition.  


11.3 Power On/Off the device


In power off status, slide the power switch to "ON" position  to turn on 

the device, then the OSD  will be displayed on screen. 

11.4 Sleeping & Power off


In power-on mode,  press the power button  on the device for 3-5 seconds 

then the sleeping mode or confirmation  for power-off screen will display 

Summary of Contents for Lx340

Page 1: ...GPS Portable Navigation Device Lx340 User Manual...

Page 2: ...rovide a warranty for the congenital quality problem but not covering for any loss or damage of property or any consequence caused by or related to using this device The navigation software and mappin...

Page 3: ...ath is defined at place A then turn off the device and move to another place beyond 300 KM away from A the device is under another Satellite Path At this moment the device needs to search for satellit...

Page 4: ...le damages scratches on the device face loose contact of the battery data loss or other hardware part broken to the device Please not use earphone with a continuous and large volume for long time set...

Page 5: ...parked which means AC in car is also not operative the temperature inside in car easily goes above 55C Keeping the device at such high temperature for prolong period of time may affect the device and...

Page 6: ...2 5 0 GPS Test 13 13 6 0 System Setting 14 14 6 1 Language Setting 15 15 6 2 Backlight setting 15 16 6 3 Power Management 16 17 6 4 Sound Setting 16 18 6 5 Time Setting 17 19 6 6 System Resources 17 2...

Page 7: ...e o u t p u t o f your device T a p t h e S c r e e n with your fingertip to select menu Back Components 1 1 1 2 3 1 5 1 4 Ref Component Description 1 Headphone Connector Connects to stereo headphone...

Page 8: ...down the screen to enter the function page Then there will be Looped playback of cartoon click it to entry this function If you click the icons beside the function icon you can enjoy the cartoons If y...

Page 9: ...lash Playback This is to play flash in your PND Operation On system main menu click the icon to entry the function of Media player click icon to get into Flash playing mode then file selection UI will...

Page 10: ...the sound icon will change to Click the mute icon to back to its normal status and the sound icon will back to at the same time In full screen tool bar will be hidden at screen bottom you may get it...

Page 11: ...dden you can slightly tap on screen to get it It will take a few minutes to search fies when video play mode starts if this application has not been used for a long time 3 3 Music Playback This is for...

Page 12: ...n music play mode will return again click button to stop click button to jump to the next one click button to jump to the previous one click button to switch Repeat mode click button to set mute then...

Page 13: ...screen display click button to select display of different percentage Click the button you can Ctrl Shift R or Ctrl R the photo is for selecting to set automatic or manual mode to turn page of display...

Page 14: ...for the satellite to ascertain the ephemeris This may cost a lot of time Clicking Reset button before searching would save much time 6 0 System Setting This is for system setting to change default set...

Page 15: ...s closed and return to the previous menu The system will be required to restart after the interface project is changed 6 2 Backlight setting This is for changing backlight brightness of the device scr...

Page 16: ...splay is shown as the illustration below Click Screen sound in this interface to enable or disable the sound of screen operations Open TTS is to enable the speech broadcasting function TTS speech engi...

Page 17: ...After entering into this UI screen display is shown as the illustration below On this UI click button on the screen to set After setting close the current window to save 6 6 System Resources This is f...

Page 18: ...mputer in which U disk is to set the device as the portable memory and ACTIVESYNC is to use the device for program debug Pictures are shown as below Click the desired connection mode and close the win...

Page 19: ...e double click button or select then click button to open this file The screen display is shown as follows Click or button to turn page up or down Manual Automatic is set for selecting Manual or Autom...

Page 20: ...icle and no bookmark is set Operation In eBook Reading mode click right button to enter into Jump function display of dialogue block is shown as in the illustration below Click the number key on scree...

Page 21: ...ke out the DC charger plug it into the wall outlet with AC 220V 100V 240V then plug in the DC jack into the device DC in jack see the illustration below Car Lighter Charger Please insert the car charg...

Page 22: ...e will wake up the system When in sleeping mode all the procedure in operation will pause but will back to normal status after waking up Specifications CPU SiRF Atlas V Memory 2GB Chip GRF3i Antenna B...

Page 23: ...button is pressed Press and hold the power on button for 5 seconds then Release it to power on Take out the battery then put it Back start the device again 3 Error in upgrade Dead or frozen during up...

Reviews: