7” DIGITAL LCD
– TV 701
20
AUTO
Press and hold this button for 5 seconds can realize au-
tomatic channel search.
RETURN
Press this button is to return to previous channel, press
it again is to return to current channel.
Press this button, the picture can turn left or right.
Press this button, the picture can turn up or down.
Selection of 3 screen modes, i.e., 4:3 and 16:9 and 3.16:
9-1 picture enlargement modes.
Basic Operation
Methods
Basic interface connection
1. Installation Method of Base Support: Align the screw
bolts of base support with the hardware pieces on
bottom of the rear TV cover, rotate in clockwise di-
rection till fix the TV set on the support.
2. Connection Method of Power Supply: Align the po-
wer plug of the AC adapter with the socket jack mar-
ked with DC 12V on the machine cover.
3. Connection Method of External Antenna Conversion
Line Align the conversion head end of the attached
antenna with the wire jack of the TV set, connect the
other end with the external antenna plug.
4. Connection Method of Earphone: Align the earphone
plug with the earphone jack of the TV set, just plug in
till its end is OK.
Notice
If earphone is applied, the sound only transmits through
the earphone, no sound from the TV set.
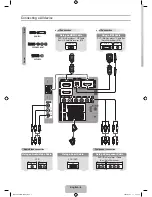
Connection Method of AV Conversion Line
Hold the AV conversion line, align the side of jack mar-
ked with on conversion line with the side of jack marked
with on AV conversion line of the TV “1” Yellow line for Vi-
deo 1 input “2” Red line for Video 2 input “3” White line for
Audio input “4” In-socket power supply 12V input.
Basic TV operation methods
1. Connect with power supply and turn on the power
switch.
2. Pull out the telescopic antenna.
3. Press Channel selection button to choose the desi-
red channel.
4. Adjust the sound volume of the TV signal.
Summary of Contents for TV701
Page 26: ...7 DIGITAL LCD TV 701 26 Note ...


