30 – EN
EN – 31
EN
Filter replacement
Filter replacement
8.3 Replacing the pre-filter
Note
Under normal conditions of use, such as in offices, medical practices, schools and
environments with regular room cleaning, it is recommended to replace both the
prefilter and the HEPA filter at least every two years (if the filter replacement is not
already indicated in the LED display beforehand). An earlier end of service life (due to
improper use and increased contamination, for example) may be manifested by a
louder operating noise or unusual odor development, among other things. In these
cases, the prefilter must be replaced before the recommended service life has been
reached. Operating the UV-C lamps* longer than the recommended 30 minutes per
day can shorten the service life of the HEPA filter.
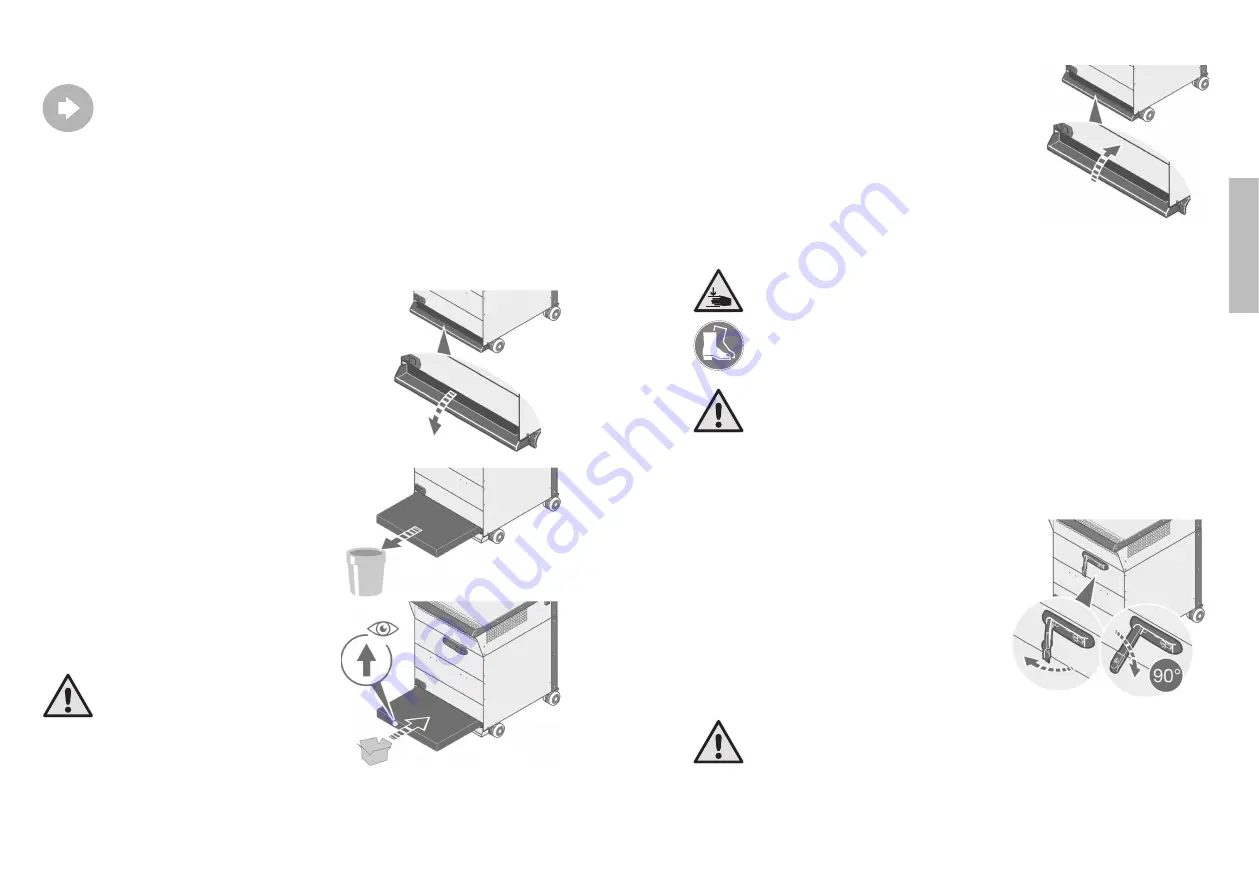
Proceed as follows to replace the pre-filter:
1. Switch off the fan and the UV-C lamps*.
2. Pull on the plug to remove the power cord from
the socket on the appliance.
3. Open the cover of the pre-filter compartment on the back
of the device by pulling down on the recessed grip in a
clockwise direction.
4. Pull out the pre-filter horizontally.
For filter disposal, please observe the special safety
instructions on page 28.
5. Push the new pre-filter horizontally into the pre-filter
compartment as far as it will go until it is fully inserted.
CAUTION!
Note the arrow on the side of the
pre-filter points in the direction of air flow.
The arrow must point upwards when
inserting the filter element.
* Applies to models with integrated UV lamps
6. Use the handle to close the cover.
The lid stays in place as soon as it is closed.
8.4 Replacing the HEPA filter
WARNING!
The HEPA filter element weighs up to 10 kg and has sharp edges.
Please wear safety shoes to protect against leg and foot injuries should the filter
element be dropped.
CAUTION!
The centre of gravity of the appliance is higher when the housing cover is open.
Lock the wheels and ensure that the appliance stands securely.
Proceed as follows to replace the HEPA filter:
1. Switch off the fan and the UV-C lamps*
(see the sections 7.3 and 7.6 from page 19).
2. Use the plug to remove the power cord from the
socket on the back of the appliance.
3. Use the supplied key to unlock the lid fastener
on the rear of the housing.
4. Now unlock the lid by pulling out the locking
lever at its the right-hand end, and turn it
90 ° downwards.
CAUTION!
Danger of tipping when opening the housing lid!
Lock the castors before you open the housing lid!
* Applies to models with integrated UV lamps


