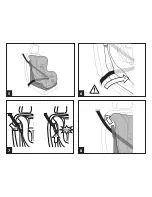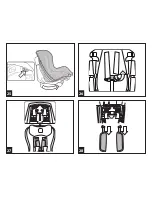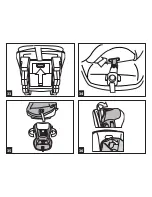
19
• Do not tumble dry.
30
°
How to replace the lining on the Vito car seat
To replace the lining of the Vito car seat:
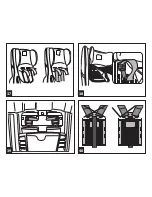
32• insert the safety harness from underneath the frame and
thread them through the openings at the base of the seat.
Insert the strap in the lining of the leg divider;
33• attach it to the opening in the frame
34• attach the strip to the attachment point of the leg divider strap
35• thread the lining starting from the seat and moving
upwards, paying attention to the shape of the backrest.
36• Thread the head rest – make sure the red strip is passed
through the opening in the fabric.
• Thread the shoulder straps in the safety harness.
37• Insert the safety straps in the seat in this order: begin with the
buckle of the shoulder straps and then deal with the straps.
38• extend the straps and insert them in the seat’s frame (the
straps in the upper hole, the buckle in the lower one).
39• fasten them properly in the back, as shown in the picture.
• fasten the safety harness straps (point 17)
IMPORTANT: the straps must not be twisted around.
40•
ATTENTION: The central adjustment strap must pass
between the body and the plastic shield, as shown.
41• fasten them to the back attachment point, threading them
behind the instructions tray.
• apply the booster seat if the baby is still small.
Serial numbers
42• The name of the product, production date and serial number
of the Vito can be found under the seat.
43• The approval label of the Vito is behind the backrest.
44• Production date of the strap.
This information is required for any complaints.
Product cleaning
• This product requires a small amount of maintenance.
Cleaning and maintenance must only be carried out by adults.
• Keep all moving parts clean and if necessary lubricate
them with light oil.
• Clean the plastic parts periodically with a damp cloth. Do
not use solvents or similar substances.
• Brush the fabric parts to remove dust.
• Do not clean the polystyrene shock absorbing device with
solvents or other similar products.
• Protect the product from atmospheric agents: humidity,
rain or snow. Extended exposure to sunshine can cause
colour changes in many materials.
• Store the product in a dry environment.
How to read the approval label
• This paragraph explains how to interpret the approval label
(orange label).
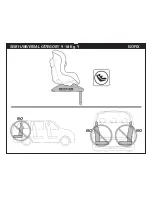
• The label is double because this car seat is approved for
two types of installation in cars:
•
ISOFIX attachment systems
(the term SEMI-UNIVERSAL
class A indicates compatibility of the car seat with vehicles
fitted with this system).
•
Attachment systems using static or inertia-reel three-point
safety belts
(the term UNIVERSAL indicates compatibility of the
car seat with vehicles fitted with this type of belt).
• The top of the label displays the trademark of the
manufacturing company and the name of the product.
• The letter E in a circle indicates the European approval
mark and the number indicates the country that issued the
approval (1: Germany, 2: France, 3: Italy, 4: Netherlands, 11:
Great Britain, 24: Republic of Ireland).
• Approval number: if it starts with 04, this indicates the fourth
amendment (the one currently in force) of Regulation R44.
• Reference standard: UN/ECE R44/04.
• Production serial number: on issue of approval, each car
seat is personalized with its own number.
Summary of Contents for Vito
Page 1: ...VitoTT VOTT_0118_1011_V1 Vito instruction for safe use...
Page 3: ...OK NO NO NO NO NO UNIVERSAL CATEGORY 9 18 Kg Y BELTED...
Page 4: ...B A 1 2 3 4...
Page 5: ...B C A D 5 7 8 6...
Page 6: ...NO NO O N NO SEMI UNIVERSAL CATEGORY 9 18 Kg Y ISOFIX...
Page 7: ...OK B A click B A 10 9 11 12...
Page 8: ...OK A B A C C B 13 14 15 16...
Page 9: ...A B A 18 17 19 20...
Page 10: ...OK 21 22 24 23 NO NO 1 1 2 3 4 5 6 7 2 3 4 5 6 7...
Page 11: ...A B 26 27 28 25 A...
Page 12: ...29 30 31 32 B A A B...
Page 13: ...33 34 35 36...
Page 14: ...37 38 39 40...
Page 15: ...0409 42 41 43 44 A...
Page 21: ...21...
Page 22: ......
Page 23: ......

