17
OPERATION
Charging the battery (not included)
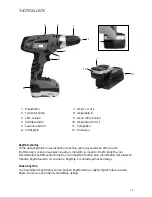
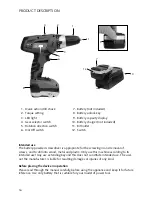
a. To remove the battery (7), push the battery unlocking buttons (8) and pull the bat-
tery backwards.
b. It is only possible to charge the battery in a temperature range between 0°C and
40°C.
c. Check if the voltage indicated on the type plate corresponds to the local mains volt-
age before you connect the charger.
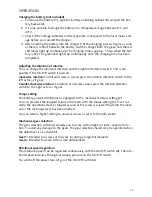
d. After inserting the battery into the charger (10) the charging process begins as soon
as there is contact between the battery and the charger. Both the green and the red
LED lamps light up continuously. The charging time is approx. 1 hour when the bat-
tery is flat. The green LED lights up continuously once the charging time has been
completed.
Adjusting the direction of rotation
You can charge the rotational direction with the right/left rotation switch. This is not
possible if the On/Off switch is pressed.
Clockwise rotation:
To drill and screw in screws press the rotation direction switch to the
left as far as it goes.
Counter-clockwise rotation:
To detach or unscrew screws press the rotation direction
switch to the right as far as it goes.
Torque setting
The battery-powered drill/driver is equipped with a mechanical torque setting (2).
You can preselect the required torque in 20 levels with the torque setting (2). If set cor-
rectly, the operational tool is stopped as soon as the screw is screwed flush into the mate-
rial or the set torque level has been reached.
You can select a higher setting to unscrew screws or set it to the drill symbol.
Mechanical gear selection
The gear selection switch (4) enables you to work with a higher or lower speed of rota-
tion. To avoid any damage to the gears, the gear selection should only be operated when
the drill/driver is at a standstill.
Gear 1:
intended for screws or for work involving a large drill diameter.
Gear 2:
intended for work with a small drill diameter.
Rotational speed regulation
The rotational speed can be regulated continuously with the On/Off switch (6). The rota-
tional speed increases through increasing pressure on the On/Off switch.
To switch off the power tool, let go of the On/Off switch (6).

