


SkyRaider DS287 User Manual
August 19, 2018
SkyRaider DS287 User Manual
Page 43
Hopefully, your telescope is mostly polar aligned, and you are ready to visit your
first DSO, and produce an image to impress one friends, neighbors, and spouse
(so you can justify spending all of your hard-earned money on those extra pieces
of equipment that you just had to have for imaging).
The first thing we need to align and verify focus of our Telescope. To do that we
only need a short duration exposure (under 5 seconds), so we will use
Video
Mode
.
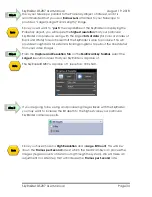
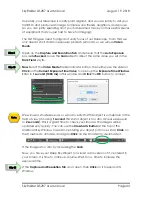
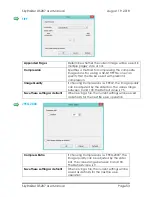
Open up the
Capture and Resolution Tab
, and ensure that the
Auto Exposure
box is
unchecked
. Move the
Gain
slider to about the same value you set in the
Dark Field
, say
5.
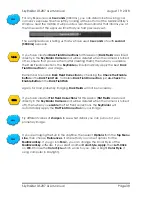
Now
Select the
Video Mode
Radial indicator button, then either use the slider or
Click
on the
Current Exposure Time
Value
to open up the
Exposure Time Window
.
Enter in
1 second (1000 ms)
in this window and
Click
the
OK
button to accept.
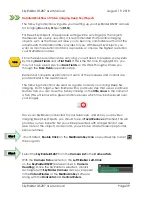
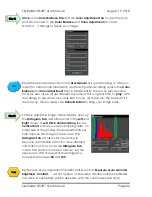
We will use a small exposure, so we can verify that the object is someplace in the
field of view (if in using
1 second
the star or object is too dim, increase exposure
to
2 seconds
). This is a great time to check your focus as the images will be
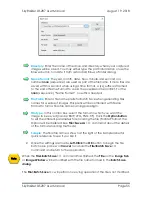
updated very quickly. You can use the
Crosshair’s Button
at the top of the
MallincamSky Window to assist in centering you object (or focus a star).
Click
on
the Crosshair to activate, and again
Click
on the Crosshair to deactivate it.
If the image is too dim, try increasing the
Gain
.
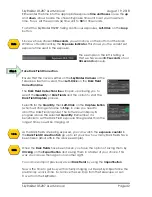
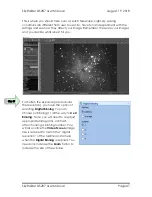
Now, you have your Deep Sky Object (or a least a dim version of it, centered in
your screen. It is time to crank-up-volume. Well, for us, time to increase the
exposure time.
If the
Capture and Resolution Tab
is not open, then
Click
on it to expand its
Window.
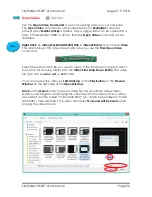
Step 11
Step 9
Step 10