


19
ENGLISH
2.
Wipe and shake dust off the sponge filters by
hand. When the sponge filters are clogged, wash them
in soapy water.
Fig.44
3.
Install the sponge filters in their original position.
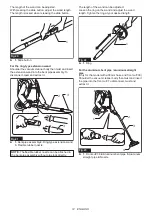
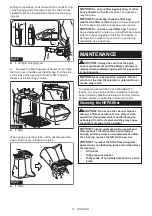
Cleaning the dust bag
Regularly clean the dust bag with soap and water. Turn
the dust bag inside out and remove the sticky dust.
Wash lightly by hand and rinse well with water. Dry
completely before installing to the vacuum cleaner.
Fig.45
NOTICE:
Wet dust bag lowers the vacuuming per-
formance as well as the life of the motor.
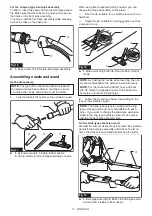
Cleaning the clog
When cleaning the clog, remove the hose or the exten-
sion wand, or the bent pipe assembly to check inside.
Refer to the section for attaching bent pipe assembly.
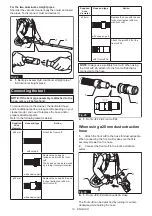
Cleaning the room for filter bag/dust bag
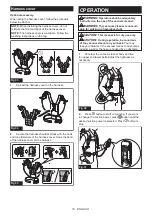
This appliance is equipped with a dust beating system. As you
walk while carrying the cleaner, springs underneath the board
vibrate the board and shake the dust off the filter bag/dust bag.
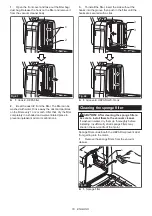
When cleaning the room for filter bag/dust bag, remove
and wipe the board inside.
1
Fig.46
►
1.
Board
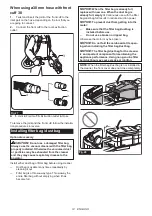
Removing the board
1.
Remove the HEPA filter. Refer to the section for
cleaning the HEPA filter for how to remove.
2.
Push down the board, and slide it to left until the
board touches the wall.
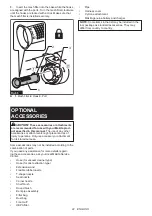
3.
Lift the right side of the board up and take it out.
1
Fig.47
►
1.
Board
Summary of Contents for VC011G
Page 23: ...23...


