


13
ENGLISH
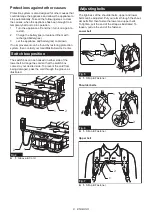
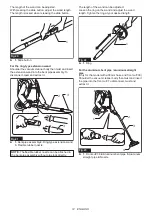
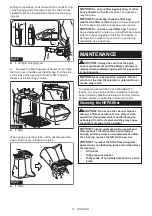
For the two aluminum straight pipes
Shoulder the vacuum cleaner body then twist and insert
the pipes. To disconnect, twist and extract it.
3
1
2
Fig.24
►
1.
Bent pipe assembly
2.
Aluminum straight pipe 1
3.
Aluminum straight pipe 2
Connecting the tool
NOTE: If the bent pipe assembly is attached to the
hose, remove it beforehand.
To connect a tool to the cleaner, the dedicated hose
and/or additional parts are required. Depending on your
cleaner model, you need to replace the hose and/or
prepare additional parts.
Refer to the following table for details.
Supplied
hose
diameter
Hose end type
Action
ø28 mm
without part
Attach the front cuff.
with snap-on part
Replace the hose end
(snap-on part) with the front
cuff.
The hose end can be removed
by turning it counterclockwise.
ø32 mm
with snap-on part
Replace the hose with the one
for dust extraction (ø28 mm,
with front cuff).
Supplied
hose
diameter
Hose end type
Action
ø38 mm
with snap-on part
Replace the hose with the one
for dust extraction (ø28 mm,
with front cuff).
with front cuff 38
Attach the joint 22-38 or the
front cuff 24.
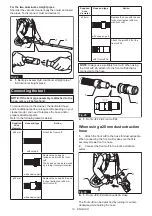
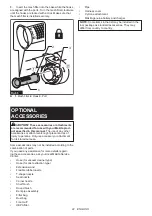
NOTE:
Always use a suitable front cuff. When using
the front cuff 24, attach it to the front cuff 22 that is
connected to the hose.
1
2
Fig.25
►
1.
Front cuff 22
2.
Front cuff 24
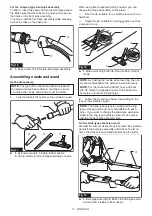
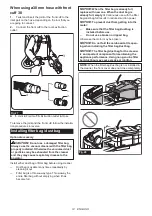
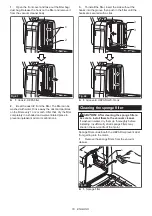
When using ø28 mm dust extraction
hose
1.
Attach the front cuff to the hose for dust extraction.
When connecting the front cuff, make sure that it is
securely screwed on the hose.
2.
Connect the front cuff to the tool's extraction
outlet.
1
2
3
Fig.26
►
1.
Front cuff
2.
Extraction outlet
3.
Hose
The front cuff can be detached by turning it counter
-
clockwise while holding the hose.
Summary of Contents for VC011G
Page 23: ...23...


