P 4/ 35
[3] DISASSEMBLY/ASSEMBLY
[3]-1. Warning
・
There is a risk of a burn injury immediately after the engine is stopped. So wait until the engine has completely cooled
before performing the work.
・
Completely remove all fuel from the inside of Fuel tank and Carburetor before performing the work. [No open flames]
・
Remove the engine oil before performing the work.
・
Perform the work on a solid workbench in a place where dust, dirt, etc. will not enter inside.
・
Remember how and where the parts were assembled when disassembling the product and take care not to make a mistake
when assembling the product.
Prepare boxes so that you can store the parts in groups when disassembling the product.
・
Handle the removed parts carefully and clean and wash them properly.
・
If a bolt or screw cannot be loosened, do not apply excessive force. Use an impact driver or similar tool.
・
Be sure to tighten bolts and screws to the specified tightening torque values.
・
After assembling the main parts, turn the engine by hand to check that there is no abnormality or looseness.
[3]-2. Blower Section (Band Completes L and R, Frame and Fan)
Disassembly
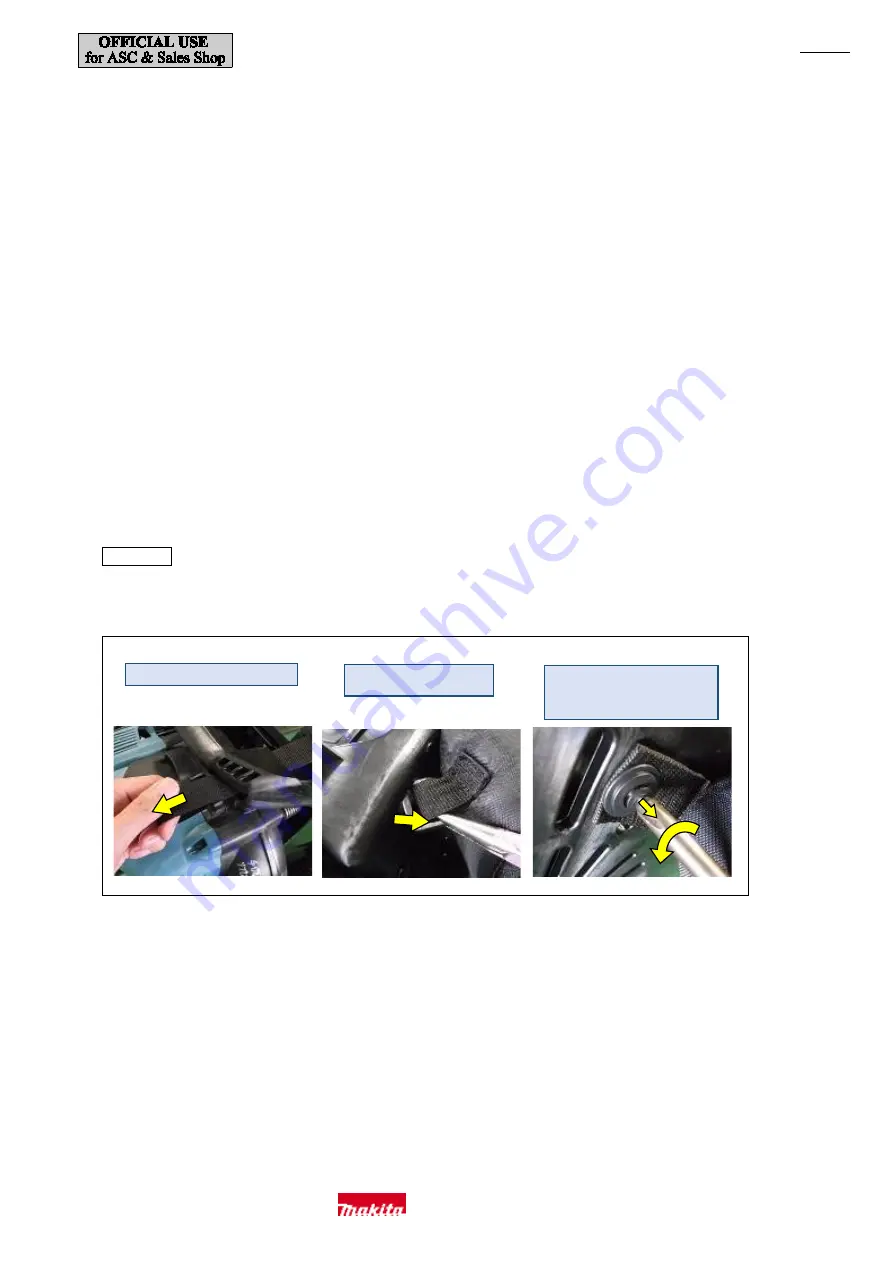
(1) Remove Band completes L and R and Hip belt. Remove each of the fixing parts as shown in
Fig. 1
.
Fig. 1
Pull out the band as shown above.
Position the buckle vertically
and then remove it.
Turn the center of Lock rivet with
a Phillips screwdriver to loosen it a
little and then remove it.
Makita Corporation


