


July 2015
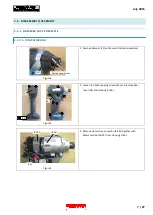
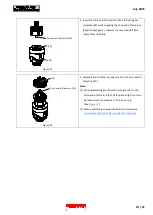
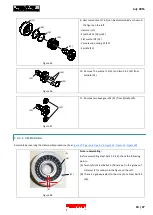
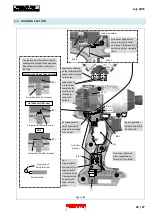
5. Press the drive end of Armature (30) to a workbench to
separate Armature (30) from Yoke unit (29).
Figure 19
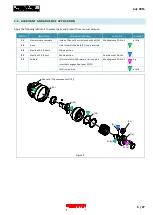
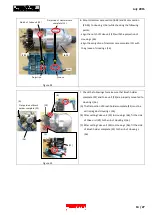
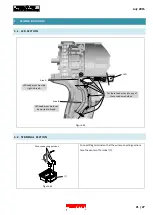
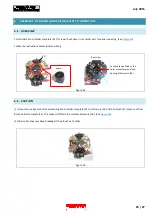
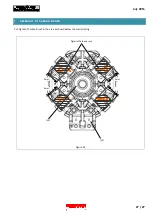
3.3.2.2.
ASSEMBLING
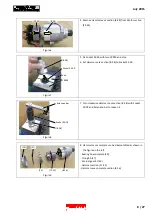
1. Face the notch of Yoke unit (29) to the drive-end side
of Armature (30).
Figure 20
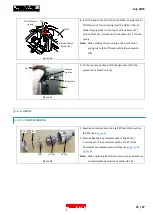
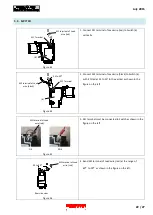
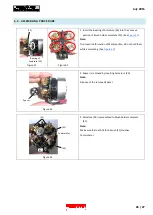
2. While holding Yoke unit (29) on a workbench, insert
Armature (30) into Yoke unit (29) slowly until the drive
end of Armature reaches workbench.
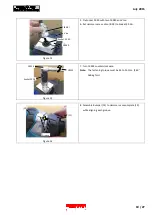
3. When the drive end of Armature (30) reaches a
workbench, lift up Yoke unit (29) slowly.
Note:
- Do not pinch your finger between Armature fan and Yoke
unit (29).
- Insert Armature (30) into Yoke unit (29) carefully so that its
wire is not damaged.
Figure 21
Drive end of
Armature (30)
Drive end of
Armature (30)
Notch of Yoke unit (29)
(29)
(30)
(30)
(29)
Drive end of Armature (30)
(30)
(29)
12 / 27