21 ENGLISH
Removing and installing filter
CAUTION:
After cleaning filter, be sure to
reassemble it in the correct position.
Clean the filter at regular intervals since using a clogged
filter may result in poor suction performance.
1.
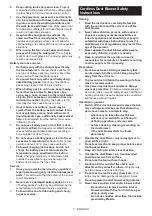
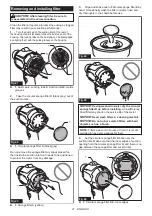
Turn the dust cap on the suction inlet at the rear of
the housing counterclockwise to take the dust cap out of the
housing. Two locking tabs on the dust cap can be disengaged
by aligning them with the guide grooves on the housing.
1
2
3
4
Fig.41
►
1.
Dust cap
2.
Locking tabs
3.
Suction inlet
4.
Guide
grooves
2.
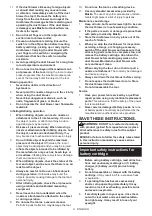
Take the circular sponge filter B (black gray) out of
the suction inlet.
1
Fig.42
►
1.
Circular sponge filter B (black gray)
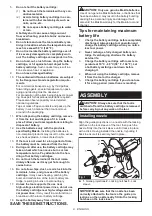
Do not remove the sponge filter A (yellow) placed fur
-
ther inside the suction inlet as it needs to be positioned
to protect the motor from any damage.
1
Fig.43
►
1.
Sponge filter A (yellow)
3.
Wipe and shake dust off circular sponge filter B by
hand. Occasionally wash the filter in water, rinse and
dry thoroughly in the shade before use.
Fig.44
Fig.45
NOTICE:
Having washed in water, dry the circular
sponge filter B up before installing.
An insufficiently
dried filter may shorten the service life of the motor.
NOTICE:
Never wash filters in a washing machine.
NOTICE:
Do not rub or scratch filters with hard
objects such as a brush.
NOTE:
Filters wear out in course of time. It is recom-
mended to have some spares for them.
4.
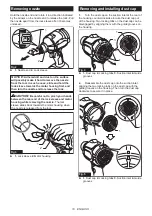
Set the circular sponge filter B back over the
suction inlet. Make sure that the inner edges of suction
opening hold the circular sponge filter B, and there is no
gap between the sponge filter and suction inlet.
1
2
Fig.46
►
1.
Circular sponge filter B
2.
Inner edges

