6 ENGLISH
Overload protection
When the battery is operated in a manner that causes
it to draw an abnormally high current, the tool automat
-
ically stops without any indication. In this situation, turn
the tool off and stop the application that caused the tool
to become overloaded. Then turn the tool on to restart.
Overheat protection
When the tool or battery is overheated, the tool stops
automatically and the lamp blinks. In this case, let the
tool and battery cool before turning the tool on again.
Overdischarge protection
When the battery capacity is not enough, the tool stops
automatically and the lamp blinks. In this case, remove
the battery from the tool and charge the battery.
Switch action
WARNING:
Before installing the battery car-
tridge into the tool, always check to see that the
switch trigger actuates properly and returns to
the "OFF" position when released.
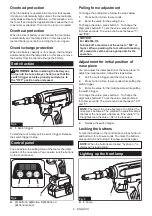
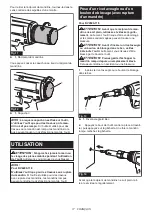
1
Fig.3
►
1.
Switch trigger
To start the tool, simply pull the switch trigger. Release
the switch trigger to stop.
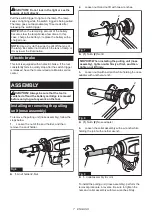
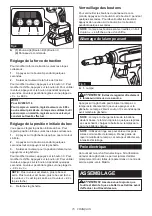
Control panel
You can adjust the pulling force of the tool or the initial
position of the nose piece. You can also lock the buttons
on the control panel.
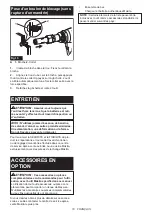
1
2
3
4
Fig.4
►
(1)
Button A
(2)
Button B
(3)
Button C
(4)
Control panel
Pulling force adjustment
To change the pulling force, follow the steps below.
1.
Press button A for a few seconds.
2.
Enter the value for the pulling force.
To change the value, press button C. To change the
digit, press button B. To set the value, press button A
for a few seconds. The value can be set between "0"
and "999".
NOTICE:
For BV4500-118
To break off a mandrel, set the value to "900" or
higher. When operating the tool without breaking
off a mandrel, set the value appropriate for the
operation.
Adjustment for initial position of
nose piece
You can adjust the initial position of the nose piece. To
adjust the initial position, follow the steps below.
1.
Pull the switch trigger until the motor stops.
2.
Press button A for a few seconds while pulling the
switch trigger.
3.
Enter the value for the initial position while pulling
the switch trigger.
To change the value, press button C. To change the
digit, press button B. To set the value, press button A
for a few seconds. The value can be set between "-99"
and "0".
NOTE:
The larger the value becomes, the tighter the
nose piece becomes. The smaller the value becomes,
the looser the nose piece becomes. (The value "0" is
the tightest and the value "-99" is the loosest.)
4.
Release the switch trigger.
Locking the buttons
To lock the buttons on the control panel, press button A
and button C for a few seconds. To unlock the buttons,
press button A and button C for a few seconds again.
NOTE:
When the buttons are locked, "hyphen (-)" is
displayed instead of digit.
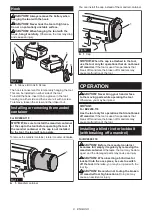
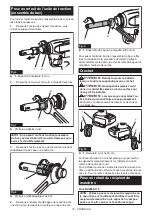
Lighting up the front lamp
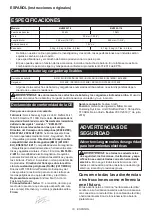
1
Fig.5
►
1.
Lamp

