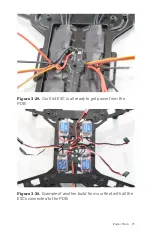
No Props for You!
Be sure the propellers are not attached to the
motors yet. That will be our very last step after we
have confirmed everything is working as expected.
This is an important safety step.
Step 6: Connect Brushless Motors
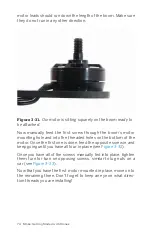
Our brushless motors will connect to the speed controllers via
the three black wires that that we attached our bullet connec-
tors to earlier. If you’re new to brushless motors, you may notice
something funny at this point: the wires are not labeled. But
there’s a reason why. There is no wrong way to connect a brush-
less motor to a speed controller, only different directions of
motor rotation. You can connect those three wires in any possi-
ble combination and it would never be “wrong” in the sense that
you are going to damage the motor; it will simply spin in one
direction or the other.
Our ultimate goal is to make the NE and SW motors spin in a
counterclockwise direction. But because our build is not com-
plete yet, just hook them all up the same and we can test them
later in the book to find out what changes we need to make.
Now it becomes pretty apparent why there is value in using bul-
let connectors! If you had to do this step with soldering directly
between the components, it would become much more difficult!
If you are building something other than our exam-
ple kit, consult your autopilot manual in order to
confirm motor directions.
Step 7: Clean Up
At this point, it’s a great idea to use a couple of cable ties and
clean up your wiring job. It’s also helpful to place identifying tabs
on the servo leads coming out of the speed controllers before
you button everything up. This will make your life much easier
76 Make: Getting Started with Drones
Summary of Contents for Belinda Kilby
Page 1: ......
Page 3: ...Make Getting Started with Drones Terry Kilby and Belinda Kilby...
Page 26: ......
Page 90: ......
Page 126: ......
Page 153: ...Figure 9 10 Compass setup Figure 9 11 Compass calibration ArduPilot Mega APM Setup 141...
Page 198: ......


