3.2 REC
This section is for recording flow.
3.2.1 REC
1. Information
a) Input MPEG2 TS,NIM,ISO/IEC 13818-2,H.264;
Output MPEG2 PS packet,only contain Video and Audio PID,no Teletext,Subtitle,
EPG etc,the output Video file format is “.MPG” and Audio file format is “.MP3”,the
output files can be played by other players which supports MPEG2 PS;TS packet,
contain Video and Audio PID,Teletext,Subtitle etc,the output Video file format is “.TSV” ,
the output files can be played by other players which supports TS
b) The save direction for the output files: the inserted storage device (USB/Card). If user
wants change the output direction, he can open the partition list by pressing the button
“Device” and make the choice. It supports 4 partitions at most;
c) The rules of naming the output files: Program name + (REC date_time(h/m/s),eg BBC
ONE(20111023_123456).MPG. If a long-time recorded file takes more than 3.9GB, it
cuts and makes a new file named by adding an extra sequence number. eg: BBC ONE
(20111023_123456)001.MPG.
2. Recording Flow
a) Set up the working partition(default partition): (This step is adapt to Timeshift also)
1) There is a Partition list shows the partitions connected to the system in Partition List
menu, Press KEY_GREEN to set the focus partition as default;
2) System will set the partition which is recognized firstly as default partition before
record if user does not set before;
3) Recorded files will be stored in the default partition.
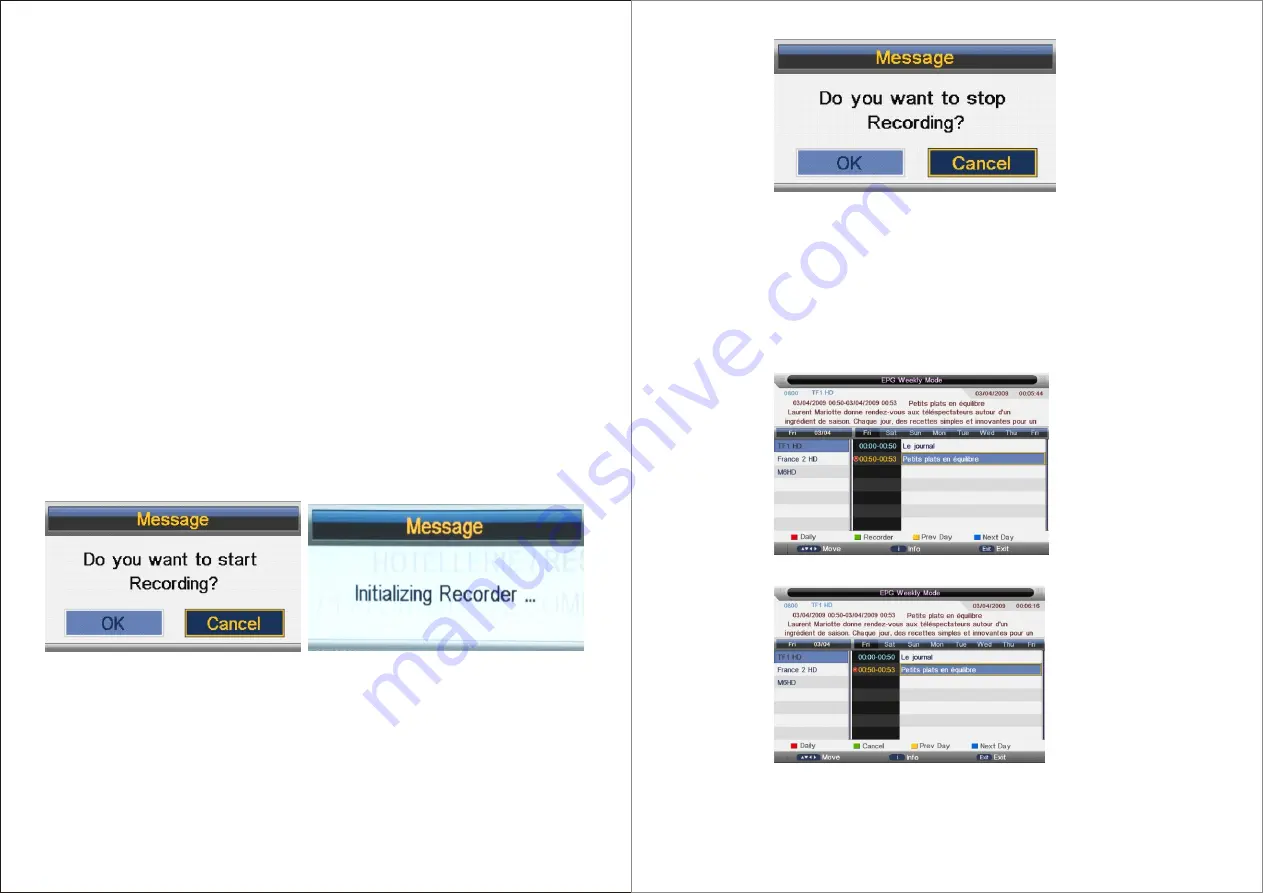
b) Press KEY_REC to start recording, when there is a program playing, it will pop up a
message “Do you want to start Recording?”. After confirm, the system will read the
speed of the storage device. If the speed is too low for recording, there is a message
“Device speed not enough, RECORD anyway?” if user choose Yes, it will record
constrainedly. In addition, the speed is high enough, it initializes in the first instance
and starts to record later.
(Confirm record window)
(Initializing recorder window)
c) As the initialization successfully ends, a REC input info menu appears on the right top
corner of the picture and it starts to record while the program is playing in the background;
d) Press KEY_DISPLAY to get the current recording information from the Info Banner, such
as current recording time and the recording progress. The recording time depends on
how much of the program has been recorded actually;
e) If the signal is not stable there may be some pause;
f ) The recording progress will stop when the device has no more free spaces if there is no
setting about when to end before. A warning massage pops up, the recording process
stops and it will keep on the normal playback process. Otherwise the progress ends
naturally when the timer is timeout. Also user could press KEY_STOP to end recording
manually;
g) System will prompt user error message and try to continue recording if there are some
bad tracks in disk.
(REC info and stop recording window)
3.2.2 Timer REC
There are two methods to set a timer. As follows:
1. In the EPG menu user can preengage programs for watching or recording;
a) Pressing KEY_GREEN once is to preengage the program only for watching(when
timeout, it jumps to the program and only play.
b) Pressing KEY_GREEN twice is to preengage the program for recording (when timeout,
it jumps to the program and starts recording). if it is timeout in standby mode, it will
power on 2 minutes in advance and starts to record under background without powering
on the panel. To watch the program, user need to press KEY_POWER;
c) The preengaged programs can be checked in Timer menu.
(Press KEY_GREEN once for reminder)
(Press KEY_GREEN twice for recorder)
2. In Timer menu, user can increase
、
delete preengage programs; In Timer Edit menu, user
could set
、
modify preengaged programs’ information;
In Timer menu: press KEY_YELLOW to get into Timer Edit menu to add a timer .Then set
timer’s information in Timer Edit menu.
71
70
Summary of Contents for LED323GS
Page 1: ...USER S MANUAL LED TV INSTRUCTION MANUAL Model LED323GS ...
Page 41: ...78 ...
Page 42: ...81 80 ...
Page 43: ...x Troubleshooting 83 82 ...


