background image

DVD Setup Menu

33

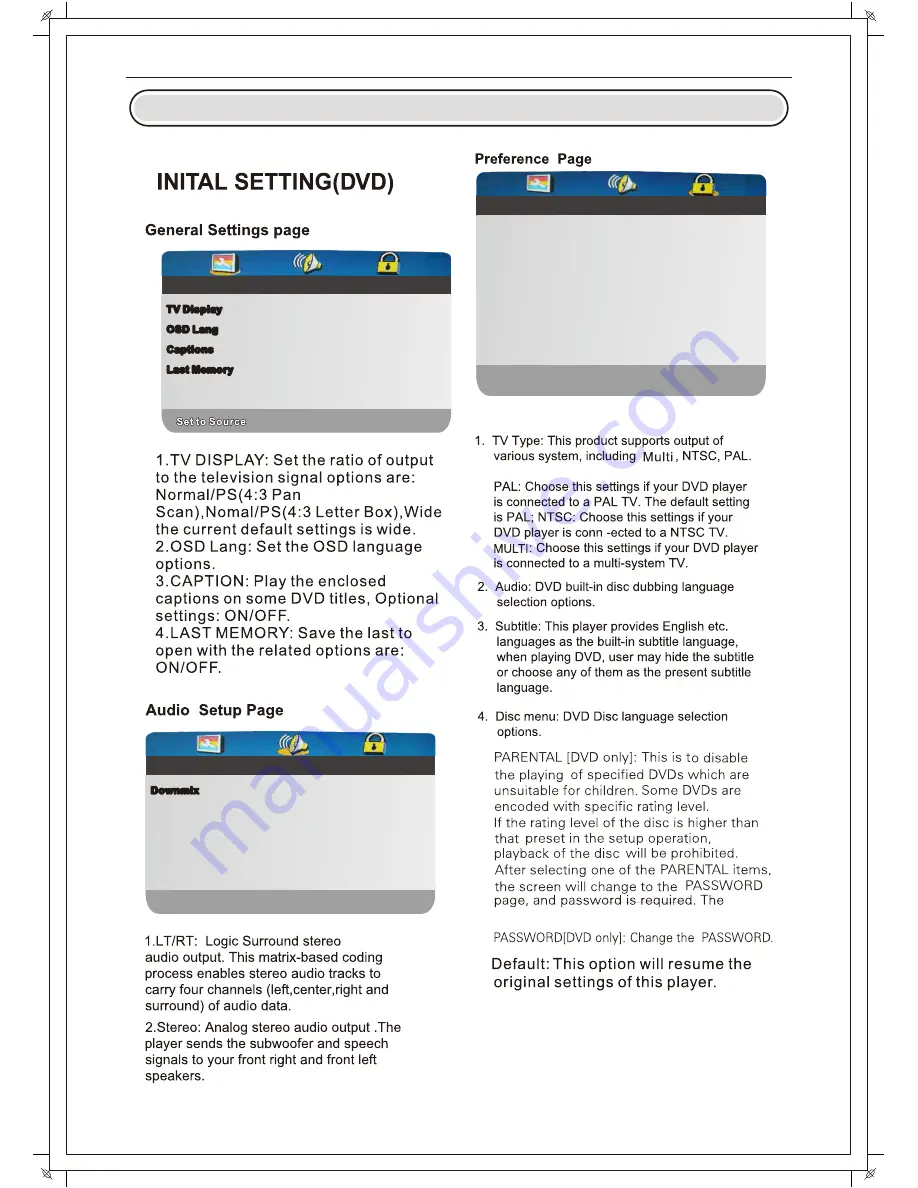
- -  General Setup Page - -

TV Display

OSD Lang

Captions

Last Memory

Wide

Eng

Off

Off

Wide

Eng

Off

Off

- -  General Setup Page - -

- -  General Setup Page - -

STR

STR

- -  General Setup Page - -

Downmix

Go To Speaker Setup Page

Go To Speaker Setup Page

- -  Preference Page - -

NTSC

Eng

Eng

Eng

NTSC

Eng

Eng

Eng

- -  Preference Page - -

TV Type

Audio

Subtitle

Disc Menu

Parental

Password

Default

TV Type

Audio

Subtitle

Disc Menu

Parental

Password

Default

Go To Preference Page

Go To Preference Page

Default Password is 8888.

5.

6.

7.

Summary of Contents for L192DE

Page 1: ...LED TV INSTRUCTION MANUAL Model L192DE...

Page 2: ...is required when the apparatus has been damaged in any way such as power supply cord or plug is damaged liquid has been spilled or objects have fallen into the apparatus has been exposed to rain or mo...

Page 3: ...Allow 10 cm between the LED TV and other appliances or built in cabinet walls When you wipe the front cabinet please make sure the power plug is pulled out and use a soft dry lint free cloth and handl...

Page 4: ...ctric shock Only qualified professionals should conduct internal adjustments maintenance and checks The TV set should not be subjected to water droplets vapor or splash This equipment should not be pl...

Page 5: ...eries in the Remote Control SYSTEMS CONNECTIONS AV Input PC Input HDMI Input YPbPr Input COAXIAL USB Input OSD Menu Operation Channel Picture Sound Time Option Lock Midia part DVD Setup Menu DVD OPERA...

Page 6: ...en size Display Type Resolution Brightness Contrast Ratio Aspect Ratio Alimentation Power consumption TV system Video Input Format Antenna Input Audio Output Weight Dimensions With stand 19 TFT LED 13...

Page 7: ...cessories Please make sure the following items are included with your LED TV If any items are missing contact your dealer Remote Control Batteries AAAx 2 Owner s Instructions Assembling Stand Process...

Page 8: ...POWER Press POWER button to toggle between normal and standby mode MENU Press to see an on screen menu of your TV s features CH Press to change channels In the on screen menu use the CH SOURCE 8 4 5 6...

Page 9: ...to the audio output jack on a Personal computer 15 USB Connecting for USB device 1 DC IN input 2 EARPHONE Connecting for headphone 3 COAXLAL The rear panel jacks on your TV make it easy to connect a D...

Page 10: ...Remote Control Unit 6...

Page 11: ...lay the source and channel s info 25 26 27 28 AUTO adjust in the PC mode Delete function button Rename function button Move function button Skip function button R DELETE G RENAME Y MOVE B SKIP 29 FAV...

Page 12: ...In or Out by Teletext window Play and Pause by Media Player DVD Stops playback by Media Player and DVD Fast Rewind by Media Player and DVD Fast Forward by Media Player and DVD Plays previous file by...

Page 13: ...have good connections before connecting power 1 AV INPUT Audio video input Use the SOURCE button to select AV on the remote control VGA OUTPUT DVD VGA OUTPUT PC AUDIO OUTPUT VGA OUTPUT 2 PC INPUT PC...

Page 14: ...nections 3 HDMI INPUT HDMI input Use the SOURCE button on the remote control to select HDMI DVD HDMI OUTPUT HDMI 4 YPbPr INPUT Video component input Use the SOURCE button on the remote control to sele...

Page 15: ...Systems Connections 5 COAXIAL 6 USB INPUT Use the SOURCE button on the remote controller to select Media USB memory 11 COAXIAL Cable Not supplied Digital Audio System AUDIO Cable Not supplied COAXIAL...

Page 16: ...12 Input Source Antenna AV YPbPr DVD PC HDMI 1 HDMI 2 Media Player ATV OK OK OK OSD Menu Operation...

Page 17: ...13 Auto tuning DVB T Manual tuning Program Edit OSD Menu Operation...

Page 18: ...14 LCN Software update OSD Menu Operation...

Page 19: ...15 Auto Tuning OSD Menu Operation...

Page 20: ...16 ATV Manual Tuning OSD Menu Operation...

Page 21: ...17 Picture Mdde Noise Reduction Color temperature Aspect Ratio OSD Menu Operation...

Page 22: ...18 Sound mode Auto volunme Surround sound The other item Balance OSD Menu Operation...

Page 23: ...19 Clock OSD Menu Operation...

Page 24: ...20 Off time On time OSD Menu Operation...

Page 25: ...21 Time Zone Sleep timer Auto standby OSD timer OSD OSD Menu Operation...

Page 26: ...22 Reset ECO Mode Blue screen OSD Menu Operation...

Page 27: ...23 Language PVR File system OSD Menu Operation...

Page 28: ...installation The function of HDMI Majestic Link allows you to connect to various other products which will provide you the function of HDMI ARC Auto Standby Auto TV on and Device control Majestic Link...

Page 29: ...25 First Time Installation Tv Connection Antenna Tune Type DTV ATV Return OK OK Menu OSD Menu Operation...

Page 30: ...26 Set password Block program OSD Menu Operation...

Page 31: ...27 Parental guidance key lock Hotel mode OSD Menu Operation...

Page 32: ...28 OSD Menu Operation...

Page 33: ...29 OSD Menu Operation...

Page 34: ...30 OSD Menu Operation...

Page 35: ...31 OSD Menu Operation...

Page 36: ...32 OSD Menu Operation...

Page 37: ...ge STR STR General Setup Page Downmix Go To Speaker Setup Page Go To Speaker Setup Page Preference Page NTSC Eng Eng Eng NTSC Eng Eng Eng Preference Page TV Type Audio Subtitle Disc Menu Parental Pass...

Page 38: ...DVD OPERATION 34 DVD Support List...

Page 39: ...Troubleshooting 35 8 MUTE plugged in been...

Page 40: ...Picture defects and the reason 36 Snowy Picture...

Page 41: ...USER S MANUAL...

Reviews: