IMPORTANT SAFEGUARDS FOR AUDIO PRODUCTS
PLEASE READ CAREFULLY THE FOLLOWING IMPORTANT SAFEGUARDS THAT ARE APPLICABLE TO
YOUR EQUIPMENT.
1. Read Instructions -
All the safety and operating instructions should be read before the
appliance is operated.
2. Retain Instructions -
The safety and operating instructions should be retained for future
reference.
3. Heed Warnings -
All warnings on the appliance and in the operating instructions should be
adhered to.
4. Follow Instructions -
All operating and use instructions should be followed.
5. Water and Moisture -
The appliance should not be used near
water-for example, near a bathtub, washbowl, kitchen sink, laundry tub,
in a wet basement, or near a swimming pool and the like.
6. Carts and Stands -
The appliance should be used only with a cart or stand
that is recommended by the manufacturer.
6A.
An appliance and cart combination should be moved with care. Quick stops, excessive force,
and uneven surfaces may cause the appliance and cart combination to overturn.
7. Wall or Ceiling Mounting -
The appliance should be mounted to a wall or ceiling only as
recommended by the manufacturer.
8. Ventilation -
The appliance should be situated so that its location or position does not interfere
with-its proper ventilation. For example, the appliance should not be situated on a bed, sofa,
rug, or similar surface that may block the ventilation openings; or, placed in a built-in installation,
such as a bookcase or cabinet that may impede the flow of air through the ventilation openings.
9. Heat -
The appliance should be situated away from heat sources such as radiators, heat
registers, stoves, or other appliances (including amplifiers) that produce heat.
10.Power Sources -
The appliance should be connected to a power supply only of the type
described in the operating instructions or as marked on the appliance.
11.Grounding or Polarization -
Precautions should be taken so that the grounding or polarization
means of an appliance is not impeded.
12.Power -
Cord Protection - Power-supply cords should be routed so that they are not likely
to be walked on or pinched by items placed upon or against them, paying particular attention
to cords at plugs, and the point where they exit from the appliance.
13.Cleaning -
The appliance should be cleaned only as recommended by the manufacturer.
14.
This product is designed for use with the antenna attached and should not be connected to
any other external antennas.
15.Non-use Periods -
The power cord of the appliance should be unplugged from the outlet
when left unused for a long period of time.
16.Object and Liquid Entry -
Care should be taken so objects do not fall and liquids are not
spilled into the enclosure through openings
17.Damage Requiring Service -
The appliance should be serviced by qualified service personnel
when:
A. The power-supply cord of the plug has been damaged; or
B. Objects have fallen, or liquid has been spilled into the appliance; or
C. The appliance has been exposed to rain; or
D. The appliance does not appear to operate normally or exhibits a marked change
inperformance; or
E. The appliance has been dropped, or the enclosure damaged.
18.Servicing -
The user should not attempt to service the appliance beyond that described in
the operating instructions. All other servicing should be referred to qualified service personnel.
23
2
Da AUX a SD/USB
Il sistema è in grado di convertire il segnale audio proveniente da AUX in formato MP3 e memorizzarlo in un dispositivo USB
o Scheda-SD (di default su USB se entrambi i dispositivi sono rilevati)
1. Premere una o più volte il tasto
FUNCTION
/
per selezionare AUX.
2. Premere il tasto
REC
/
per iniziare la registrazione, il sistema leggerà automaticamente il contenuto del dispositivo
USB/Scheda-SD e creerà una cartella per memorizzare il brano MP3.
3. Verranno visualizzati il simbolo REC ed il messaggio RIPP TO, il simbolo AUX inizierà a lampeggiare.
4. Il simbolo del dispositivo di destinazione, USB o CARD, inizierà a lampeggiare quando inizia la registrazione.
5. Premere il tasto
STOP/BAND
per terminare la registrazione da AUX
Nota: Verrà visualizzato il messaggio NO FUNCT se si preme qualsiasi tasto durante la registrazione da AUX. Verrà
visualizzato il messaggio NO DEV se non vengono rilevati né dispositivi USB né Schede-SD. Verrà visualizzato il
messaggio FULL se non cè abbastanza memoria disponibile nel dispositivo selezionato.
Cancellare brani MP3
Il sistema è in grado di cancellare MP3 precedentemente registrati o file esistenti.
1. In modalità riproduzione USB o Scheda-SD, premere e tenere premuto per 2 secondi il tasto
REC/ERASE
/
, il brano
in riproduzione sarà fermato e cancellato.
2. Verrà visualizzato il messaggio delete
ALTOPARLANTI ESTERNI OPZIONALI
1. Con la vostra nuova radio, avete la possibilità di collegare degli altoparlanti esterni.
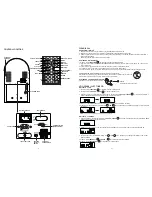
2. Le prese per gli altoparlanti esterni è posizionata sul retro della radio.
A fianco delle prese per gli altoparlanti cè un interruttore con scritto Int./Ext.
Quando utilizzate altoparlanti esterni, linterruttore deve essere nella posizione EXT. In questo modo si disattivano gli
altoparlanti interni e la potenza di uscita viene indirizzata agli altoparlanti esterni.
3. Se si decide di non utilizzare altoparlanti esterni, assicurarsi che linterruttore sia nella posizione INT.
ILLUMINAZIONE A LED
Lilluminazione frontale a led (7 colori che si alternano) è regolata dall interruttore posto sul retro dellunità (LIGHTING SWITCH
(RELEASE/HOLD)).


