Engine Bolts and Firewall Requirements
The engine should be mounted to either a glass-filled nylon engine mount,
a machined aluminum engine mount, or an integrated hardwood beam
mount. Use only high-quality 6-32 or 4mm steel socket-cap screws and
related hardware to mount the engine to the engine mount. The firewall in the
aircraft should be aircraft grade 5-ply plywood no less than 1/4" thick and the
firewall should be reinforced to meet the torque and weight of the engine.
Fuel Tank Size and Orientation to Carburetor
Ideally, the stopper in the fuel tank should be level with the high speed needle
valve or just slightly below it. Some models will only allow the fuel tank to be
mounted higher than the ideal location. A fuel tank that is positioned higher
than the ideal location usually doesn’t pose any problem except when it is
mounted excessively higher and/or is used in conjunction with an inverted
mounted engine or during extreme aerobatic flight. If you mount the engine
inverted, we strongly suggest lowering the fuel tank so the stopper assembly
is slightly below the high speed needle valve. Doing this will prevent fuel
from siphoning into the engine and flooding it. If you cannot lower the fuel
tank far enough, we suggest lowering it as far as can be allowed in your
particular application.
The size of the fuel tank used should be 10oz.~12oz., depending on the
model and the length of flights desired. Use of a 12oz. tank will provide
approximately 15 minutes of run time at full throttle. Use of a fuel tank any
larger than 12oz. can lead to excessive leaning of the engine during flight
and is not recommended.
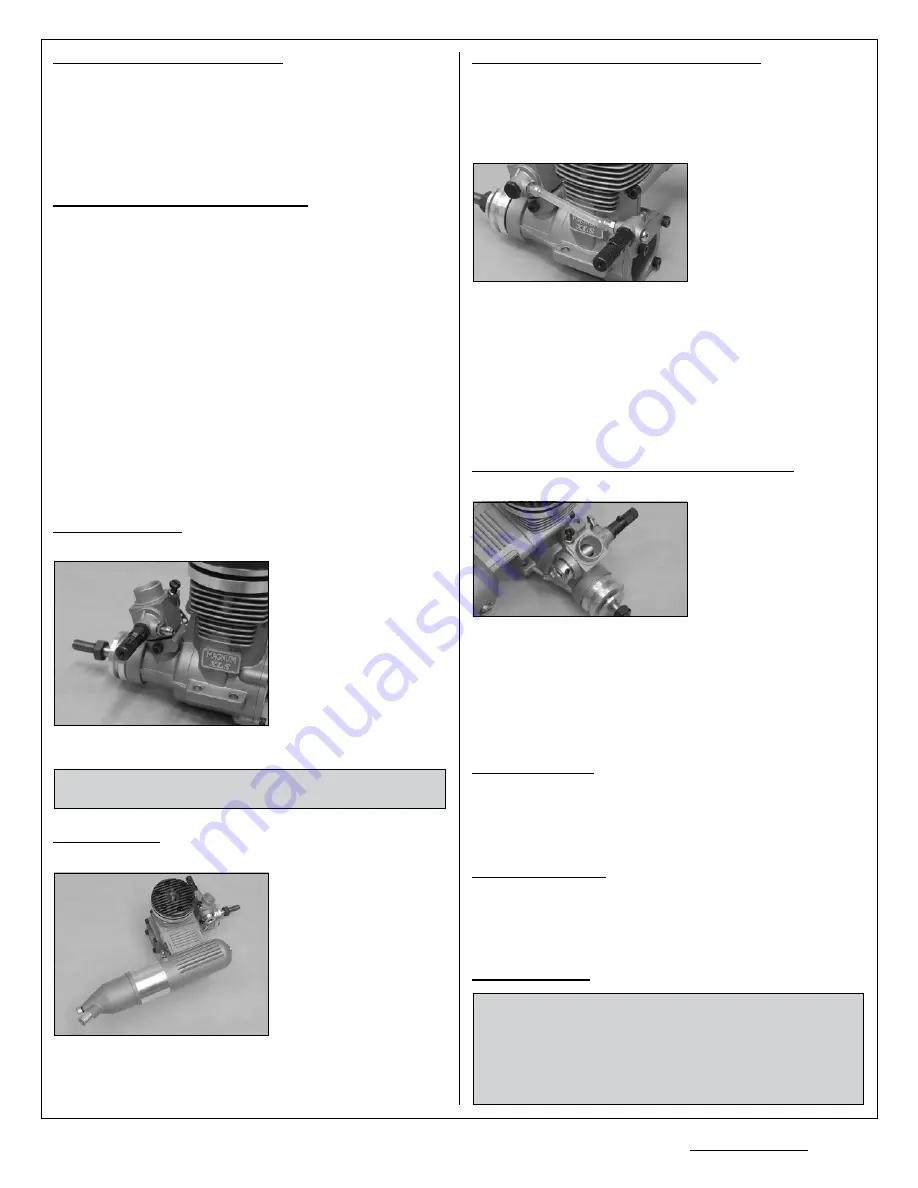
Carburetor Installation
The carburetor is held in place using two socket-cap screws provided. Slide
the base of the carburetor into the
crankcase, being careful to keep
the carburetor perpendicular to
the front of the engine. Using
your thumb, push down firmly on
the carburetor so that the base of
the carburetor sets completely
into the crankcase. An o-ring is
installed on the carburetor throat
to seal the joint. While holding the
carburetor firmly down into place, install and
GENTLY
tighten the socket-cap
screws using the hex wrench provided.
WARNING
Do not overtighten the socket-cap screws or you might strip
the threads in the carburetor, resulting in replacement of the carburetor.
Muffler Installation
The muffler is mounted to the engine using the two socket-cap screws, two
split washers and one of the two
gaskets provided. The second
gasket should be kept as a spare.
Tighten both screws firmly to
prevent the muffler from loosening
during flight. The exhaust cone
on the back of the muffler can
be adjusted to better match the
installation of your particular
application. To adjust the exhaust
cone, loosen the retaining nut, rotate the cone to the desired angle, then
tighten the retaining nut firmly while holding the axial bolt in place from the
front of the muffler.
It is important to tighten the retaining nut firmly to
prevent the exhaust cone from loosening during flight.
Carburetor Idle Stop Screw and Adjusting the Idle Speed
The idle stop screw holds the throttle barrel in the carburetor body and
also adjusts the closure of the
throttle barrel. We recommend
adjusting the idle stop screw to
allow the throttle barrel to close
completely. This will allow you
to adjust the idle speed via your
transmitter; therefore, you will
need to set up your transmitter throttle trim lever to keep the engine at a low
idle when the trim lever is centered, then to shut off the engine when the trim
lever is pulled all the way back. To adjust the idle stop screw
, first loosen the
hex nut using an adjustable wrench, then loosen the idle stop screw (turn
counter-clockwise) to allow throttle barrel to close more, or tighten the idle
stop screw (turn clockwise) to make the throttle barrel stay open more.
When satisfied with the adjustment, tighten the hex nut firmly.
Needle Valve Extension
If an extension is required to adjust the high speed needle valve, use a
1.5mm diameter wire of the necessary length (not included). Loosen the
grub screw in the side of the needle valve using a 1.5mm hex wrench, insert
the wire into the end of the needle valve, then tighten the grub screw firmly.
Throttle Arm Position
The throttle arm angle can be adjusted to better suit your particular
application. Using a 1.5 hex wrench, loosen grub screw in the side of the
throttle arm, then adjust the angle of the throttle arm either forward or
backward, and firmly tighten the grub screw.
Propeller Installation
WARNING
Before installing the propeller it must be balanced. Running
your engine using an out-of-balance propeller can lead to excessive vibration,
which will result in excessive stress and wear on both the engine and the
airframe. Balance the propeller using the method recommended by the
propeller manufacturer. Several products are available to properly balance
propellers. Ask your local retailer for more information about these items.
2
Global Services
l
18480 Bandilier Circle
l
Fountain Valley, CA 92708
l
Phone: (714) 963-0329
l
Fax: (714) 964-6236
l
Email: [email protected]
Rear Needle Valve Assembly Installation - Optional
Your XLS Series engine comes with the needle valve preinstalled in the
carburetor. Also included is a rear needle valve assembly which can be
installed in place of the carburetor mounted needle valve assembly. By using
the rear needle valve assembly, adjusting the needle valve is safer because
it's further behind the spinning propeller.
To mount the rear needle valve
assembly, use an adjustable
wrench to unscrew and remove
the needle valve assembly from
the carburetor and to unscrew
and remove the plug from the
rear needle valve mount.
Carefully thread the needle valve assembly into the rear needle valve mount
and tighten it firmly, then carefully thread the plug into the carburetor and
tighten it firmly. Remove the two upper backplate mounting screws, then
install and tighten the two longer socket-cap screws and split washers
(included with the rear needle valve assembly) to secure the rear needle
valve assembly to the engine backplate. Connect the length of fuel tubing
provided between the chrome fuel nipples on the rear needle valve assembly
and the carburetor. The fuel pick-up line from your fuel tank should be
connected to the larger brass nipple on the rear needle valve assembly.


