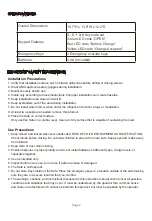
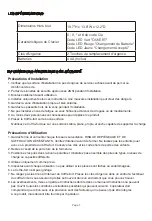
Magnum 13106 User Manual Download Page 2

SPECIFICATIONS

IMPORTANT SAFETY INFORMATION

Installation Precautions

1. Verify that installation surface has no hidden utility lines before drilling or driving screws.
2. Wear ANSI-approved safety goggles during installation.
3. Mount securely before use.
4. Install only according to these instructions. Improper installation can create hazards.
5. Keep installation area clean and well lit.
6. Keep bystanders out of the area during installation.
7. Do not install when tired or when under the influence of alcohol, drugs or medication.
8. At least two people are needed to move this product.
9. Place the Safe on correct surface.
    Only use this Safe on a stable, level, clean and dry surface that is capable of sustaining the load.

Use Precautions

1. Keep closed and locked whenever unattended. RISK OF CHILD ENTRAPMENT AND SUFFOCATION. 
    Check inside before closing. Do not allow children to play with or near safe. Keep keys and codes away
    from children.
2. Keep clear of door when closing.
3. Position batteries in proper polarity and do not install batteries of different types, charge levels, or 
    capacities together.
4. Use as intended only.
5. Inspect before every use; do not use if parts are loose or damaged.
6. The Safe is not fireproof.
7. Do not store Keys inside of the Safe. Place the emergency keys in a location outside of the safe making 
    sure they are in a secure location that you can find.
8. The warnings, cautions, and instructions discussed in this instruction manual cannot cover all possible
    conditions and situations that may occur. It must be understood by the operator that common sense 
    and caution are factors which cannot be built into this product, but must be supplied by the operator.

Page 2

Overall Dimensions

19.7"H x 13.8"W x 12.2"D 

Keypad Features

0 - 9,   & # Key code set
Green LED code “OPEN”
Red LED code “Battery Change”
Yellow LED code “Change Accepted”

Emergency Keys

2 Emergency override keys

Batteries

4 AA (Included)

Summary of Contents for 13106

Page 1: ...t Observe all safety information to protect yourself and others Failure to observe the instructions may result in property damage and or personal injury Please keep instructions for future reference F...

Page 2: ...allow children to play with or near safe Keep keys and codes away from children 2 Keep clear of door when closing 3 Position batteries in proper polarity and do not install batteries of different typ...

Page 3: ...or if Entry Code is forgotten Remove Emergency Lock Cover Insert Key and turn counterclockwise Turn Knob clockwise and open Door Remove Key and replace Emergency Lock Cover Store Keys in secure place...

Page 4: ...DOOR Turn the knob master key counterclockwise to close the door AUTOMATIC LOCK 3 Continuously wrong entries will activate the warming beep for 20 seconds CAUTION The key pad would be disabled during...

Page 5: ...eparate Use the expansion bolts or clamping screws to secure the case to the wall Make sure the case is mounted in place as required and then tighten all screws CAUTION Use the expansion bolt when the...

Page 6: ...s curit pour vous prot ger et prot ger les autres Le non respect des instructions peut entra ner des dommages mat riels et ou des blessures Veuillez conserver les instructions pour r f rence future Po...

Page 7: ...ou proximit du coffre fort Conserve les cl s et les codes hors de port e des enfants 2 Restez l cart de la porte lors de la fermeture 3 Positionnez les piles dans la bonne polarit et n installez pas e...

Page 8: ...gence Ins rez la Cl et tournez dans le sens antihoraire Tournez le Bouton dans le sens des aiguilles d une montre et ouvrez la Porte Retirez la Cl et replacez le Couvercle de Verrouillage D urgence Ra...

Page 9: ...principale dans le sens antihoraire pour fermer la porte VERROUILLAGE AUTOMATIQUE 3 Entr es continuellement erron es activeront le bip de r chauffement pendant 20 secondes MISE EN GARDE Le clavier se...

Page 10: ...r Utilisez les boulons d expansion ou les vis de serrage pour fixer le bo tier au mur Assurez vous que le bo tier est mont en palette comme requis puis serrez toutes les vis MISE EN GARDE Utilisez le...

Reviews: