background image

MF CT200


- 3 - 


EXPLODE-VIEW: 


Summary of Contents for MF B200

Page 1: ... 1 MF B200 YK B0801A M MAGNETIC BIKE OWNER S MANUAL ...

Page 2: ...MF CT200 2 IMPORTANT PLEASE READ THIS MANUAL CAREFULLY BEFORE USING THE BIKE ...

Page 3: ...TIONS 2 EXPLODE VIEW 3 INNER EXPLODE VIEW 4 PARTS LIST 5 ASSEMBLY TOOLS 6 ASSEMBLY STEPS 7 CONDITIONING GUIDEWIRES 10 TARGET HEART RATE 10 BEGINNERS GUIDE 11 WORK OUT TIPS 11 HOW TO BEGIN 11 STRETCHING GUIDE 12 SPECIFICATIONS 19 ...

Page 4: ...ediately If there are any defective components do not use the exercise bike 5 Keep unsupervised children away from the exercise bike at all times 6 The exercise bike should not be used by persons weighing more than 120 kg 7 Wear appropriate clothing and athletic shoes when exercising do not wear loose clothing or jeweler that may get caught in moving parts 8 Do not arch your back when using the ex...

Page 5: ...MF CT200 3 EXPLODE VIEW ...

Page 6: ... 4 INNER EXPLODE VIEW ...

Page 7: ... 1 40 Belt wheel 1 5 Handle bar 1 41 Washer 1 6 Seat post 1 42 tri groove nut 1 7 Seat sliding joint 1 43 Ball rack 2 8 Seat 1 44 Bowl seat 2 9 Display 1 45 Nut 1 10 Tension controller 1 46 Loose proofed washer 1 11 Washer 1 47 Nut 1 12 Cross pan head bolt 1 48 Inner hexagon bolt 2 13 Sensor wire 1 49 Spring washer D8 3 14 Tension wire 1 50 Clip spring 2 15 Sensor trunk wire 1 51 Magnetic board ax...

Page 8: ...MF CT200 6 ASSEMBLY TOOLS ...

Page 9: ... wire 15 Then connect the Tension wire 14 with the Tension controller 10 At last fix the Handlebar post 4 to the Main frame 1 with inner hexagon pan head bolt D and Arc washer C STEP 3 Lock the Pedal 16L R onto the Crank of the Main frame 1 ATTENTION There are labels L and R on the left and right pedals You should assemble the left pedal in anti clockwise direction while the right pedal in clockwi...

Page 10: ...post 6 into the Mainframe 1 and finally fix it with Spring knob G STEP 5 Adjust the Handle bar 5 to a suitable angle Insert the T like screw F through Handlebar chunk cover 21 Bushing 20 and Washer 19 to fix the Handlebar 5 onto the Handlebar post 4 STEP6 Connect the Handle pulse wire 22 and Trunk wire 15 to the wire of the Display 9 correctly Attach the Display 9 to Handlebar post 4 tighten the D...

Page 11: ...hose with health problems WHY EXERCISE Exercise has been proven essential for good health and general wellbeing Regular exercise will Relieve tension and stress Provide enjoyment and fun Stimulate the mind Help maintain stable weight Control appetite Boost self image Improve muscle tone and strength Improve flexibility Lower blood pressure Relieve insomnia TARGET HEART RATE TRAINING ZONE AGE MIN M...

Page 12: ...oo soon can lead to injuries If you are sore or tired give yourself a few extra days to recover HOW TO BEGIN Start with two or three 15 minute sessions per week with a rest day between work outs Warm up for 5 to 10 minutes with gentle movements like walking or swinging your arms in a circle and then stretch the muscles you ll use during your work out Seated cycling works mainly the quadriceps thin...

Page 13: ...ual mobility exercises of all the joints i e simply rotate the wrists bend the arm and roll your shoulders This will allow the body s natural lubrication synovial fluid to protect the surface of your bones at these joints Always warm up the body before stretching as this increases blood flow around the body which in turn makes the muscles more supple Start with your legs and work up the body Each ...

Page 14: ...ck of the rear leg starting to stretch Note Keep your back and rear leg straight when performing this stretch Side the rear leg backwards to increase this stretch if required HAMSTRING STRETCH Sit with one leg extended Bring the other leg towards you and rest the sole of that foot onto the inner thigh of the extended leg Keeping your shoulders square reach forward towards your toes as far as possi...

Page 15: ...alance reach back and grasp one foot with your other hand Bring your heel as close to your buttocks as possible Hold for the required count and then relax INNER THIGH STRETCH Sit with the soles of your feet together and your knees outward Pull your feet toward your groin area as far as possible Hold for the required count and then relax ...

Page 16: ...ch as far as possible Hold for the required count the slowly return to the upright position and relax GLUTS BUTTOCKS STRETCH Sit up with your right leg stretched outwards place your left foot over your right leg at the knee joint placing your foot flat on the floor Use your right arm to pull the bent knee across your body until you begin to feel a stretch in the left buttock Hold for ...

Page 17: ... knees bent Keeping your upper back firmly on the floor allow your knees to fall to one side your lower back will rotate naturally Hold for the required count and relax Repeat on the other side Note If any pain is felt avoid this stretch UPPER ABDOMINALS STRETH Lie on your stomach with your forearms flat on the floor palms ...

Page 18: ...required count and then relax UPPER BACK Start off on all fours looking down towards the floor Push your shoulders as high as possible imagine a wire placed between your shoulder blades lifting you Hold for the required count and then relax Note This stretch is sometimes called the cat stretch CHEST STRETCH Stand up and place both hand on the small of your back just above your backside ...

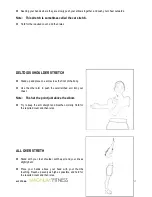
Page 19: ... across the front of the body Use the other arm to push the outstretched arm into your chest Note Push at the point just above the elbow Try to keep the arm straight and breathe normally Hold for the required count and then relax ALL OVER STRETH Stand with your feet shoulder width apart and your knees slightly bent Place your hands above your head with your thumbs touching Reach up evenly as high ...

Page 20: ...MF CT200 18 SPECIFICATIONS Dimensions L x W x H 890x470x1300mm Batteries 2 x AA size Class Rating HC Maximum User Weight 120kg Please note that the specifications are subject to change without notice ...

Reviews: