Be Strong.
™
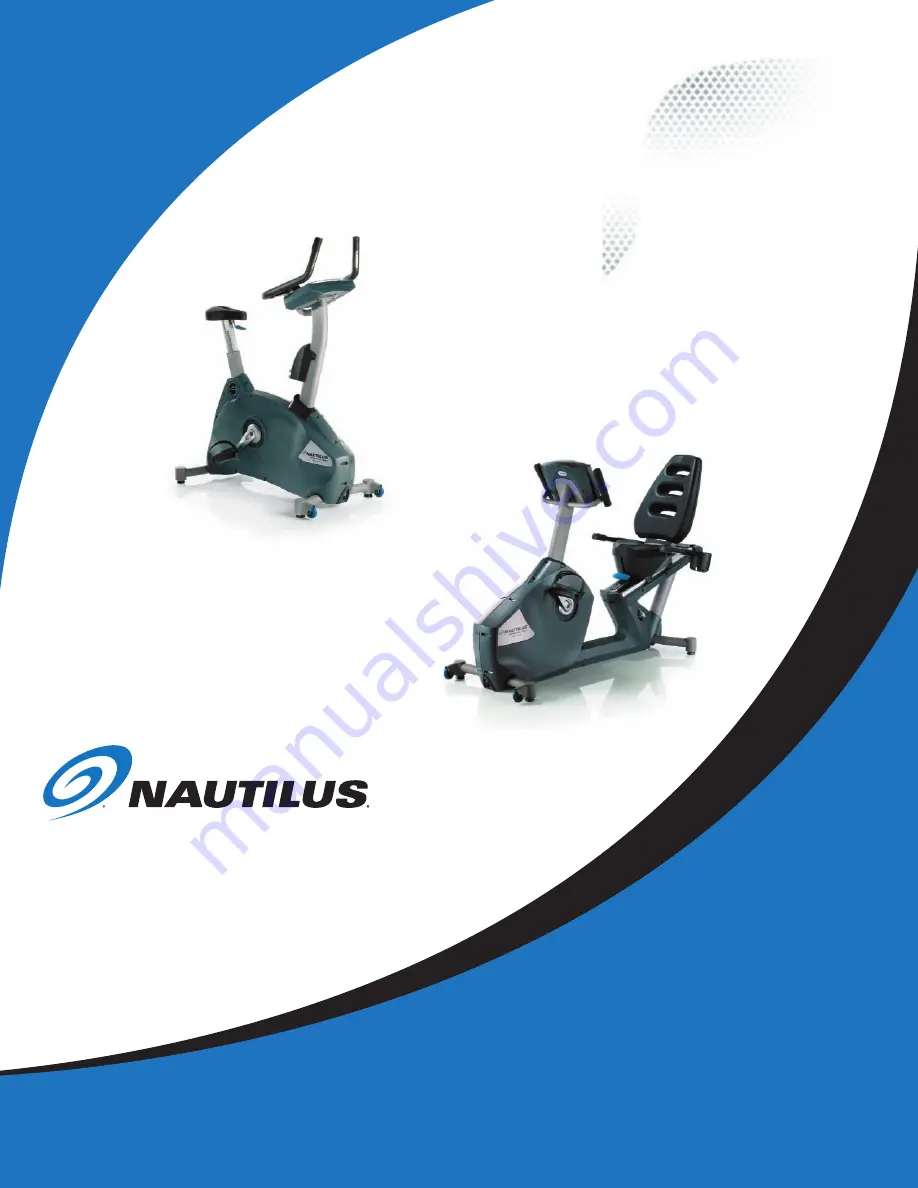
Model: U916 & R916
P/N: 001-6882 Rev B (09/2006)
Owner’s Manual
Commercial Series Bike
Model U916
Model R916
Page 1: ...Be Strong Model U916 R916 P N 001 6882 Rev B 09 2006 Owner s Manual Commercial Series Bike Model U916 Model R916...
Page 2: ...duct exceeds your expectations and is a valuable tool for your facility Please carefully read through this manual to familiarize yourself with the operation of your new Nautilus bike Doing so will hel...
Page 3: ...r Program 22 More Workouts 24 Nautilus Fit Test Program 24 Calorie Goal 28 HR Intervals Program 29 Random Play Program 30 Custom Intervals Program 30 Workout Program Options 31 Heart Rate Monitoring 3...
Page 4: ...81 L 127 cm x 205 74 cm Power Requirements 9V AC DC Power Supply Battery Charger Max user weight 400lbs 182 kg Model R916 Dimensions 24 W x 67 L x 46 H 60 96 cm x 170 18 cm x 116 84 cm Unit Weight 180...
Page 5: ...and other in charge of children should be aware of their respective responsibilities Moving parts that may appear to present obvious hazards to adults may not appear to do so to children 4 Consult a...
Page 6: ...d all safety precautions and warning information prior to using your product Be sure to replace any warning label if damaged illegible or missing If you need replacement labels please call a Nautilus...
Page 7: ...f you do not have or cannot nd or need to replace a warning label please call 1 800 628 8458 North America or 41 26 460 77 77 International of ce to obtain a new label Label 1 See Figure 1 for general...
Page 8: ...se the stabilizer bars instead to avoid any damage to the plastic covers The machine can now be rolled on the transport wheels The recumbent bike is heavy and requires two people to safely move from o...
Page 9: ...he seat will automatically lock into place Lower or raise the seat as necessary It is also possible to adjust the seat without getting off the bike Simply take your weight off the saddle while in the...
Page 10: ...enter your body weight Enter your weight in pounds or kilograms if the console is set to metric units Correct entry errors by pressing CLEAR before you press ENTER 4 The console will prompt you to ent...
Page 11: ...display window In most of the workouts the timer will count down in minutes and seconds until the workout is nished or stopped If 0 is entered in the MANUAL or HR ZONE TRAINER workout the timer will c...
Page 12: ...diture will vary signi cantly based on a person s age gender weight and metabolism Calories Hour Provides the rate at which calories are burned per hour at the current resistance level and RPM Speed D...
Page 13: ...rval The ashing column shows your current interval Key Functions Remote Operation Control ROC The Remote Operation Control functions are located on the end of the handlebars above the contact heart ra...
Page 14: ...g to provide any user information Level Intensity UP DOWN Keys The exercise intensity level may be changed at any time during a workout between Level 1 the easiest and Level 20 the hardest Pressing th...
Page 15: ...ut program keys including a More Workouts key with multiple advanced program options While the console is in the SELECT WORKOUT mode press one of the exercise program keys to preview the desired worko...
Page 16: ...the console timer will count up to the maximum time of 99 minutes Once you have selected a program follow the console prompts ENTER WEIGHT type in your body weight in pounds or kilograms if your cons...
Page 17: ...e Manual Program allows you to control the intensity level of the bike during the workout while accurately calculating exercise statistics based on your weight The default intensity level is 1 unless...
Page 18: ...with moderate changes in intensity level designed to stimulate fat store assimilation for users on a weight control program The profile in the center display indicates relative intensity Any changes...
Page 19: ...file in the center display indicates relative intensity Any changes to the intensity level will not change the look of the remaining profile however the new intensity level will continue through the r...
Page 20: ...nter your weight using the numeric keypad and press ENTER Or press ENTER to accept the default value Your weight is used to calculate the number of calories burned for each minute of exercise and the...
Page 21: ...Press STOP again to end the workout The workout statistics will be displayed and then the console will revert back to the SELECT WORKOUT message INTENSITY CONTROL The intensity level may be changed at...
Page 22: ...If you are using the telemetry HR method put the chest strap on Remember to wet the electrodes underneath the chest strap The console must detect a heart rate signal to allow selection of the HR Zone...
Page 23: ...st 30 seconds HR BELT NEEDED No telemetry belt signal has been sensed during the initial setup time HR MODE DISABLED No heart rate signal is allowed due to the set up option that was chosen Heart rate...
Page 24: ...n insufficient amount of time for many individuals to achieve a true steady state To ensure that a steady state has been achieved the heart rate should be measured after two minutes of exercise at a g...
Page 25: ...h not as precise as maximal exercise testing is not without advantages For example the results of such testing can provide a fairly accurate reflection of an individual s fitness status without the co...
Page 26: ...are within 5 beats min then the heart rate during the last minute is plotted against the work rate and the program advances to the next 3 minute stage The program continues for two to four stages unti...
Page 27: ...seconds INCREASE TO 90 Indicates that your RPMs are below 75 revolutions per minute For the Fit Test RPMs should be held constant at 90 revolutions per minute DECREASE TO 90 Indicates that your RPMs...
Page 28: ...Philidelphia PA 2000 p 77 Calorie Goal The Calorie Goal program allows the user to define a target number of calories to burn during their workout To use the Calorie Goal Program 1 Press the MORE WORK...
Page 29: ...play WORK TARGET HR A suggested target heart rate will be displayed based on your age Press ENTER to accept the calculated target heart rate or enter a different target heart rate using the numeric ke...
Page 30: ...ate a custom interval program by entering Rest Level and Time Work Level and Time and total of intervals To use the Custom Intervals Program 1 Press the MORE WORKOUTS key Then use the Level UP or DOWN...
Page 31: ...level will not change the look of the remaining profile however the new intensity level will continue through the rest of the workout Options During a Workout After the message Enjoy Workout is displ...
Page 32: ...d End of Your Workout The program is at the end of the workout when the workout time is completed or from the PAUSE state when the STOP key is pressed At this point each workout statistic is scrolled...
Page 33: ...hin range of the receiver in the machine Two electrodes on the underside of the chest belt sense the heart rate signal and send it to the receiver The far right decimal point in the Heart Rate Display...
Page 34: ...es and hand lotion act as an insulating layer to reduce the signal strength Also the EKG signal generated by some individuals is not strong enough to be detected by the sensors These individuals shoul...
Page 35: ...workout session even if the signal is lost while performing the workout and vice versa EITHER INPUT allows either telemetry or contact heart rate signals to be detected Does not lock out a particular...
Page 36: ...ndicates that whether you are young or old people who workout at light to moderate intensities may have an easier time sticking to their exercise programs than those people who work out harder and mor...
Page 37: ...to be able to pick up a full bag of groceries and tie our shoes without having to sit down When developing a fitness program it is only appropriate that you develop all three components in order to ac...
Page 38: ...ing helps maintain bone and muscle mass as we get older For women strength training along with cardiovascular training may also protect against post menopausal bone loss and osteoporosis in their late...
Page 39: ...program that is successful You should ensure that you are consuming at least 1 200 Calories per day total A total weight loss of no more than 2 lbs per week is recommended for long term weight managem...
Page 40: ...pace for very long When you are first starting out you should exclusively work in the Zone 1 and Zone 2 intensities After a few weeks you can occasionally incorporate Zone 3 and Zone 4 intensities for...
Page 41: ...find that your numbers don t change but you are able to stay in Zone 3 and Zone 4 longer than you used to Don t get too attached to any specific number or target heart rate If you train properly you w...
Page 42: ...our workout Try not to let your workout become routine or mundane and always remember that some exercise is better than none at all So if you feel you are not motivated to continue stop your workout e...
Page 43: ...hange by pressing ENTER Then use the Level UP or Level DOWN keys or the numerical keypad to change the value for the selected option Press ENTER to accept the choice for that option The Defaults optio...
Page 44: ...de Displays the current status of Clinical Mode ON when bike is plugged in and OFF when bike is battery powered Note When going from AC powered to battery powered the status will not be updated until...
Page 45: ...ENTER The console will display MACHINE STATUS 2 Press Level UP or Level DOWN to scan through the choices to view Press CLEAR to exit the machine status codes The machine status options are as follows...
Page 46: ...e DISPLAY TEST is displayed The console screen alternates turning on all LCD segments and a representative program screen Verify that all LCD segments turn on Test keyboard To test all the keys on the...
Page 47: ...To review the error log and reset the service timer 1 Press Level UP 7 ENTER The console will display MAINTENANCE LOG 2 Press Level UP or Level DOWN to scan through the choices Select the option you...
Page 48: ...et the counter Press LEVEL UP 7 ENTER Then use the Level keys to scroll through the options When MAINT HOURS is displayed press ENTER Press the 0 key then press ENTER Press CLEAR to return to the open...
Page 49: ...he battery charger is located in the front of the machine at the base NOTE If installing the optional LCD Monitor refer to the NV915 installation manual at this time Plug the wall pack battery charger...
Page 50: ...es or expenses in connection with its exercise products Nautilus liability hereunder is expressly limited to the replacement of goods not complying with this warranty or at Nautilus election to the re...
Page 51: ...Fax 800 898 9410 CORPORATE HEADQUARTERS Nautilus Inc World Headquarters 16400 S E Nautilus Drive Vancouver Washington USA 98683 Phone 800 NAUTILUS INTERNATIONAL CUSTOMER SERVICE INTERNATIONAL OFFICE N...
Page 52: ...rights reserved Nautilus the Nautilus Logo ROC Remote Operation Control Be Strong StairMaster and StepMill are either registered trademarks or trademarks of Nautilus Inc All others are trademarks of t...